The role a Weapon Squad plays in the larger tactical picture of an U.S. Army Light Infantry Platoon...
Introduction

For the U.S. Army the Platoon is the smallest, organically self contained unit to conduct military operations. The Weapon Squad (WPN SQD) is able to execute many types of missions.
Offensive fires in support of:
• Maneuver unit (SBF for area targets)
• Isolation of OBJ Avenues of Approach (to prevent counter-attack)
• Assault of the OBJ (SBF for point targets)
• Support of Consolidation and Reorganization (must move from SBF to OBJ area)
Defensive fires in support of:
• Base force protection
• Defense of Key Terrain
Mounted use:
• Convoy security
• SBF with dismounted maneuver element
They have two 2 man machinegunner/assistant gunner (MG/AG) gun teams and one 2 man AT/Ammo Bearer team (Anti-Tank/AB)
Platoon Task Organization
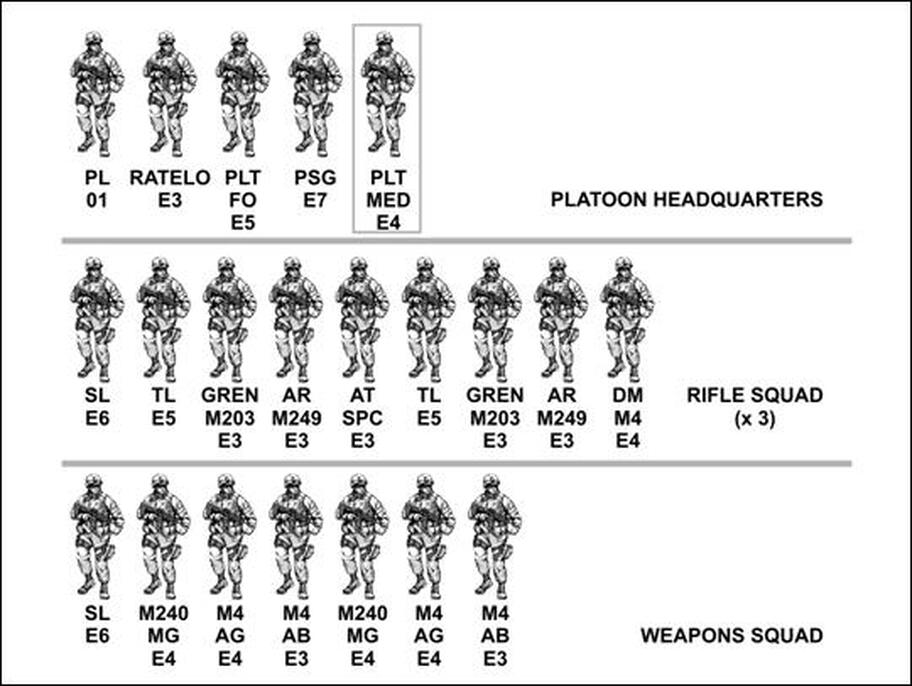
The Platoon HQ
• Platoon Leader (PL) - OIC (Officer In Command)
• Platoon Sergeant (PSG) - 2IC (2nd In Command)
• Platoon Radio Operator (RTO) - (Communicates with Company/Battalion)
Attached to the PLT:
• Medic - Works under the supervision of the Company Senior Medic (CSM)
• Foward Observer (FO) - Plans/executes artillery fire
• Foward Observer Radio Operator (FO RTO) - Communicates Fire requests
3x Rifle Squads (9 Soldiers each)
• 1 Squad Leader (SQD LDR)
• 2 Team Leaders (TL)
• 2 Automatic Rifleman (AR)
• 2 Grenadier
• 2 Rifleman (1 equipped as a Designated Marksman)
1x Weapon Squad (WPN SQD)
• 1 Squad Leader (SQD LDR)
• 2 Machine Gunners (MG)
• 2 Assistant Gunners (AG)
• 2 Anti-Tank Gunners (AT)
• 2 Ammo Bearer (AB)
PLTs may/can have attachments/detachments that may change their "traditional" methods of employment.
PLTs may/can create internal moves to better accomplish the mission.
Example: All 3 SQDs may give up their DM (Designated Marksman) to the WPN SQD.
Example: Some/all of the SQDs may give up one or both of their ARs to the WPN SQD.
Example: A MG Team may be detached to a SQD to a specific tasking.
Roles of each Weapon Squad member
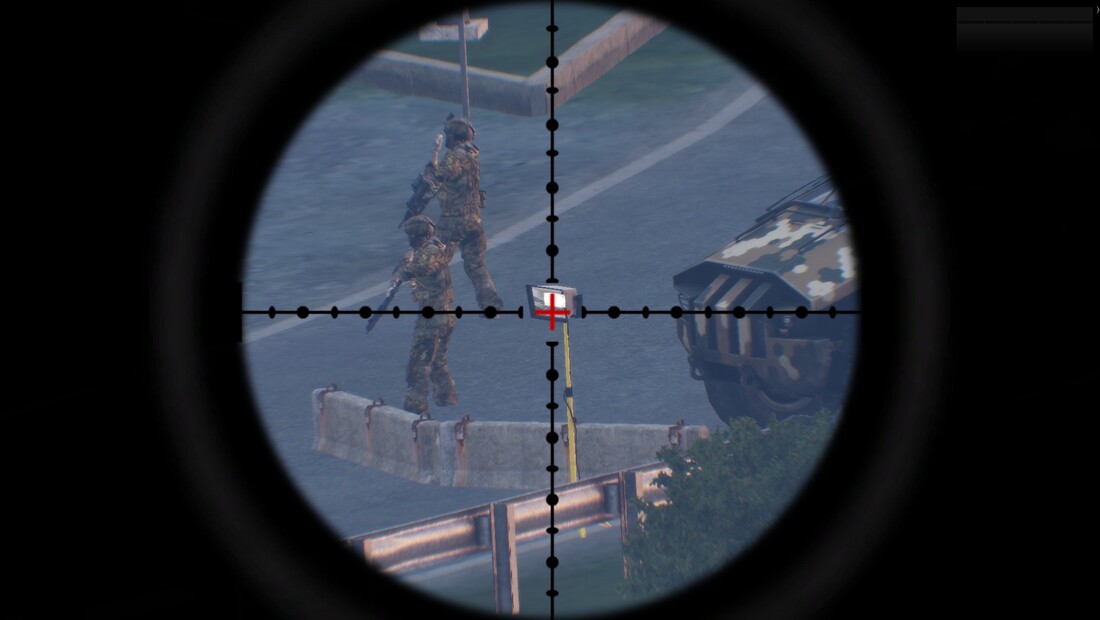
Attack By Fire
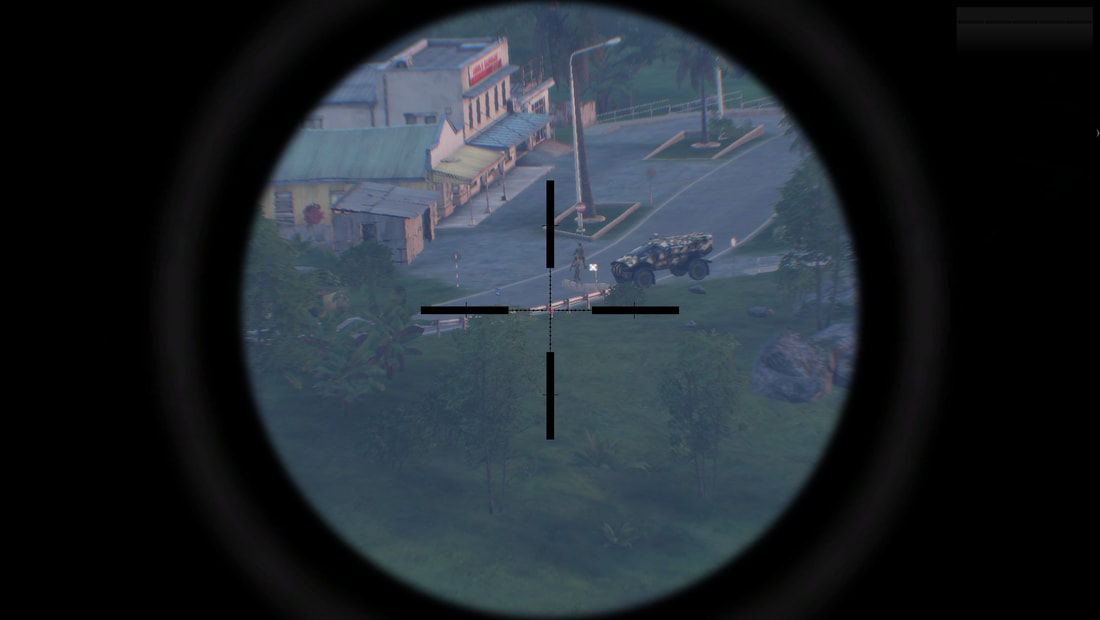
Support By Fire Position "Scott"

Squad Leader (1) - Senior NCO (Non-Commissioned Officer) of the Platoon. Directs and employs the teams. Prepared to take over the position of the Platoon Sergeant if necessary.
MG Gunner (2) - Is the most experienced soldier who is in charge of putting the MG "in" and "out" of service. The senior MG Gunner is prepared to take over the Squad is need be.
A-Gunner (2) - Assists the MG with spotting rounds, informing the SQD LDR of the round count/status of the MG, barrel changes, watching for an enemy flanking and keeping the MG supplied with ammunition. He is also prepared to take over the MG if need be.
Ammo Bearer (2) - Carries extra ammunition.
AT (2) - Carries an AT system.
Tactics, Techniques and Procedures
Rates of Fire
Sustained rate
100 rounds per minute
6 to 9 round bursts
4 to 5 seconds between bursts
Barrel change every 10 minutes
Rapid rate
200 Rounds per minute
10 to 13 round bursts
2 to 3 seconds between bursts
Barrel change every 2 minutes
Cyclic rate
650 to 950 rounds per minute
Full auto until empty
Barrel change every minute
When 2 MG TMs are operating together, several methods of fire distribution can be used:
Alternating
Each MG TM fires an alternating burst, also known as: "Talking Guns"
• Allows for constant fire
• Slow down the rate of ammo consumption
• Allow longer barrel use before needing to change
Successive
One MG fires all their rounds (regardless of rate), then the next MG begins to fire.
• Less concentrated fires
• Less ammo use
• Longer span of firing time on target
SBF Set-Up
Map markers
Trench/sandbag construction
The 'ACE' modification allows you to build/place:
• Big trench (need a entrenching tool)
• Small trench (need a entrenching tool)
• Sandbag emplacement (need sandbags)
• Big trench (need a entrenching tool)
• Small trench (need a entrenching tool)
• Sandbag emplacement (need sandbags)
Grenade Launcher
Allows to harass the Enemy with:
• HE rounds
• Smoke rounds to obscure the Assault Element's movement
• Smoke rounds close to the OBJ in order to obscure the Enemy's field of view
• Flare use to:
1) Illuminate OBJ
2) Signal (lift/shift fire)
• HE rounds
• Smoke rounds to obscure the Assault Element's movement
• Smoke rounds close to the OBJ in order to obscure the Enemy's field of view
• Flare use to:
1) Illuminate OBJ
2) Signal (lift/shift fire)
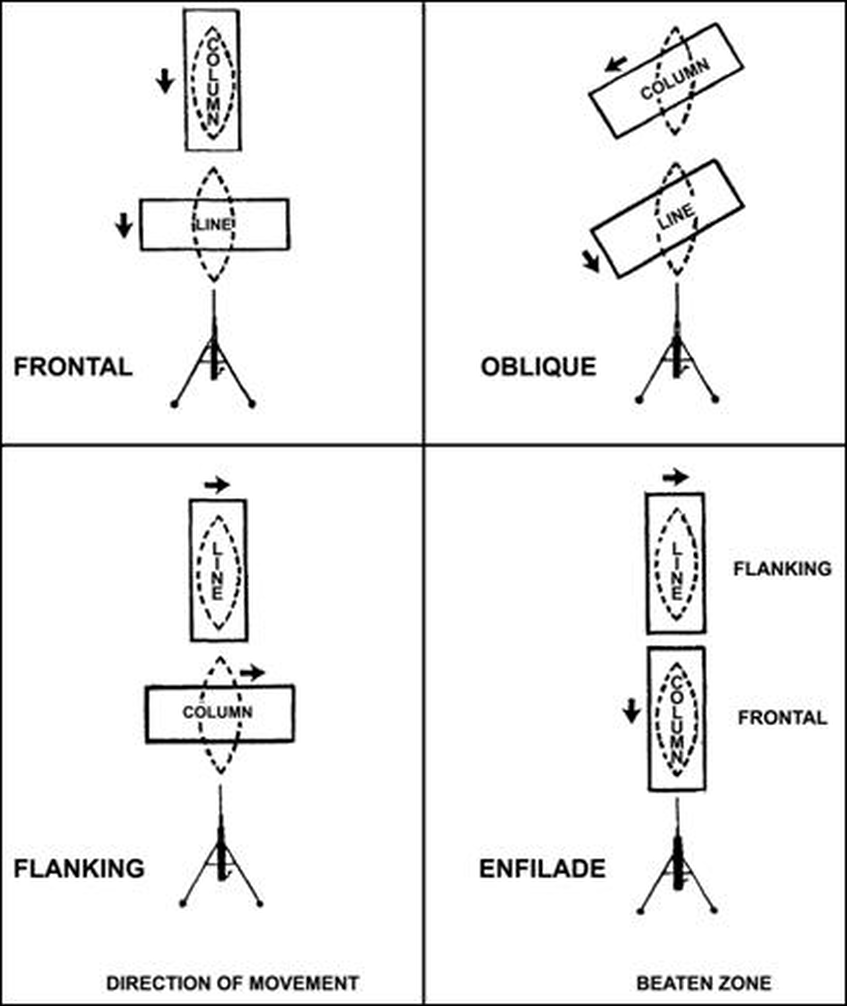
SBF should ideally sets up perpendicular to the Assault Element's advance
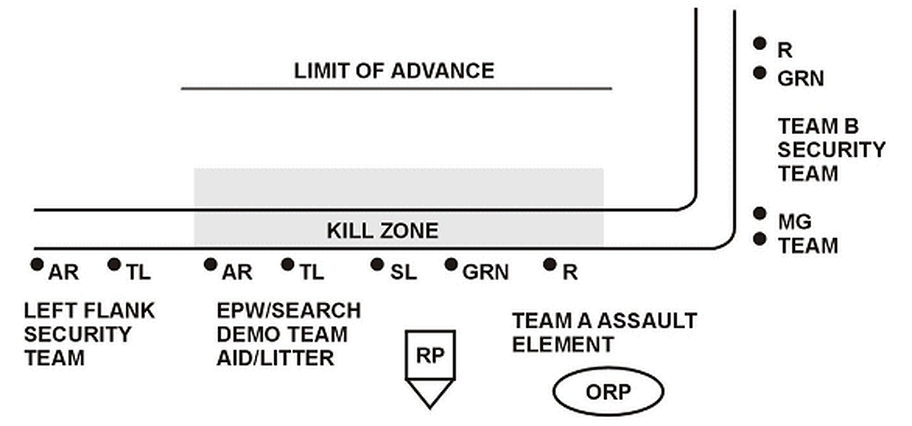
It is best to have the SBF at a right angle (90 degrees) to the Assault Element
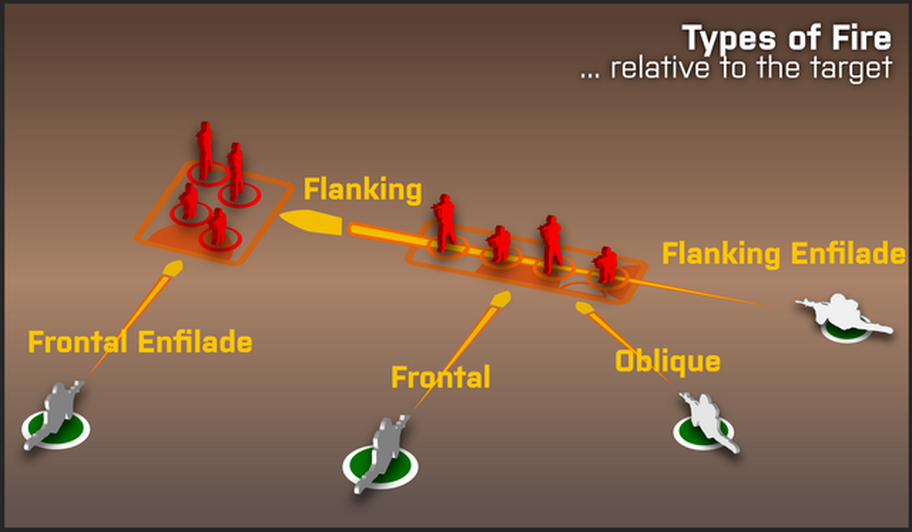
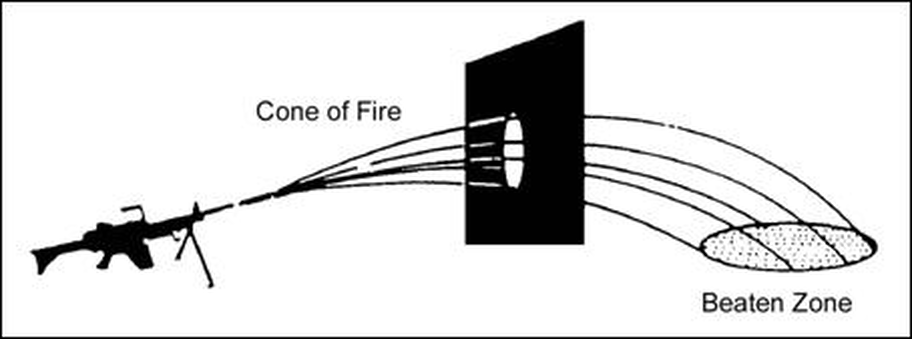
Use the 'beaten zone' dimension of the MG to your advantage
Frontal/flanking enfilade fire is BY FAR the best angle of attack
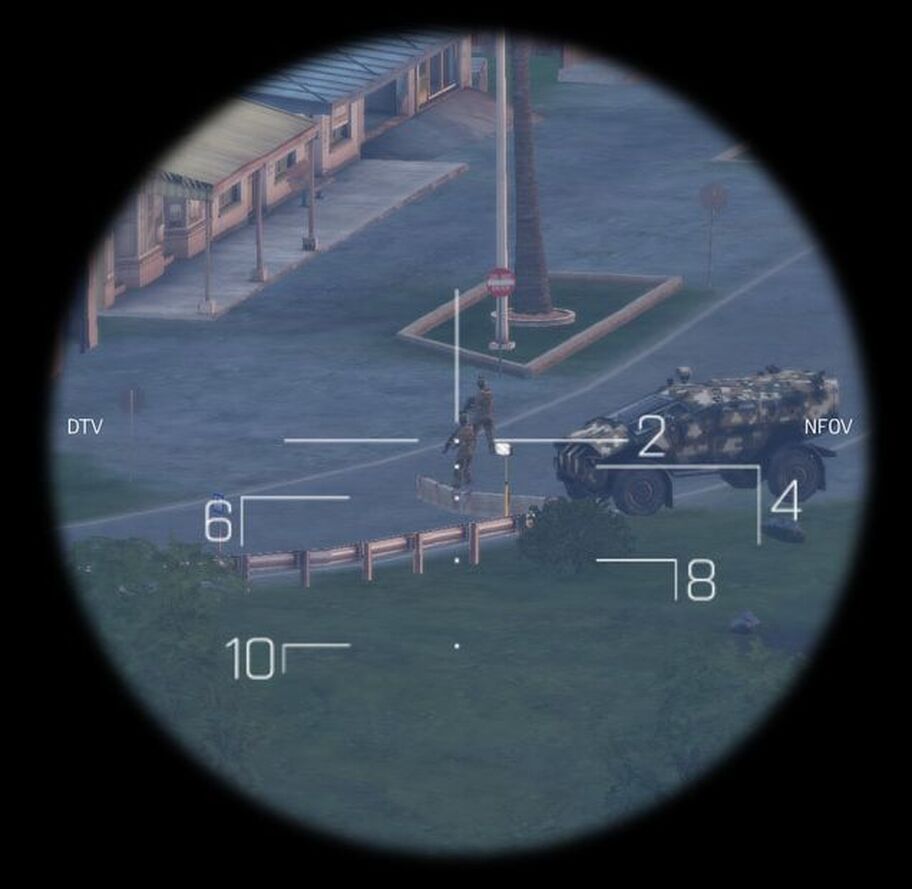
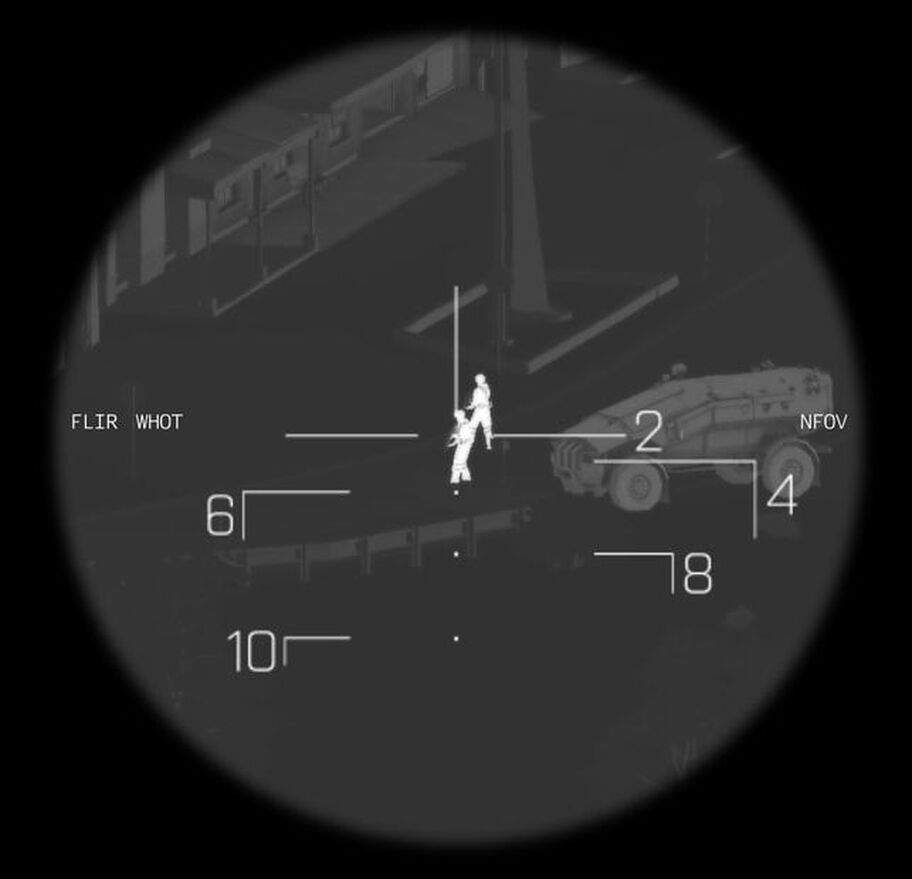
* * * M240B Beaten Zone Dimensions * * *
Range: 500m (1m wide x 110m long)
Range: 1,000m (2m wide x 75m long)
Range: 1,500m (3m wide x 55m long)
Range: 2,000m (4m wide x 50m long)
Range: 500m (1m wide x 110m long)
Range: 1,000m (2m wide x 75m long)
Range: 1,500m (3m wide x 55m long)
Range: 2,000m (4m wide x 50m long)
Crew-Served Weapon Use
For a CSW to be moved it MUST be broken-down into 2 parts
(1 weapon and 1 tripod)
***Remember to match a raised/not raised CSW with a raised/not raised Tripod***
1. Player "A" needs CSW weapon bag (launcher or backpack slot)
2. Player "B" needs a tripod bag (launcher or backpack slot)
3. One bag must be put on the ground where the CSW must be used..
4. The player with the weapon bag must be close to set up the CSW
5. Some type of ammo platform should be close by
6. When using the CSW, make sure to be AT LEAST 500 meters away (out of small arms range).
Use the optics (NVG, thermal image) to your advantage.
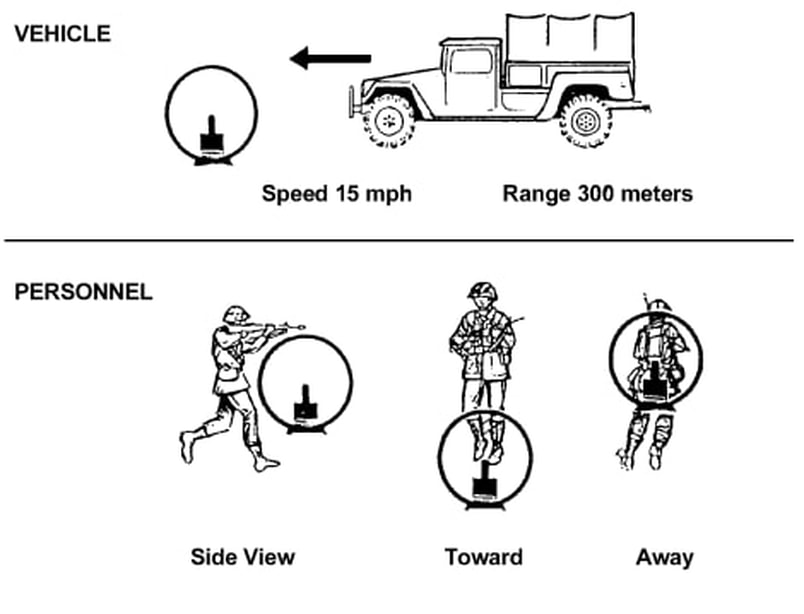
Advanced Marksmanship
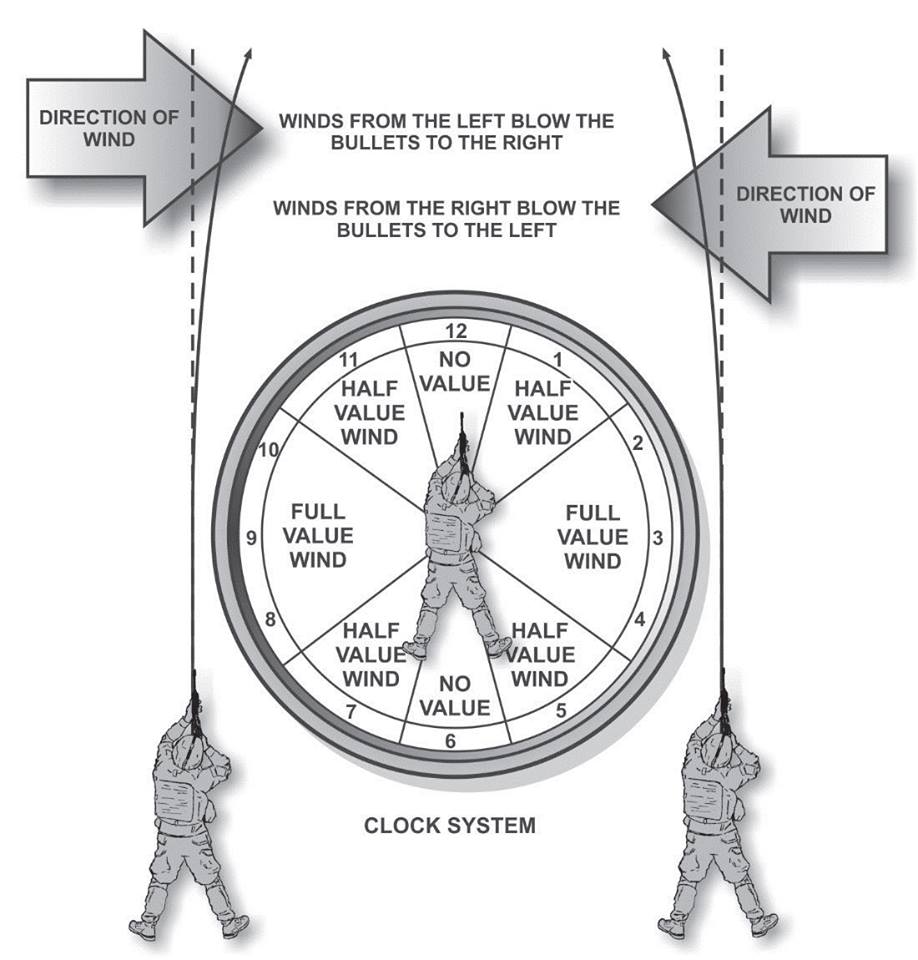
Wind Effects - Wind DOES effect bullet trajectory
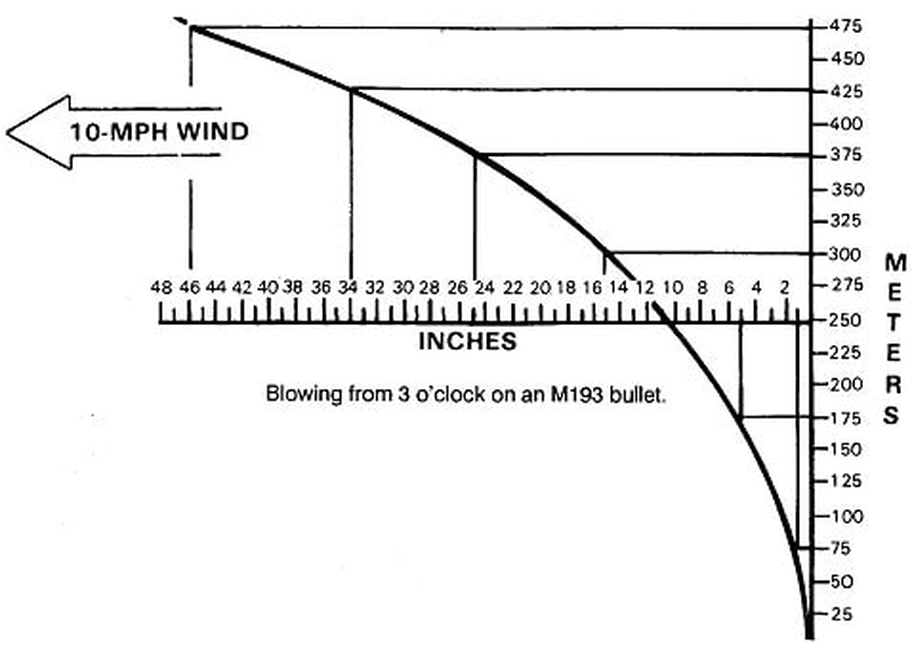
Use indicators to see the intensity and the direction of wind, examples include:
• Wind arrow (ACE3 mod)
• Smoke grenades
• Flares
• Tracers
• Smoke
• Fire
• Flag poles
• Munitions effects (CAS/artillery
• Wind arrow (ACE3 mod)
• Smoke grenades
• Flares
• Tracers
• Smoke
• Fire
• Flag poles
• Munitions effects (CAS/artillery
Weapon Attachments
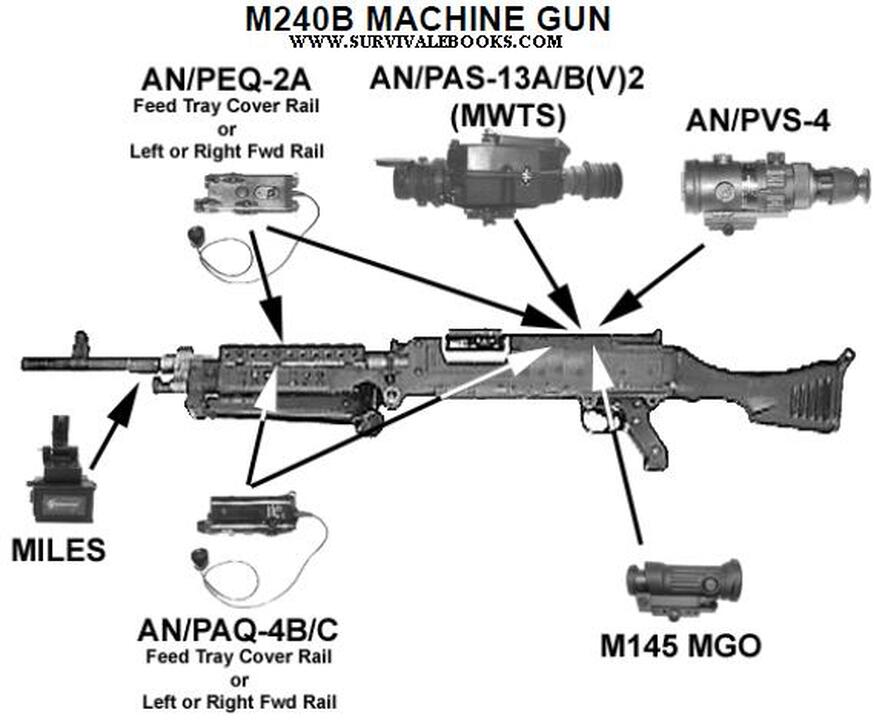
Day
Thermal
Movement values (1, 3/4, 1/2, 0)
Advanced Tactics
SDZ - Surface Danger Zone
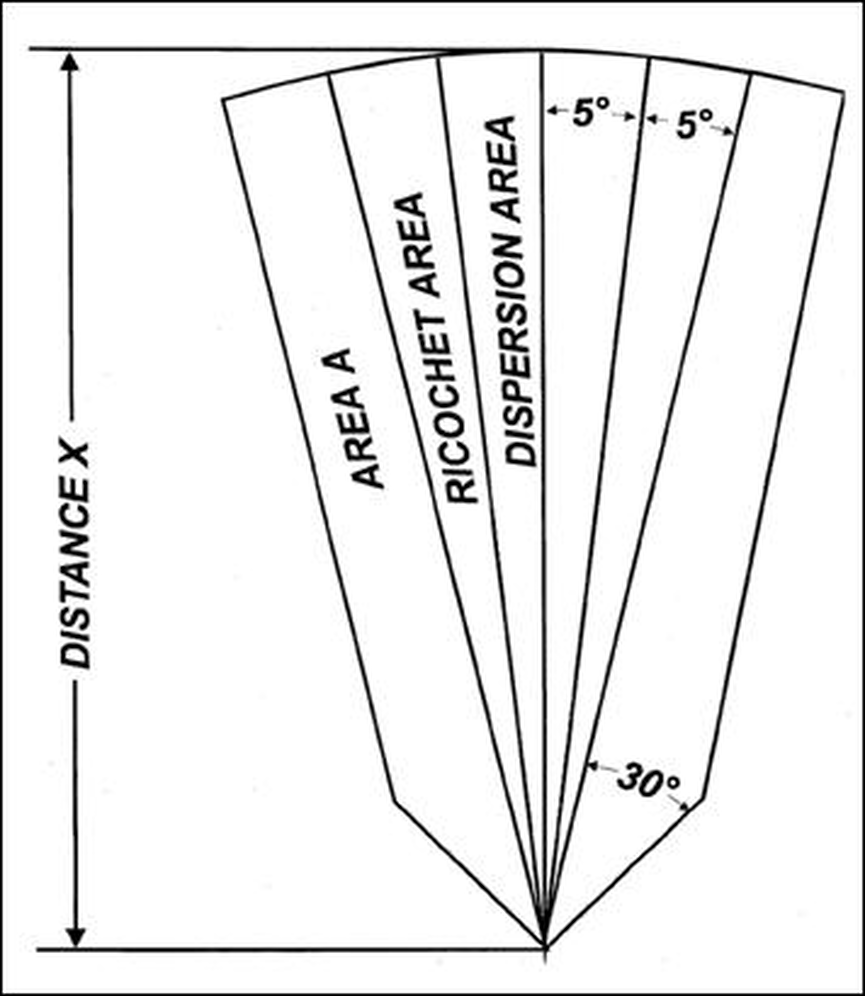
For safety...keep troops 45+/- degrees away from the SBF
Use smoke to to indicate wind speed and point of aim/shot placement.
Use smoke to to indicate wind speed and point of aim/shot placement.
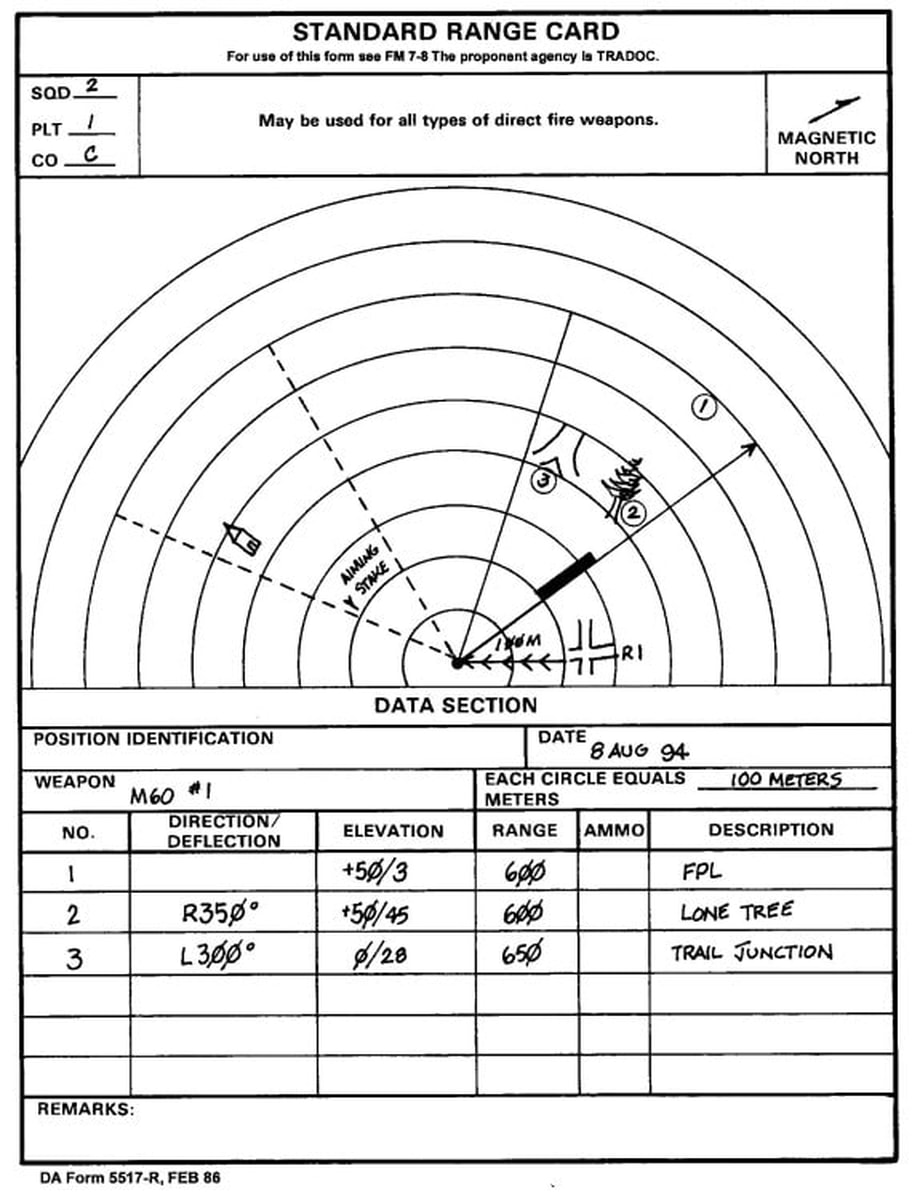
Range Card
While conducting Defensive Operations or Deliberate Offensive Operations, take time to map out OCOKA:
• Observation and Fields of Fire (Engagement Areas, weapon position, dead space)
• Cover and Concealment (areas where Friendly/Enemy forces have protection from fires)
• Obstacles (Natural/man-made that will canalize the Enemy)
• Key Terrain (gives a strong advantage to whom ever controls it)
• Avenues of Approach (air or ground route the attacking force will probably take)
Fire Commands
Follow ADDRAC: alert, direction, description, range, assignment, control
• Alert - one or both MGs ("Fire Mission...MG TM #1")
• Direction - cardinal, clock etc (10 o'clock)
• Description - "Enemy dismounted Fire Team in the open", "Soft-skinned vehicle")
• Range - specific meters, to a known point ("50 meters LEFT of the Barn")
• Assignment - rates of fire ("Rapid"), fire distribution ("Alternating"), types of rounds (tracer only)
• Control - "On my Command", "Fire when ready", "Fire on my tracers"
Example: Fire Mission MG TM #2, Front, armed technical, Rapid, Armour piercing, On my mark...signal when ready."
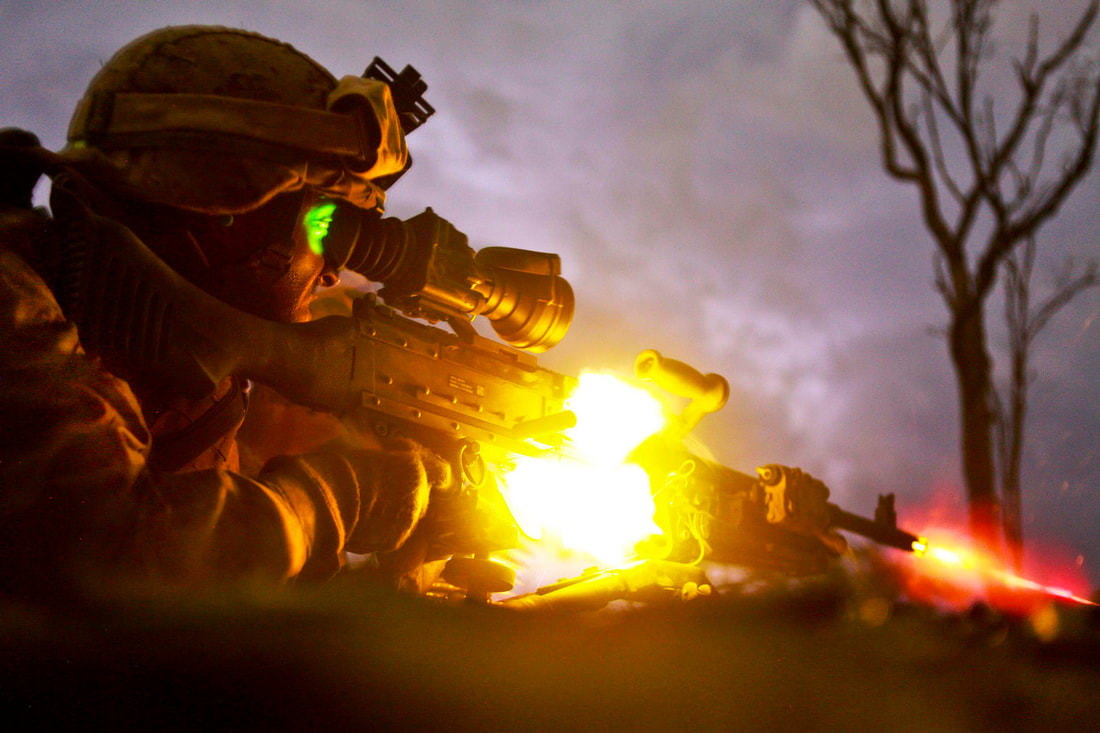
Limited Visibility
Use IR Lasers and NVGs to 'own the night'.
Tracers can help Leaders mark targets but it also can give away your position
IR lasers allow for extreme precision BUT the Enemy can spot you with NVGs
Tracers can help Leaders mark targets but it also can give away your position
IR lasers allow for extreme precision BUT the Enemy can spot you with NVGs

Spotting Scope
Gain incredible magnification capabilities. Used by the AG/Spotter to correct shot placement
SSWT Kit
Allows the user to have a deployable shooting rest when no other option in the field is available
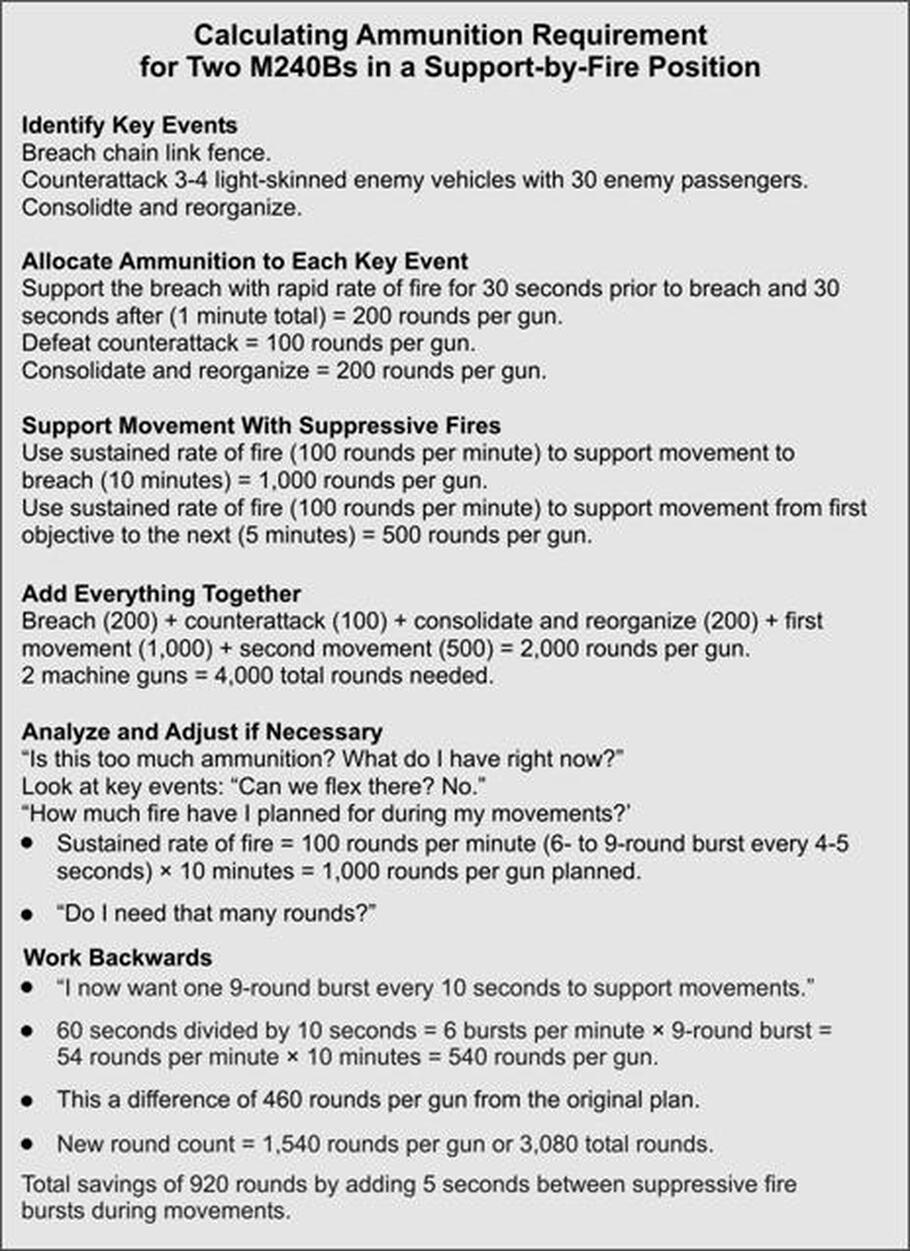
Ammunition Consumption Planning
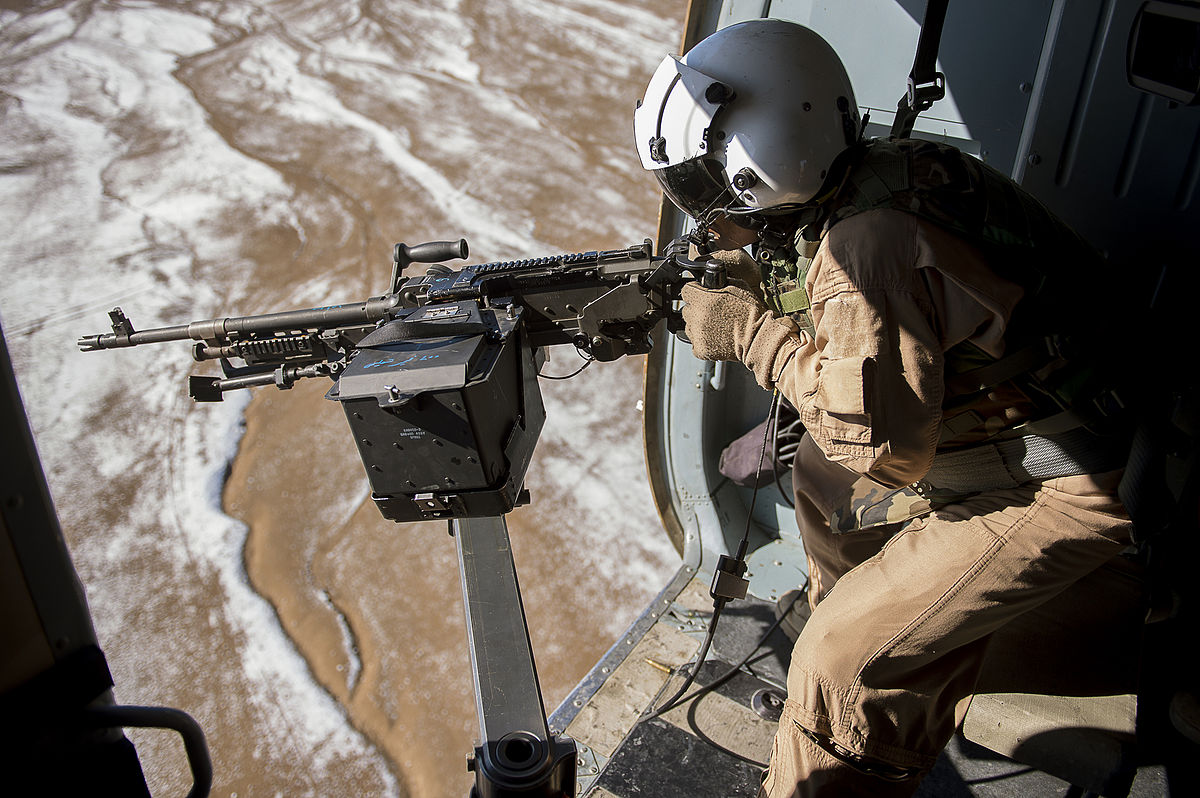
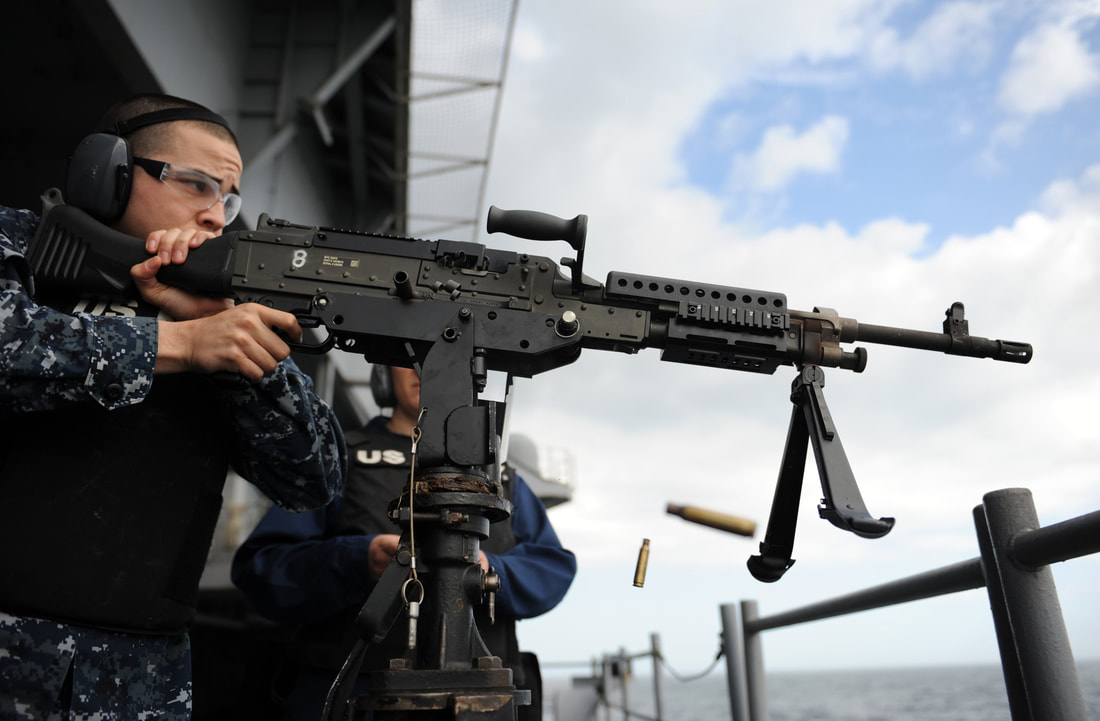
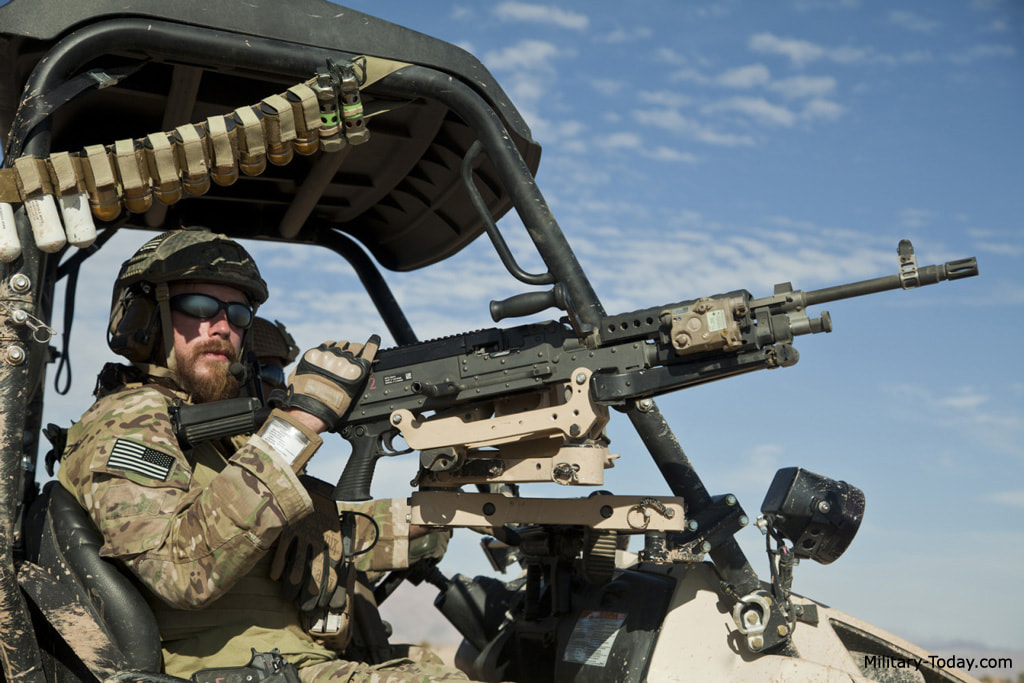
Vehicle Mounted
Helicopter
Watercraft
Tactical Vehicle
Conclusion
It is important to remember:
• Use MG TMs in pairs
• Make a Range Card to identify key targets
• Become a master of ambush/raid operations (Initiate/Shift/Lift fires/advance to LOA)
• Know your weapon system capabilities (MEL, penetration, rates of fire, barrel changes)
Have SOPs for:
• SBF position occupation
• MG TMs going into/out of action (1 at a time)
• Fortification construction (entrenching tool/sandbag/SSWTKit)
• HMG use and capabilities (backpacks, optics etc)
• Convoy operations
• Communication signals (pyrotechnics/hand/audible etc)
