Ground VehicleS
The Role of Vehicles on the Battlefield
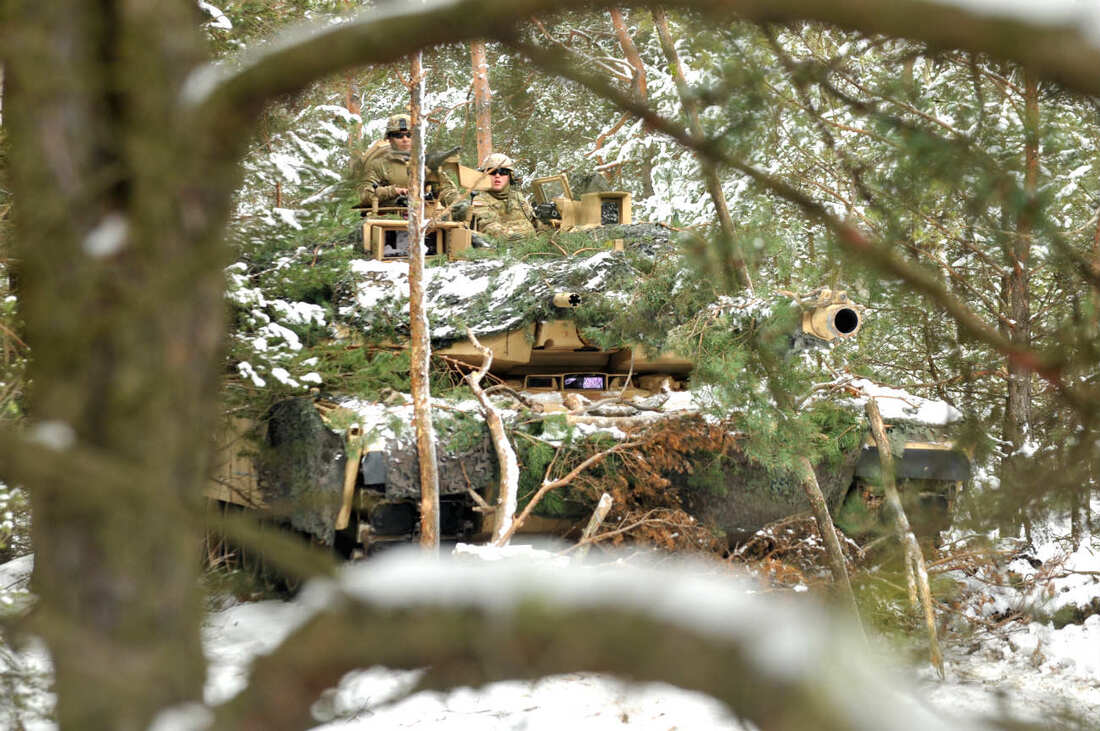
The main thing one must remember when taking a vehicle role is that you ultimately are there to support the infantry. It is not your job to run around pell-mell trying to rack up an impressive kill count; instead, you should do everything you can to work with friendly forces so that you can best support the infantry. Note there are exceptions to this, in some cases to use armored vehicles such as tanks to their fullest potential they cannot be tied down supporting infantry. Instead, given the situation, they can be formed into fast moving, independent units which can spearhead attacks, good examples of this are during the Gulf War & the Iraq War.
This first section will be oriented around giving you an understanding of basic ground vehicles. From there, we'll work up to more advanced concepts like armored vehicles and crew coordination.
This first section will be oriented around giving you an understanding of basic ground vehicles. From there, we'll work up to more advanced concepts like armored vehicles and crew coordination.
General Ground Vehicle Tips
Foot Recon & Ground Guides
When the tactical situation permits it, the commander of a vehicle can dismount from the vehicle to do a 'foot recon'. This is typically done when the vehicle is about to crest some significant terrain feature. Dismounting and checking over the crest 'on foot' allows for the commander to decide on where possible enemy threats might be, locate obvious threats, and choose on where and how to crest the terrain, where his gunner should be aiming when they crest, and so forth.
Ground guides, on the other hand, are infantry who walk in front of a vehicle to guide it through a tricky area. Ground guides can be used to get a vehicle positioned specifically where the infantry need it, to help guide vehicles through a potentially mined area, or to help them navigate through tight or confusing terrain.
Ground guides, on the other hand, are infantry who walk in front of a vehicle to guide it through a tricky area. Ground guides can be used to get a vehicle positioned specifically where the infantry need it, to help guide vehicles through a potentially mined area, or to help them navigate through tight or confusing terrain.
Throwing the Weight Around
Depending on their weight and hardiness, vehicles can be used to knock down trees, bushes, walls, and other obstacles in order to clear lanes of fire & observation for themselves or the infantry that they support. Tanks are generally able to knock down anything, whereas trucks and such generally focus on light bushes and light walls to prevent disabling themselves in the process.
Close coordination with the infantry commanders is needed in order to create effective lanes of fire that are integrated into the defensive plans of the supported infantry. Too many trees knocked down, or holes punched in walls, can compromise the ability of the infantry to put up an effective defense.
Keep in mind that in addition to clearing obstacles, vehicles can also be used to create better concealment. A tank may have a hard time finding concealment in an area where the trees have their branches at too high of a level to mask the tank - however, knocking a tree down in the direction of the enemy may suddenly provide concealment. From the enemy's point of view, it will likely just look like a bush and blend in with the natural terrain.
Vehicle Equipment
Different vehicles may have different capabilities insofar as sensors are concerned, but all share the same basic HUD features.
First is the vehicle radar, which is positioned at the center-top of the screen. The radar is an abstraction of more complex sensor systems and is key to a crew's situational awareness. The radar is centered around the vehicle (represented by an icon( and has two circles with the outer one displaying compass bearings as well as showing a digital compass reading of the current view direction. It's important to remember that this is the direction a given crew member is looking through his optic - be that driver, gunner, or commander - and not necessarily the heading that the vehicle is pointed. The two rings indicate ranges - the first is one kilometer, the second two. The current field of view of the gunner(s) and commander are indicated with cones extending away from the vehicle - these cones will narrow and expand based on that position's current zoom level.
First is the vehicle radar, which is positioned at the center-top of the screen. The radar is an abstraction of more complex sensor systems and is key to a crew's situational awareness. The radar is centered around the vehicle (represented by an icon( and has two circles with the outer one displaying compass bearings as well as showing a digital compass reading of the current view direction. It's important to remember that this is the direction a given crew member is looking through his optic - be that driver, gunner, or commander - and not necessarily the heading that the vehicle is pointed. The two rings indicate ranges - the first is one kilometer, the second two. The current field of view of the gunner(s) and commander are indicated with cones extending away from the vehicle - these cones will narrow and expand based on that position's current zoom level.
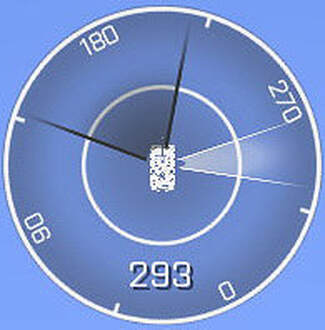
Identified friendly targets will display as green dots, while identified enemy targets will show as red. Unknown or destroyed vehicles will appear grey.
On the upper-left of the HUD is the vehicle's damage readout. Red means a system is completely disabled, while shades of yellow or orange indicate damaged components. This is broken down into the following categories:
On the upper-left of the HUD is the vehicle's damage readout. Red means a system is completely disabled, while shades of yellow or orange indicate damaged components. This is broken down into the following categories:
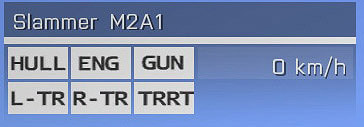
HULL
When fully compromised, the vehicle will be destroyed, taking any embarked crew members with it.
ENG
The vehicle's engine. If disabled, the vehicle will lose mobility.
GUN
If disabled, the main gun will no longer be able to elevate, but can still fire.
L-TR
The left track. Disabling one track will disable the vehicle's mobility until repaired.
R-TR
The right track. Same story.
TRRT
The turret. A disabled turret cannot be turned and loses any stabilization features it might have had, though the weapons will still operate. This may make it possible to employ things like the cannon of a tank by turning the vehicle in order to point the disabled turret in the right direction.
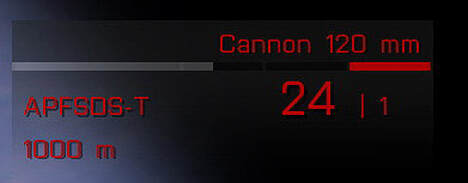
Some vehicles have optics which employ automatic laser ranging, in which case the range is displayed in the bottom-center of the view.
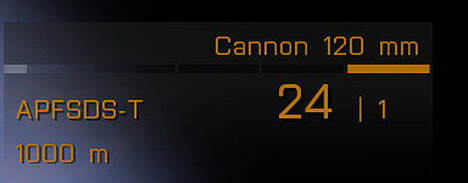
Finally, the upper-right section displays the currently active weapon or countermeasure, the ammo remaining in it, and is color-coded to indicate if the weapon is ready to be fired. After firing something that takes time to reload, such as a tank main gun, this HUD element will turn red while a progress bar indicates the reload time remaining. Shortly before reloading fully, this will turn yellow, then white to indicate that the weapon is able to be fired again.
Finally, the upper-right section displays the currently active weapon or countermeasure, the ammo remaining in it, and is color-coded to indicate if the weapon is ready to be fired. After firing something that takes time to reload, such as a tank main gun, this HUD element will turn red while a progress bar indicates the reload time remaining. Shortly before reloading fully, this will turn yellow, then white to indicate that the weapon is able to be fired again.
Lock Symbology
Any weapon that can lock onto a target will first have to acquire the target. This is done either by right-clicking over the target, pressing "T" to lock, or "R" to cycle through available targets. When a target is acquired, it will have a green box around it. To lock the target, you must have it within a certain number of degrees of the weapon's orientation (relative to the nose on most aircraft, or the direction the weapon is facing on ground vehicles) - this may vary depending upon the specific weapon.
When a target has been acquired and locked, the box has a circle overlaid on it. At this point any guided weapon can be fired and it will automatically track and (hopefully) destroy said target. Note that when reaching the limits of the lock 'cone', the circle indicator will begin to fade out, letting you know that you're about to lose lock. Note that this applies to aircraft, ground vehicles, and also infantry launchers.
When a target has been acquired and locked, the box has a circle overlaid on it. At this point any guided weapon can be fired and it will automatically track and (hopefully) destroy said target. Note that when reaching the limits of the lock 'cone', the circle indicator will begin to fade out, letting you know that you're about to lose lock. Note that this applies to aircraft, ground vehicles, and also infantry launchers.
LEFT: TARGET ACQUIRED, LOCK-ON PROCESS INITIATED. RIGHT: TARGET FULLY LOCKED
Countermeasures
Many vehicles are equipped with smoke dischargers for defensive purposes. These dischargers are most often mounted to the vehicle's turret, allowing the smokescreen to be laid in the direction that the turret is pointed.
The vehicle commander generally has control of the smoke system. He selects it as he would a normal weapon and presses his countermeasures key to deploy the smoke. The canisters will propel away from the vehicle in an arc, quickly deploying a thick white smokescreen after a few moments. This smoke can be used for a variety of purposes to screen friendly forces from enemy observation. This sort of countermeasure smoke is designed to block infrared wavelengths, meaning that it is just as effective against thermal optics as normal vision.
Many smoke systems have two or more deployments available before they will need to be reloaded at a supply position.
Bear in mind that smoke, used as a defense against enemy anti-tank assets, is only really useful if the vehicle moves after deploying it. Movement makes it much harder for any manually-guided missile systems to properly track the vehicle as well.

Armaments
Ground vehicles come equipped with a wide variety of armaments. The most common types are described in this section, with the intent being to familiarize all players with the capabilities of the different weapon systems they will see employed from vehicles.
Cannons
Large-bore cannons are the main guns on tanks, or standalone artillery pieces. They are capable of causing great damage to whatever they hit, but have a relatively slow reload time.
Cannons are usually either 105mm, 120mm or 130mm, anything above that is deemed to heavy to efficiently implement, as it comes with a lot of downsides. The M1A1 Abrams has a 120mm smooth-bore cannon which falls under this category.
Cannons typically have a range of ammunition types to choose from, such as:
High Explosive (HE)
Purely intended to kill light vehicles, cause damage to structures and fortifications, and blow up infantry. These rounds simply explode on impact, using blast damage, fragmentation, and overpressure as their killing effects.
Sabot
Sabot rounds are small, incredibly dense darts of metal that are intended to punch through enemy armor with sheer kinetic force. They are generally ineffective against troops but can be used to great effect against enemy vehicles and armor. They tend to be overkill for anything below a medium armor classification.
High Explosive Anti-Tank (HEAT).
Unlike sabot rounds, HEAT rounds rely on chemical means to attempt to defeat armored threats. They have a high-explosive component as well, making them dual-purpose in that they can harm both armored targets as well as infantry and other light targets. HEAT rounds are generally less effective than sabot rounds against modern armor, but handle anything less than that with ease.
Anti-Personnel
The APERS round used by some tanks is an example of an antipersonnel round - imagine a 120mm shotgun and you get the general idea. The defining characteristic of such a round is the ability to more or less annihilate an entire platoon at a given distance in a single shot, assuming they were all exposed at the time. You really do not want to be on the bad end of these.
Autocannons
Autocannons are found on infantry fighting vehicles and other medium armored vehicles.
These smaller-bore cannons (20-40mm) tend to have a rapid firing rate and are capable of using sabot or high-explosive rounds. They are superb at killing infantry and other similarly-classed armored vehicles, but come up at a distinct disadvantage when faced against main battle tanks. Cannons can be used to devastating effect when engaging masked urban targets - putting HE shells into a room, or blasting SABOT rounds through walls that hostiles are hiding behind, are both superb at wrecking an enemy defense.
The Bradley is an example of a NATO vehicle with such an autocannon, with the BMP-2 being a similar example of an OPFOR vehicle with a similar autocannon
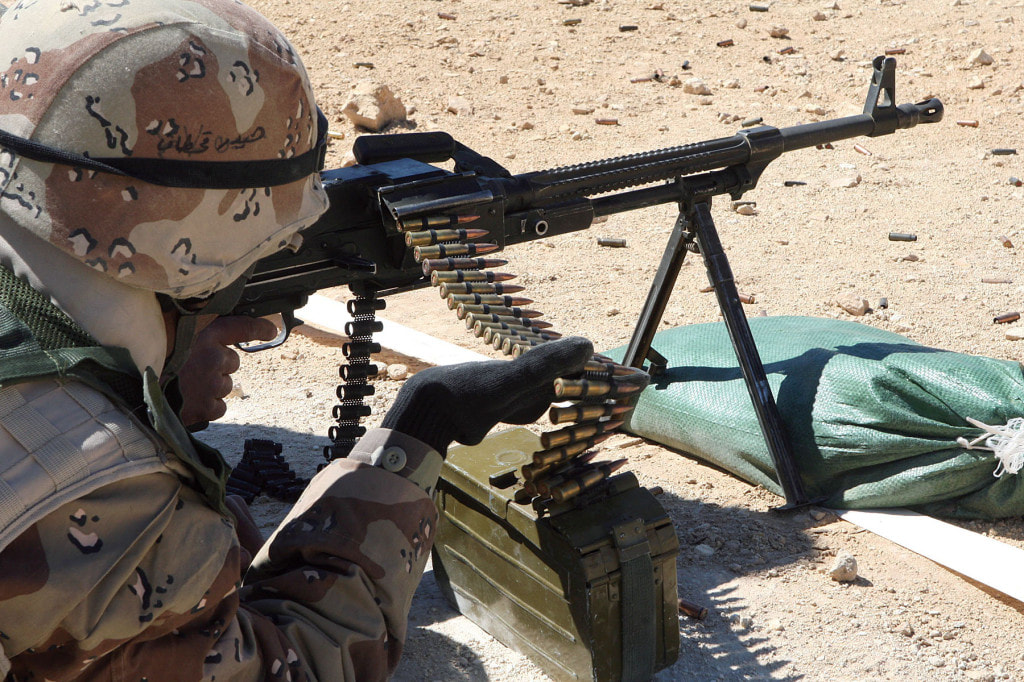
Machineguns
Every armored vehicle inevitably has at least one machinegun on it. Machineguns can range from medium-caliber like the 7.62mm M240 up to the heavy-caliber .50cal M2 Browning. They are used against soft targets such as trucks or enemy infantry, and can generally carry an obscene amount of ammo due to said ammo being stashed in the vehicle itself. Heavy-caliber machineguns can even be employed successfully against light enemy armored systems, and can also punch through walls that lighter machineguns cannot.
Machineguns come in several types of mounts on armored vehicles:
Coaxial
Coaxial machineguns are sighted to the same place that the main gun is, and are controlled by the vehicle's gunner. Coaxial machineguns are employed to destroy infantry and soft vehicle targets, preserving the main gun ammunition for more significant threats.
Crew-operated external mounts
These machineguns are mounted on the outside of the vehicle, requiring the crew members to 'turn out' and manually operate them, which in turn leaves them vulnerable to enemy small-arms fire.
Crew-operated internal mounts
Some vehicles have internally-operated machineguns that can be employed by passengers of the vehicle. The BMP-3 is an example of such a vehicle.
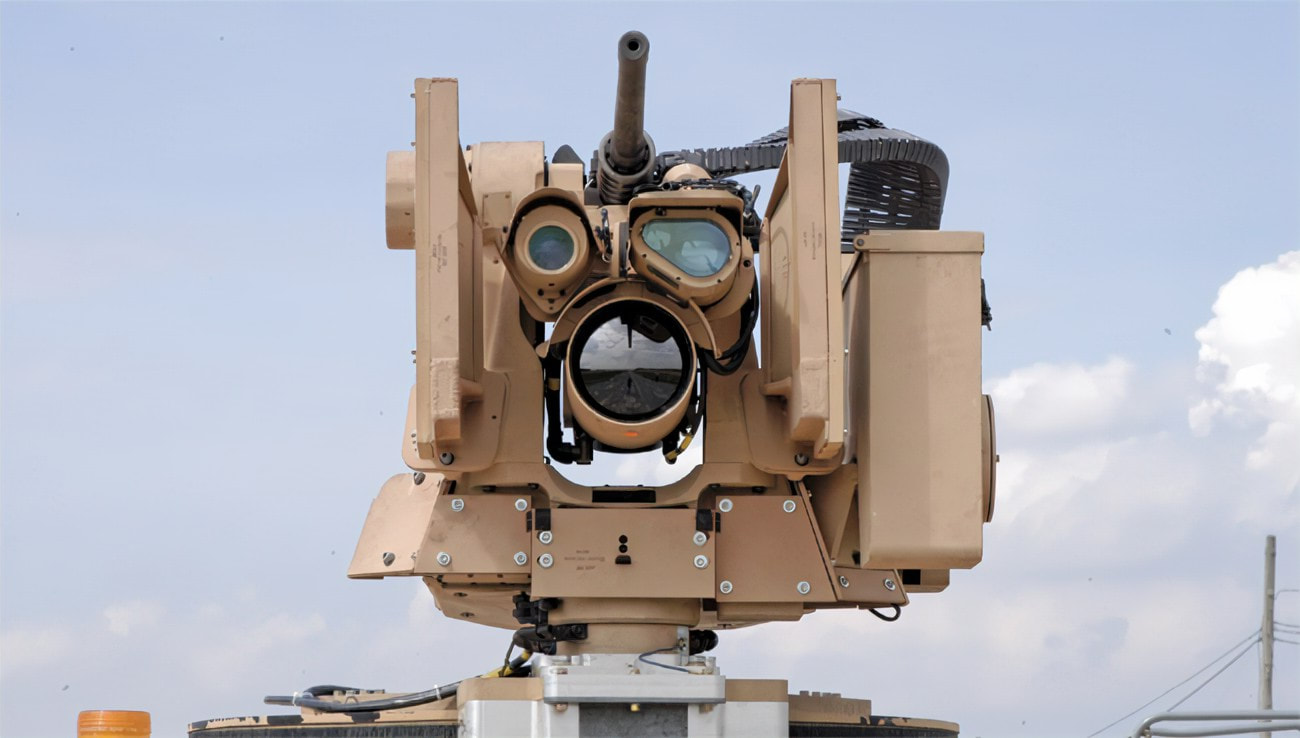
Remote weapon station (RWS)
These machineguns or grenade machineguns are mounted externally, yet use a sensor package/control system mounted internally that allows the crew to operate them without having to be exposed to enemy fire. The RWS mount that the commander of the M1220 Caiman MRAP has access to is an example of this type of mount.
Machineguns come in several types of mounts on armored vehicles:
Coaxial
Coaxial machineguns are sighted to the same place that the main gun is, and are controlled by the vehicle's gunner. Coaxial machineguns are employed to destroy infantry and soft vehicle targets, preserving the main gun ammunition for more significant threats.
Crew-operated external mounts
These machineguns are mounted on the outside of the vehicle, requiring the crew members to 'turn out' and manually operate them, which in turn leaves them vulnerable to enemy small-arms fire.
Crew-operated internal mounts
Some vehicles have internally-operated machineguns that can be employed by passengers of the vehicle. The BMP-3 is an example of such a vehicle.
Remote weapon station (RWS)
These machineguns or grenade machineguns are mounted externally, yet use a sensor package/control system mounted internally that allows the crew to operate them without having to be exposed to enemy fire. The RWS mount that the commander of the M1220 Caiman MRAP has access to is an example of this type of mount.
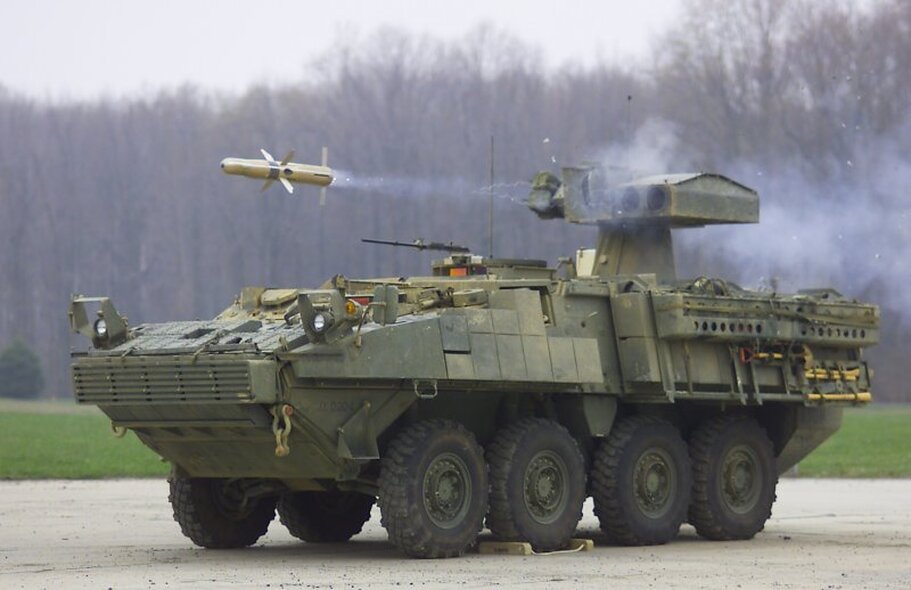
ATGMs
Anti-Tank Guided Missiles are carried by a number of armored vehicles. These missiles are capable of outright destroying most armored threats and are very dangerous to face off against. ATGMs such as the US TOW give less-than-heavy-armor vehicles a fighting chance against main battle tanks. Most common ground-launched ATGMs require some sort of guidance/tracking of the target from launch time until impact.
ATGMs can also be employed effectively in an anti-bunker/anti-building capacity when the threat of enemy armor is not present.
ATGMs can also be employed effectively in an anti-bunker/anti-building capacity when the threat of enemy armor is not present.
Grenade Machineguns
The grenade machinegun is exactly what it sounds like. Capable of firing dozens of grenades at a high rate of fire, these are superb weapons to use against enemy infantry, soft vehicles, and light armor. Their effects against heavier vehicles are generally unremarkable - by the time they can do enough damage, the heavier vehicle will have already blown them to scrap.
Grenade machineguns generally have a steeply arced trajectory due to their relatively low velocity, but the terminal effects of the grenades are independent of their velocity and stay lethal out to as far as they can be lobbed.
Grenade machineguns generally have a steeply arced trajectory due to their relatively low velocity, but the terminal effects of the grenades are independent of their velocity and stay lethal out to as far as they can be lobbed.
Turret Types
Arma simulates the degree to which a turret is or is not stabilized. There are two basic types - non-stabilized and stabilized. Stabilized turrets can occasionally come in varieties where only one axis is stabilized, though that is rarer.
Non-Stabilized
A non-stabilized turret does not have any special method to keep the turret pointed in a given direction while the vehicle is moving. Because of this, uneven terrain makes it difficult for the gunner to engage on the move or when the vehicle is turning. Non-stabilized turrets are most effective when the vehicle is at a complete stop and the gunner is able to aim effectively.
Two examples of non-stabilized turrets can be found in the HMMWV and AAV vehicles. Neither is particularly accurate if the gunner is attempting to engage while moving on rough terrain. Utilization of a non-stabilized turret weapon system requires a tighter coordination between the gunner and driver for good effects to be achieved.
Two examples of non-stabilized turrets can be found in the HMMWV and AAV vehicles. Neither is particularly accurate if the gunner is attempting to engage while moving on rough terrain. Utilization of a non-stabilized turret weapon system requires a tighter coordination between the gunner and driver for good effects to be achieved.
Stabilized
Stabilized turrets use special adapted mechanisms to maintain their orientation and direction, within reasonable limits, while the vehicle maneuvers. Because of this, vehicles with stabilized turrets can engage effectively even when driving at high speeds, over rough terrain, or during turns and other vehicle maneuvers.
The M1A1 Abrams is a prime example of a vehicle with a stabilized turret.
The M1A1 Abrams is a prime example of a vehicle with a stabilized turret.
Vehicle Damage Model
While not a fully hardcore simulation-level damage system, the Arma 3 vehicle damage model does have a number of different damage effects that can present themselves based on the location and severity of the damage. This section will describe them.
General
Armored Glass
For vehicles with bullet-resistant glass such as MRAPs, each window will be able to sustain a certain amount of damage before it is compromised and destroyed. Light weapons may take dozens of rounds to finally shatter the window, but heavier weapons like .50cal machineguns can quickly punch through and destroy an armored glass window.
Always remember that the armored glass is there to give you a chance to survive unexpected fire - it is not perpetually impervious to damage!
Always remember that the armored glass is there to give you a chance to survive unexpected fire - it is not perpetually impervious to damage!

Non-Catastrophic Kills
Non-catastrophic kill is the result of a vehicle being knocked out without it violently exploding into flames. It is likely that one or more crew members have been killed in the process, and the survivors will likely be wounded. Due to it not always being clear when a vehicle has been knocked out in such a fashion, many gunners will put additional rounds into the vehicle until they get secondary explosions, flame, or some other visual indication that the vehicle is no longer a threat.
Catastrophic Kills
A catastrophic kill happens when the vehicle explodes violently from battle damage. If the crew is inside when this happens, they won't have a chance and will be obliterated in the blast.
Secondaries
A vehicle which has been knocked out, either via a catastrophic or non-catastrophic kill, will likely have secondary explosions if the vehicle burns. Secondary explosions are caused by the vehicle's ammo or fuel exploding, and they can easily take out any nearby dismounted infantry. In addition to this, some mods introduce enhanced cookoffs that further refine the secondary-explosion system. Cookoffs can result in stored rockets igniting and launching, ammo causing turrets to be propelled into the air, or just generally send dangerous shrapnel throughout the area.
ALWAYS STAY CLEAR OF ALL KNOCKED-OUT VEHICLES!
ALWAYS STAY CLEAR OF ALL KNOCKED-OUT VEHICLES!
Fire
Destroyed vehicles that catch fire will cause damage to any players that get close to them. As it says above, stay clear of all knocked-out vehicles. Nothing good can come from getting up close to them.
Wheeled
Flat Tires
Most wheeled vehicles are susceptible to having their tires flattened by enemy fire. This makes the vehicle difficult to control, usually with it tending to turn heavily into the tire(s) that were damaged. Drivers should attempt to keep their vehicle moving for as long as possible and attempt to get out of the kill zone before abandoning the vehicle (if necessary).
Tracked
Tracked vehicles can suffer a number of different types of damage.
Tracking
Tracking is known as a "mobility kill". When a vehicle is tracked, it means that they have lost the use of one (or both) tracks and can no longer move in a controlled fashion. The vehicle becomes a stationary turret - or bunker - for all intents and purposes. The vehicle crewmen should stay put if they can safely do so and fight from within their vehicle. If this is not possible, they need to immediately bail and make their way to friendly infantry positions. Reasons for bailing would include knowing that enemy ATGM or AT teams are able to re-engage them or are likely to be able to strike without possibility of prevention.
Disabled Turret/Gun
A solid hit to an armored vehicle's turret can cause it to lock up and become unresponsive. In this case, the tank may or may not be able to effectively engage the enemy, depending on whether the gun is active and how it is oriented. In most cases a tank which has lost use of its turret needs to get out of the combat zone and head back to friendly territory for repairs. When the loss of the main armament has been sustained, it is referred to as a "firepower kill".
Basic Vehicle Roles
As a general rule, you should be capable of handling vehicle role responsibilities early in your Arma career. It is important that players are familiar with all of the roles available so that they can operate as a motorized vehicle crewman, or a mechanized one, when the time comes - or gain the basic proficiency to allow them to train up as a heavier vehicle crew in the future.
To that end, let's look at the different vehicle roles available to basic infantry.
To that end, let's look at the different vehicle roles available to basic infantry.
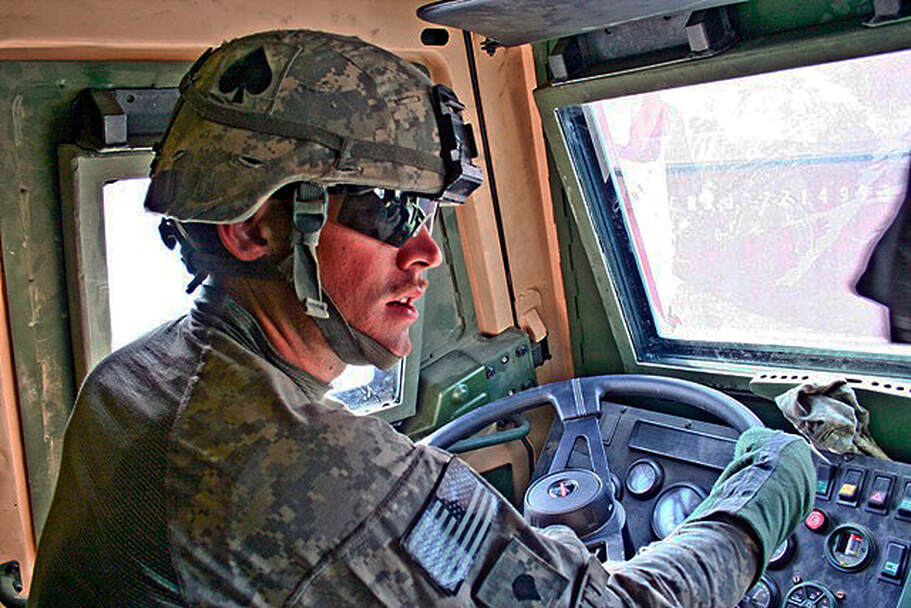
Driver
A driver does what it sounds like - drives the vehicle around the battlefield in accordance with his team leader or squad leader's directions.
The driver does not dismount unless he is explicitly told to by his team leader, or when the verbal command "BAIL OUT, BAIL OUT, BAIL OUT!" is given by himself or another player.
A summary of the driver's responsibilities follow.
The driver does not dismount unless he is explicitly told to by his team leader, or when the verbal command "BAIL OUT, BAIL OUT, BAIL OUT!" is given by himself or another player.
A summary of the driver's responsibilities follow.
• Drives the vehicle according to the directions of his team leader.
• Maintains spacing when moving with other vehicles.
• Knows the overall formation being employed, also known as the 'order of march', and his vehicle's place in it.
• Stays mounted at all times unless told to dismount directly, or when a "BAIL OUT" command is issued.
• Communicates the vehicles' status and issues a "BAIL OUT!" command if necessary. If the vehicle's tires are blown, he immediately attempts to pull the vehicle into cover or concealment or out of the kill zone before giving the "BAIL OUT!" order. If this is not possible, he immediately halts the vehicle and gives the bail out command.
• Exercises good navigation techniques either by listening to his navigator's directions or navigating on his own in the absence of a dedicated navigator.
• Watches the road for any signs of satchels, mines, IEDs, explosives, etc. Dangerous explosives will require immediate evasive action - while other members of the crew should be observing as well, the driver is the one who can react most rapidly to avoid them.
• Stays alert and avoids colliding with other vehicles as well as any unexpected obstacles in his path.
Navigator
The navigator is often a fireteam leader. He typically sits in the front passenger seat of the vehicle and utilizes his map and view of the terrain to give the driver clear, concise directions on where to go and how to get there. When not looking at the map, the Navigator assists in spotting threats to the vehicle.
Some responsibilities are as bear:
Some responsibilities are as bear:
• Gives the driver clear and concise direction at all times. This includes describing the route, giving advance warning of any turns that may be needed, etc. The navigator never assumes that the driver knows anything about the route - he always explicitly calls for turns and other maneuvers, and gives plenty of advance warning to the driver - such as telling him that a turn is on the right, 500 meters ahead, and then updating him as the vehicle closes on it.
• Must be familiar with what the movement plan is from start to finish, in order to be able to make judgment calls if re-routing becomes necessary.
• Assists in watching the road for any signs of satchels, mines, IEDs, explosives, etc.
Dangerous explosives will require immediate evasive action - an additional member spotting the explosive will ensure that the driver is aware and able to maneuver and avoid the threat.
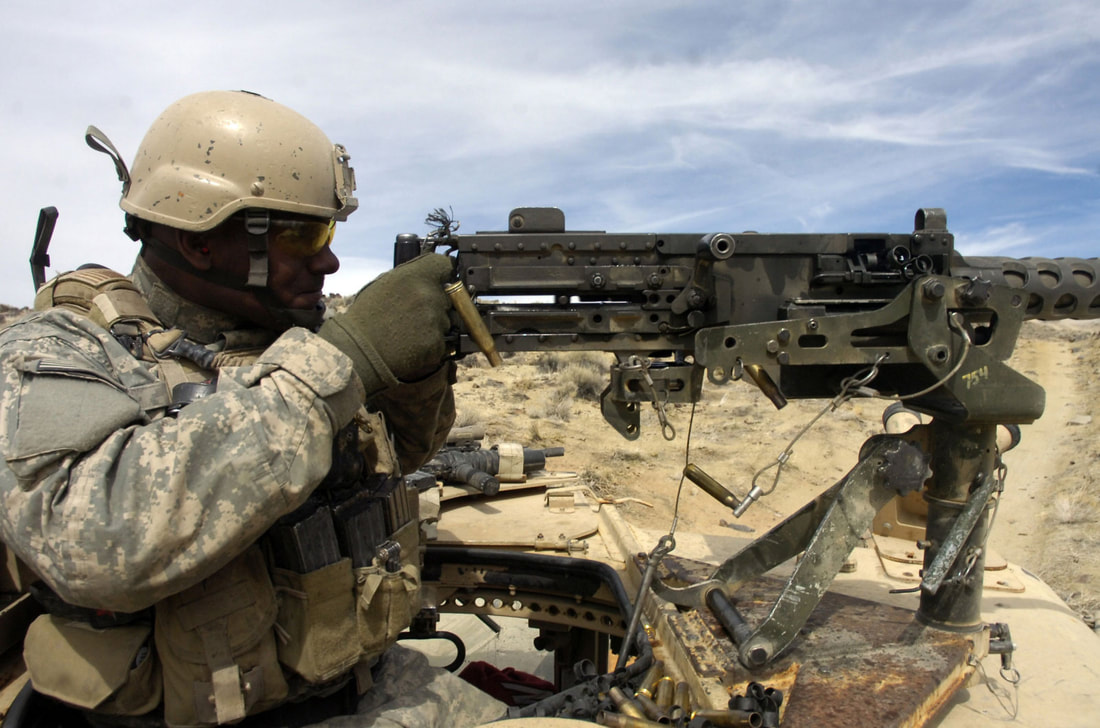
Gunner
A gunner is tasked with employing the crew-served weapon system of the vehicle, or in the case of many vehicles, the Remote Weapon System (RWS). Due to his elevated position or the use of an RWS sensor, he has better observation of the terrain than the rest of the vehicle and communicates what he sees to help maintain the rest of the vehicle's situational awareness.
A gunner does not dismount the vehicle unless his crew-served weapon is empty and unable to be replenished, when he is directed to by his team leader, or when the command "BAIL OUT, BAIL OUT, BAIL OUT!" is given.
A summary of the gunner's responsibilities follow.
A gunner does not dismount the vehicle unless his crew-served weapon is empty and unable to be replenished, when he is directed to by his team leader, or when the command "BAIL OUT, BAIL OUT, BAIL OUT!" is given.
A summary of the gunner's responsibilities follow.
• Employs the vehicles crew-served weapon system or Remote Weapon System.
• Maintains a high state of situational awareness and conveys what he sees to the passengers of the vehicle.
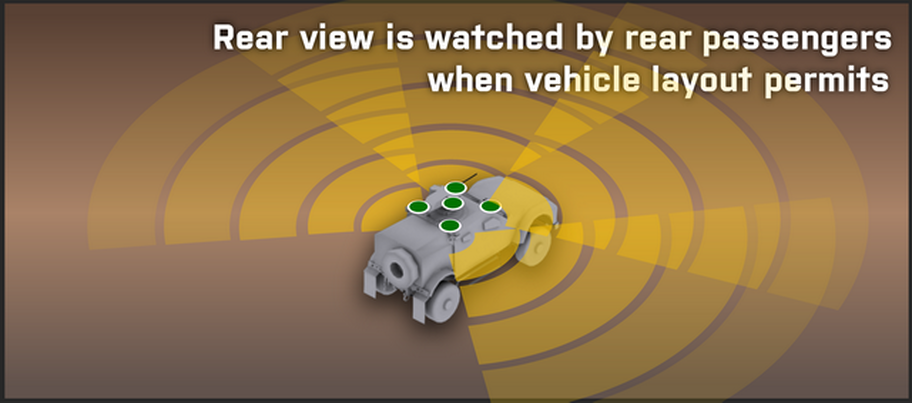
• Scans a sector appropriate to the position of his vehicle in the overall vehicle formation or convoy.
Front vehicles always scan to the front
Rear vehicles always scan to the rear
All other vehicles watch either left or right, alternating
• Stays mounted on his weapon until it is empty, he is directed by his team leader to dismount, or the command "BAIL OUT!" is received.
• Maintains a high state of situational awareness and conveys what he sees to the passengers of the vehicle.
• Scans a sector appropriate to the position of his vehicle in the overall vehicle formation or convoy.
Front vehicles always scan to the front
Rear vehicles always scan to the rear
All other vehicles watch either left or right, alternating
• Stays mounted on his weapon until it is empty, he is directed by his team leader to dismount, or the command "BAIL OUT!" is received.
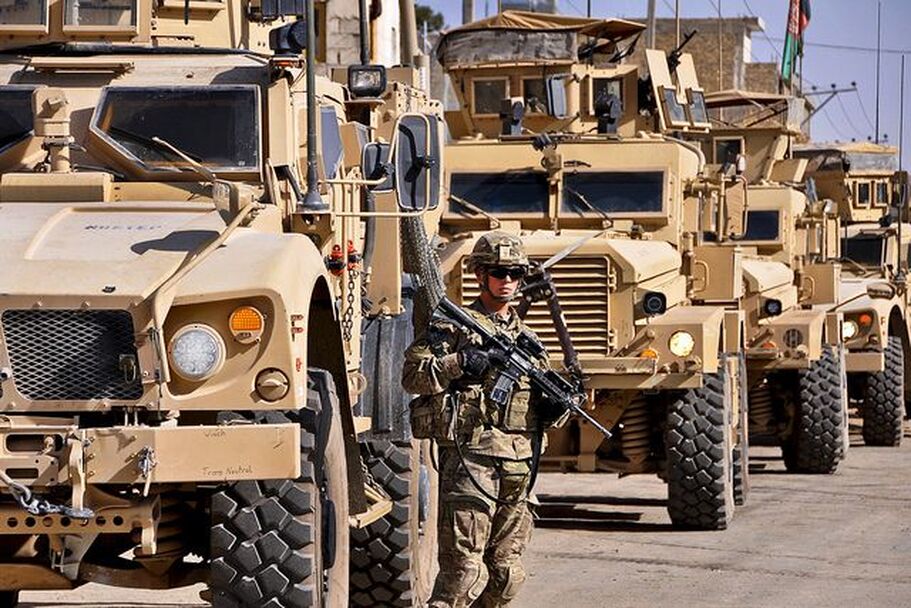
Passenger
Passengers of transport vehicles are generally infantry embarked for the purpose of transporting them to a fight. They're interested in getting safely to the fight, and their responsibilities reflect this. They are expected to remain vigilant and ready to fight at a moment's notice.
Some of their responsibilities are:
Some of their responsibilities are:
• Scan for and communicate threats. While they will sometimes not have a good view of their surroundings, they will take advantage of whatever view they do have to maintain situational awareness.
• Dismount to provide local security. When required, infantry dismount to provide local security for vehicles. This is generally done during temporary halts en route to their actual final dismount point.
• Dismount to fight. Once at the final dismount point, or as required otherwise, infantry disembark the vehicles, form up into their respective units, and begin the assigned fight. This can include reacting to a convoy ambush as well as any other unexpected fights that might happen before the main objective.
Basic Vehicle Guidelines
Loading Up
When it comes to embarking troops into a vehicle, the process is straightforward so long as leaders take initiative and command, and subordinates listen for and follow directions.
Element leaders always load up last in vehicles. Their responsibility is to get their team members into the vehicle that has been assigned by their higher leadership. After being designated a vehicle, they will direct their team members to it, supervise their loading, and then load up as the last man. If they need to take the front passenger seat of a vehicle to act as a navigator, they will need to direct the person sitting in that seat to get out, then wait for them to mount up before remounting the vehicle. This is simply due to Arma not allowing you to choose which specific passenger seat you load into.
As a general rule, a fireteam will attempt to occupy the following positions in a vehicle if they're assigned to one.
• Fireteam Leader - Navigator
• Automatic Rifleman - Passenger.
The AR does not take turret gunner, since doing so would mean that the fireteam's automatic rifle would be unused if the rest of the team needed to dismount while the turret gunner remained in his position.
• Assistant Automatic Rifleman - Turret gunner or remote weapon systems operator, passenger
• Grenadier - Passenger
• Riflemen - Driver, passengers, turret gunner or remote weapon systems operator.
The best driver is picked from the rifleman. In the absence of willing or capable riflemen drivers, the fireteam leader can become the driver, with another team member acting as navigator.
Halts & Dismounting
Due to the way Arma models vehicles and armor, armored personnel carriers and troop-carrying vehicles tend to be a bit vulnerable to enemy fire. It is a good idea to avoid staying mounted as passengers in them, due to the risk of a single RPG wiping out the entire vehicle, its crew, and the immediate family and close friends of everyone who was embarked on it at the time.
When dismounting, infantry elements should provide 360° security as a standard. They should also try to get at least fifteen meters of clearance from the vehicle to help protect against primary or secondary explosions in the event that it is engaged.
When dismounting, infantry elements should provide 360° security as a standard. They should also try to get at least fifteen meters of clearance from the vehicle to help protect against primary or secondary explosions in the event that it is engaged.
It is a good idea to have "Eject" bound to an easily accessed key combo for emergency dismounts, such as 2x Ctrl+E.
Moving on, let's look at the various other considerations that must be made regarding halts and dismounting from vehicles.
When to dismount?
To help decide on when to dismount, versus when to stay mounted, follow these basic guidelines.
• If a halt is short duration (30 seconds or less), mounted troops typically stay in their vehicles.
All personnel continue to scan around the vehicle and stay alert to any potential enemy threats.
• If a halt is longer duration, mounted troops dismount and provide local security.
Team leaders and squad leaders will order the dismount, at which point the "Dismount Drill" procedures are conducted. When it comes time to remount and move out, team leaders and squad leaders will say "Remount", "Mount up", or some variation thereof, which will then be repeated by everyone in earshot over direct-speaking comms. Each team leader will maintain accountability of their men each time they dismount and remount to ensure that nobody is ever left behind.
• Regardless of the duration of a halt, the driver and gunner always stay mounted.
The only time they will leave the vehicle is if it is disabled or destroyed, or ordered to. The gunner may also dismount if the vehicle gun is out of ammo, so that he can employ his personal weapon.
5 & 25 Scan
A "5 & 25" scan involves scanning the area immediately around you and the vehicle for five meters, then dismounting and scanning for 25 meters in all directions. The idea is to ensure that the vehicle did not stop near a concealed satchel charge, mine, or enemy. The tactical situation will determine how much time you have to spend on this scan. At the very least, upon dismounting, ensure that you do a hasty 360° threat scan. Ensure you check all of the concealment-offering objects - such as bushes, brush, etc - around you as time permits. A well-camouflaged enemy will be extremely difficult to detect.
Note that due to the peculiarities of how Arma models armor and vehicle protection, the "5 & 25" scan often becomes "get out of the vehicle FIRST and scan afterward", instead of the more real-world procedure of scanning the first 5 meters while still mounted. In reality, being mounted in an armored vehicle provides a very large degree of protection. In Arma 3 this can depend heavily on the armor of the vehicle and the potential explosives used, so it can be a judgment call as to whether you'll want to dismount first or not.
Note that due to the peculiarities of how Arma models armor and vehicle protection, the "5 & 25" scan often becomes "get out of the vehicle FIRST and scan afterward", instead of the more real-world procedure of scanning the first 5 meters while still mounted. In reality, being mounted in an armored vehicle provides a very large degree of protection. In Arma 3 this can depend heavily on the armor of the vehicle and the potential explosives used, so it can be a judgment call as to whether you'll want to dismount first or not.
Dismount Drill Procedures
The 'dismount drill' is a standard set of procedures that are executed upon dismounting a vehicle. While they can differ somewhat based on the tactical situation (ie: under fire or not), the same concepts apply at all times.
If dismounting under fire...
• Dismount once the vehicle has come to a halt or is moving slow enough that exiting will not injure you.
• Immediately return fire on known or suspected enemy positions while moving to a position that offers cover or concealment. If no cover or concealment is available, either use the vehicle as cover, or take a lower stance.
• Begin the "React to Contact" battle drill and follow it until directed otherwise.
• If the situation allows, conduct a hasty "5 & 25" scan, as described above.
Ambushers will often try to get vehicles to stop in an area that has been mined or otherwise booby-trapped.
If not under fire...
• Dismount once the vehicle has come to a halt.
• Move away from the vehicle to a position that offers cover or concealment. If unavailable, take a knee or go prone to reduce your exposure.
• Conduct a deliberate "5 & 25" scan, as described above.
• Scan outward and identify likely threat avenues, key terrain, etc.
• Continue scanning the surrounding terrain for enemy threats until ordered to remount the vehicle or move out with your team leader.
Bear in mind that this same dismount drill can be used when exiting a helo or any other vehicle where you may need to immediately fight or form a perimeter and provide security.
The decision to dismount can be a command from a leader or on your own disciplined initiative. If given as a command, it will be "Dismount, dismount!". Individual initiative is important here, of course. Don't sit in a vehicle getting shot up if you know you should be dismounting to react to the threat on foot!
The decision to dismount can be a command from a leader or on your own disciplined initiative. If given as a command, it will be "Dismount, dismount!". Individual initiative is important here, of course. Don't sit in a vehicle getting shot up if you know you should be dismounting to react to the threat on foot!
Do not say "BAIL OUT!" when ordering an infantry dismount!
"BAIL OUT" will cause the entire crew to exit the vehicle as well, and should only be used if the vehicle is in imminent threat of being completely destroyed.
"BAIL OUT" will cause the entire crew to exit the vehicle as well, and should only be used if the vehicle is in imminent threat of being completely destroyed.
Situational Awareness
Everyone in a vehicle must scan their sectors to maintain situational awareness at all times. Vigilance will help to spot enemy ambushers and spoil their element of surprise. The sector a person scans will depend upon where they are placed in the vehicle. For an MRAP, basic sectors are depicted below.
360° coverage is the ultimate goal.
360° coverage is the ultimate goal.

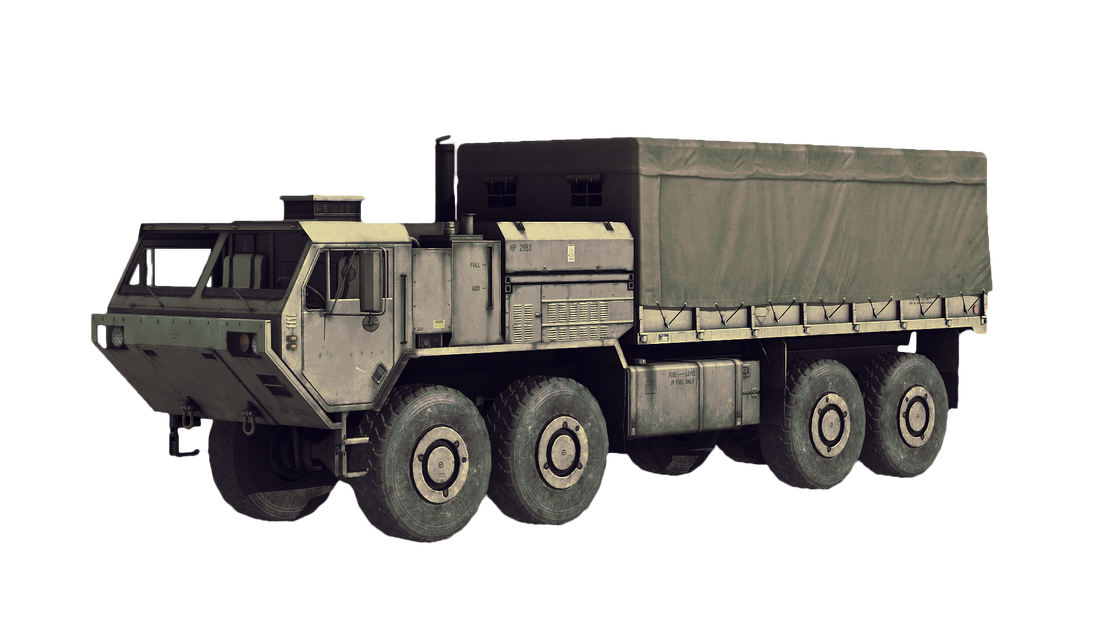
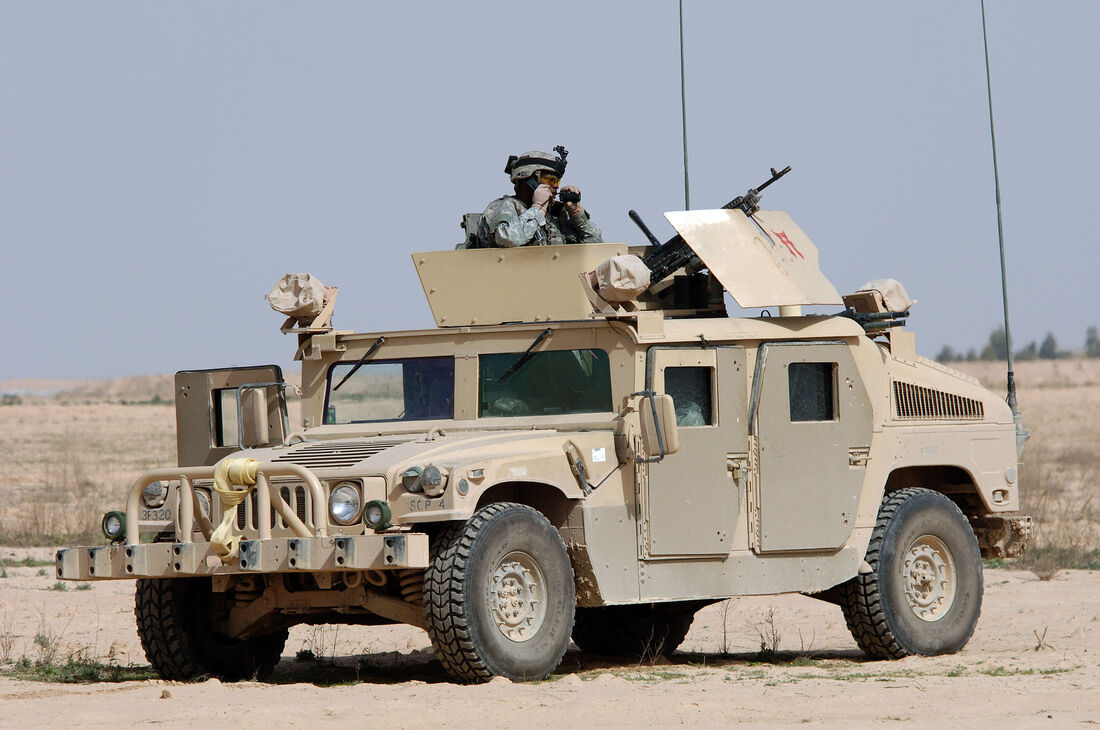
Soft Vehicles
Transport trucks, unarmored HMMWVs, jeeps, motorcycles, etc, fall into the 'soft' vehicle class. These are meant to be used as transportation and will not survive any significant combat. During combat, 'soft' vehicles carry the minimum of crew - a driver and gunner at most. All infantry using them as transportation dismount to fight on foot once contact is made, or whenever it is anticipated as being imminent.
Types of Soft Vehicles
Unarmed
Unarmed soft vehicles fall into two general categories - transport and service. Transport vehicles are concerned with getting troops somewhere, while service vehicles carry fuel, ammo, and provide mechanical support to damaged vehicles. Refuel trucks can be used to refuel any vehicle via a hose and fuelnozzle. Repair trucks allows to perform advanced repairs while wielding a toolkit in their backpack and an ammo truck allows to change a vehicles loadout, at least on helicopters and planes as well as to rearm their weapons.
All of these are death traps once bullets start flying.
All of these are death traps once bullets start flying.
Armed
Armed soft vehicles are generally vulnerable to enemy attack, yet have a powerful weapon on them that helps to counterbalance that vulnerability. HMMWVs with HMGs, GMGs, ATGMs, and such are the prime examples of this class of vehicle, while guerrilla vehicles like technicals also fit.
Typical Threats
The following threats are the ones most commonly employed against soft vehicles. While there are plenty of other things that can destroy a soft vehicle, these are the most commonly encountered. For more information about additional threat types, read the "Armored Vehicles - Typical Threats" section below, and understand that most of those can also be employed against soft vehicles.
If you take anything away from this, it should be that soft vehicles do not stand up to serious enemy resistance and are best employed in low-intensity conflicts. If you're going into a serious fight, bring a serious armored vehicle.
If you take anything away from this, it should be that soft vehicles do not stand up to serious enemy resistance and are best employed in low-intensity conflicts. If you're going into a serious fight, bring a serious armored vehicle.
Small-Arms Fire (SAF)
Small arms fire is by far the greatest and most prevalent threat towards 'soft' vehicles in Arma. The key characteristics of it, as it relates to 'soft' vehicles, follow.
• Generally massed. Most infantry units will mass fire on soft vehicles to ensure their swift destruction.
• Can puncture the hull of a soft vehicle easily, wounding or killing those inside.
• Can destroy tires and cripple the mobility of a vehicle.
• Generally massed. Most infantry units will mass fire on soft vehicles to ensure their swift destruction.
• Can puncture the hull of a soft vehicle easily, wounding or killing those inside.
• Can destroy tires and cripple the mobility of a vehicle.
Heavy Machinegun Fire
Heavy machinegun fire typically is encountered in the form of enemy vehicles. Heavy machineguns are more than capable of quickly destroying a soft vehicle. They do everything that small-arms fire does, except multiplied in intensity. They can destroy tires, tear through the vehicle hull and kill anything they hit, destroy the engines, and generally swiss-cheese soft vehicles in short order.
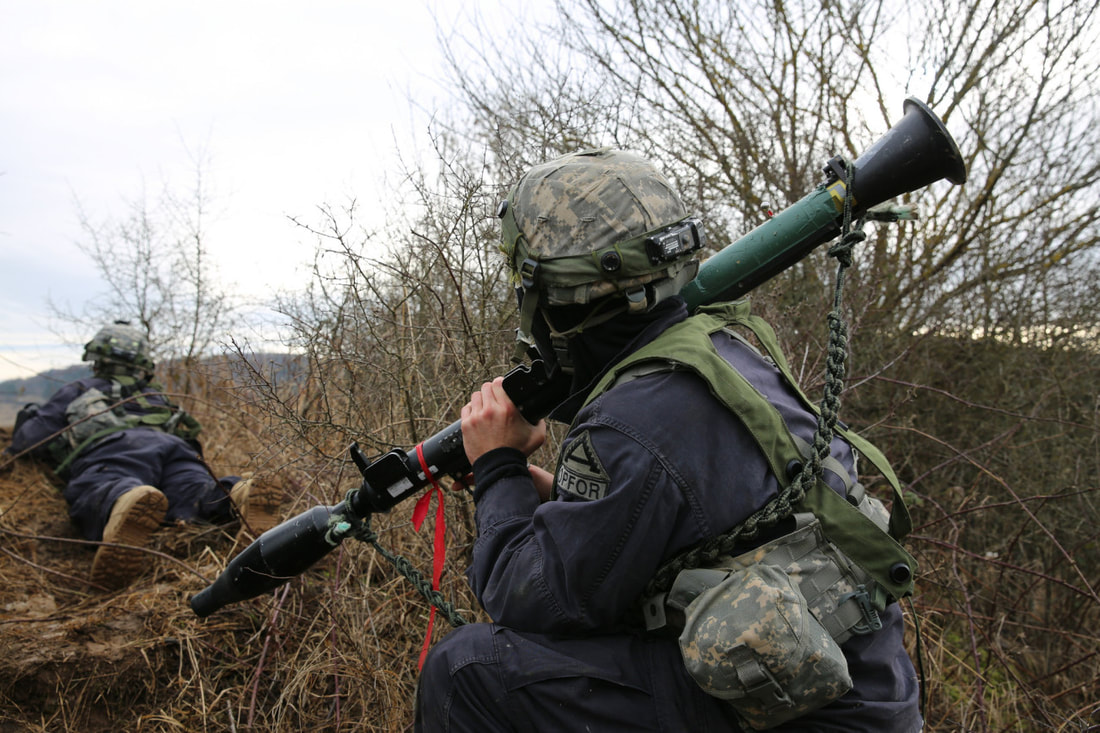
Light Anti-Tank Rockets
Light anti-tank rockets, such as the RPG-7, are deadly threats to soft vehicles. One good hit from an RPG warhead is usually enough to disable a soft vehicle, if not outright destroy it.
Armored Vehicles
Types of Armor
For the purposes of Arma 3, the three armored vehicle classes are light, medium, and heavy. These classifications are given based upon two things: The armor of the vehicle and the armament. They differ somewhat from the real-world classifications in some regards, but this convention is done in consideration of the way in which Arma models such vehicles.
Light
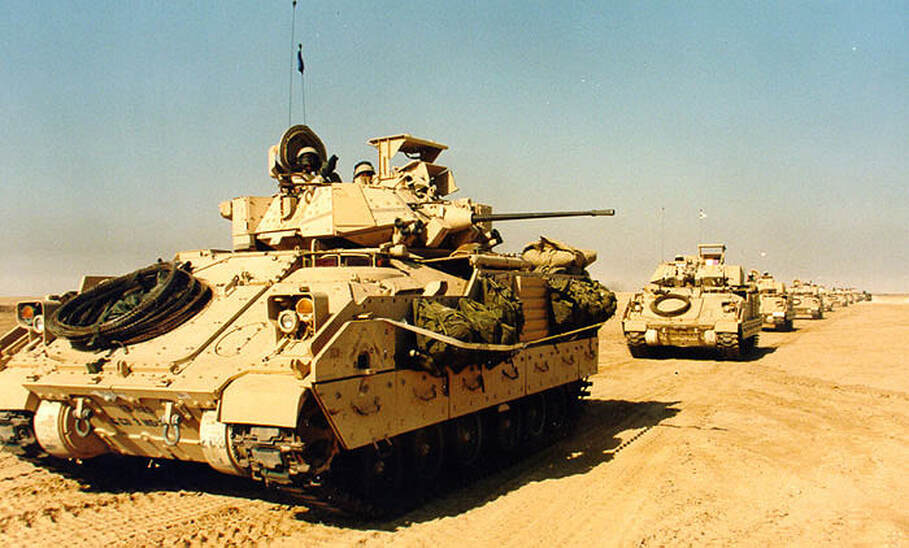
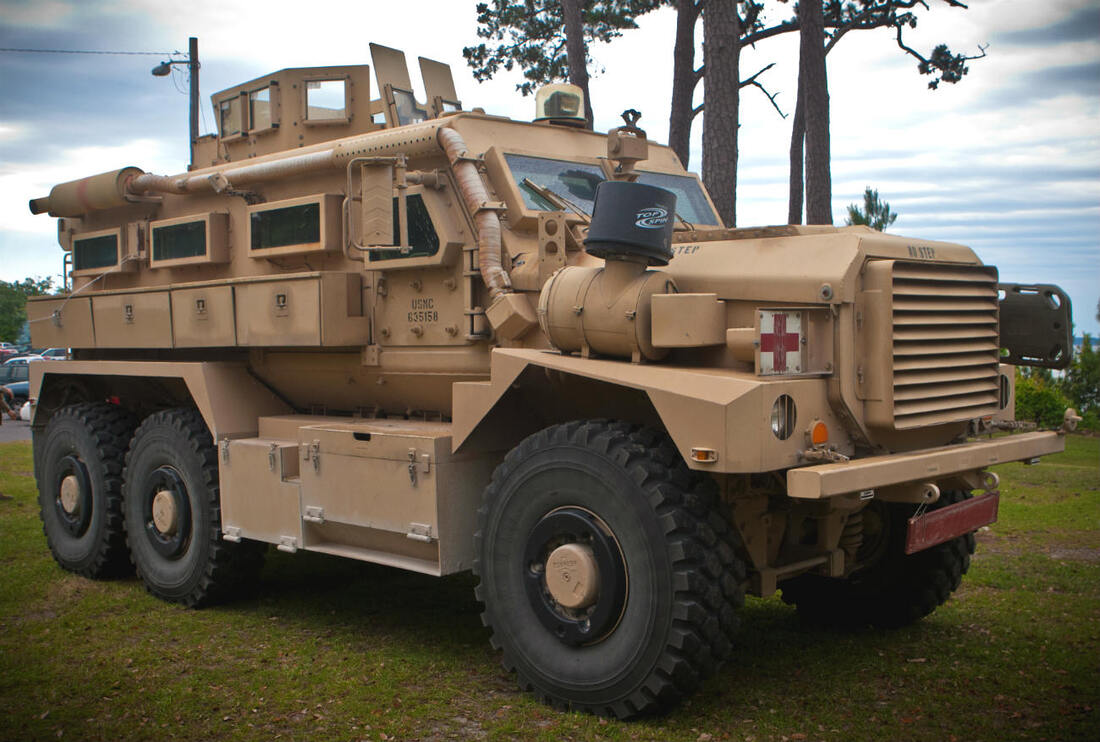
For our purposes, light armor has the weakest armor and weakest weapons - nothing more than a .50cal MG and a grenade launcher is typical for this class. MRAPs with their HMG and GMGs fit this, while older weapon systems like Strykers, AAVs, up-armored HMMWVs, and M113s fall into the light armor class as well.
Light armor offers effective protection against small-arms fire but generally is vulnerable to anti-tank weapons like RPGs and various types of explosives.
There are two main types of light armored vehicles, Mine Resistant, Ambush Protected (MRAP) and Armored Personnel Carriers (APCs).
An MRAP is an armored vehicle, usually used for transportation only. MRAPs have been introduced after the shift away from regular warfare into more guerrilla like battles, where regular armies had to worry more about IEDs, ambushes and so on, giving MRAPs their name. You usually find these vehicles outfitted with heavy support weapons, controlled either directly or remotely from within the safety of the vehicle via computer.
Unlike light vehicles, these things can take a beating. In some cases they are completely protected to rounds up to 12.7mm/50cal but will definitely protect you from regular rifle rounds. They might have some weak points such as open spaces like the gunner hatch, their tires, sometimes their windows and so on. Luckily for you, not every guerrilla fighter is able to hit a tiny weak spot on a moving vehicle from 400m away. Beware though as even outdated anti-tank weaponry will do short work of MRAPs in most cases.
Are you interested about the "mine resistant" part of the name? They simply started using bigger bombs, making even the heavies or armor useless, so do not get your hopes up too high and watch out for those strange garbage piles on the side of the road.
If protection of infantry is the highest priority: APCs provide good protection for transporting troops to where they need to be. Usually equipped with some kind of machinegun, sometimes even autocannon, they can also provide some hate towards the enemy. An APC usually stays a bit behind instead of openly engaging with the enemy as that would be the job of an IFV, laid out further down in the vehicle section.
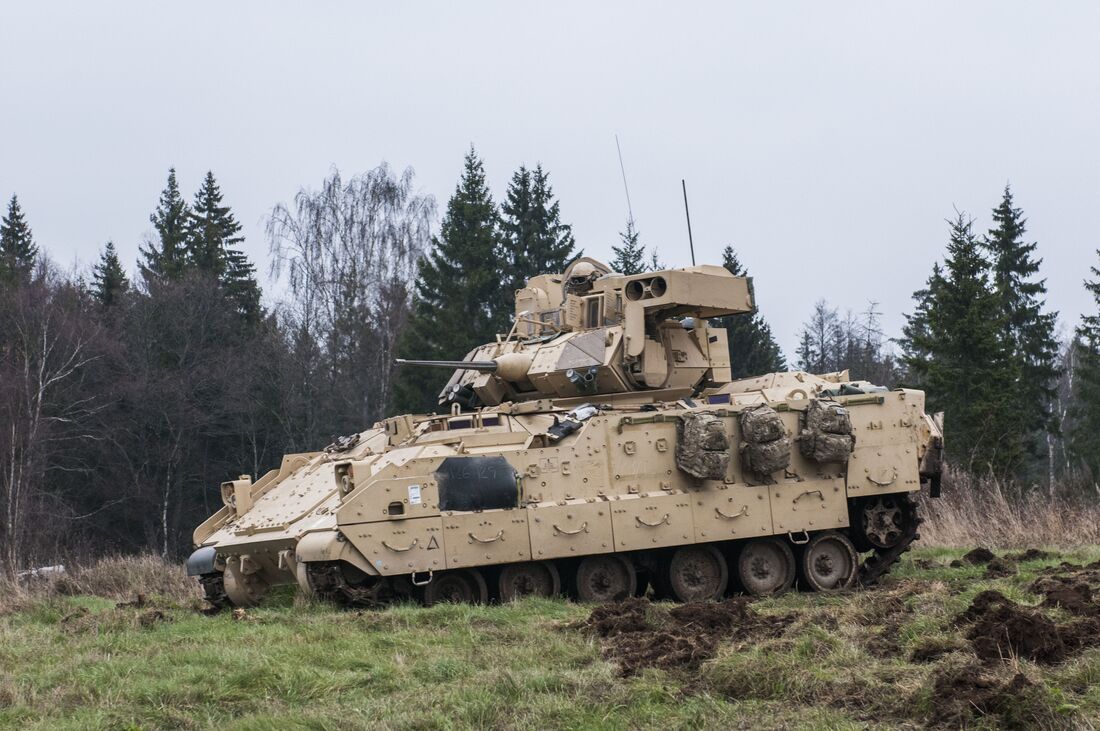
Medium
Medium armor tends to differ mainly by the armaments it has. Medium armor has at least a cannon (typically automatic). The Bradley IFV, Stryker MGS (Mobile Gun System) or ATGM (Anti-Tank Guided Missile), and LAV-25 are considered medium armor due to their markedly improved lethality compared to the light armor.
Medium armor provides excellent protection against small-arms fire and some (but not much) protection against infantry-carried anti-tank weapons. Their weapons allow them to wipe the floor with any enemy infantry and some of them are even effective against heavy armor thanks to ATGMs and such.
The common nomenclature assigned to medium armor is typically known as an Infantry Fighting Vehicle, or IFV.
IFVs are the backbone of any infantry based large scale operation, they are a transport and support vehicle unified in one. They might not be able to take a lot of damage, but they sure know how to deal it themselves. Their job is to support the infantry elements where ever they can, take care of armored threats and provide cover as well as to transport their precious meat based friends to where they are needed.
As the name suggests, IFVs will usually not work on their own and rather be used as support. They sport various weapons from basic machine guns over cannons to up to highly effective missiles. They have a low profile to keep themselves hidden relatively easily. You will see IFVs in larger scale missions, manned by 2-4 crewmen and used either in cities as mobile cover or as overwatch from further away.
Crewmen of IFVs are fullfilling the same requirements as tankers of MBTs, including gear and tasks.
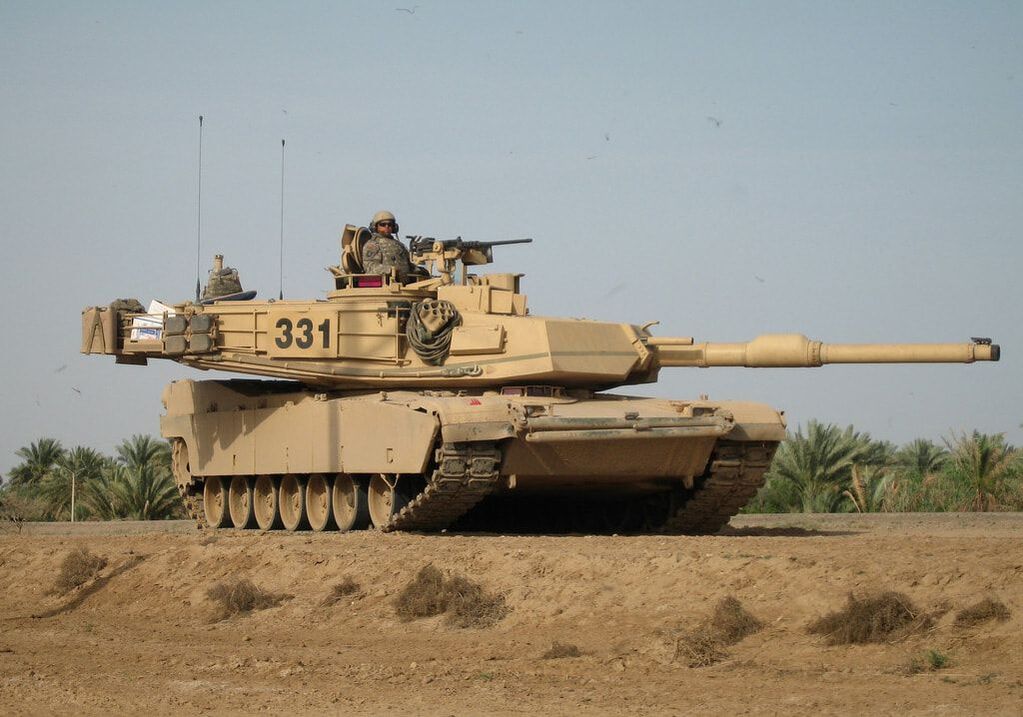
Heavy
These are exclusively tanks. Tanks are the backbone of armored warfare. The MBT is basically the modern evolution of medium tanks first popularized shortly before the second world war. The M1 Abrams Main Battle Tank series is the heavy armor for the U.S. military and is one of many examples. It has tremendous firepower, great armor, and is pretty much the king of armored vehicle combat in Arma 3. Heavy armor is the infantry's worst nightmare come to menacing life. Tanks are known for high tech equipment, effective and diverse weaponry and protection against all but the nastiest of AT weapons.
There is a huge variety of tanks: tracked or wheeled, big cannons or smaller ones, autocannons and even tanks with missile launchers. Their tasks remain mostly the same though.
As a crewman of a tank you will most likely be an engineer as well, in case your tank needs field repair. For this task you will find repairkits, entire service trucks as well as spare wheels and tracks to repair your vehicle.
Armor Considerations
Armor offers an impressive array of capabilities on the modern battlefield. In combination, these factors produce the shock effect that allows armor units to close with and destroy the enemy in most weather and light conditions.
Armor can defend much like the infantry, but they are most effective when employed in a mobile situation that exploits their speed, shock, and firepower. Armor is most effective if the enemy is unaware of their presence and has planned to fight only against the infantry forces that he has identified.
Armor requires proficient operators and large amounts of resupply to sustain themselves in battle.
Mobility
Capabilities
• Armor mobility comes from its ability to move fast either on or off the road. The ability to cross ditches; to ford streams and shallow rivers; and to push through small trees (up to 12 inches in diameter), vegetation, wire obstacles, and limited obstructions allows armor to move effectively in various types of terrain.
• The addition of a mine plow enhances breaching capability, but also hinders movement in rough terrain.
• Global positioning systems (GPS) and inertial position navigation (POSNAV) systems allow modern armored vehicles to move to virtually any designated location with greater speed and accuracy.
Limitations
• Armor is noisy. Therefore, there is little chance of them arriving in an area undetected.
• Because armor lacks bridging equipment, they can only cross bodies of water less than 4 feet deep .
• Reconnaissance parties must ascertain the capacity of roads, bridges, and building floors to determine if they can support armored vehicles.
Firepower
Capabilities
• The best anti-tank weapon on the battlefield is the tank. The tank's main gun is accurate and lethal at ranges out to 2,500 meters. The stabilized gun allows effective fires even when the tank is moving cross-country.
• The various weapon systems found on tanks, IFVs and MRAPs provide a high volume of fire for self-defense and provide supporting fires for the infantry and armor movements.
Limitations
• Armored vehicles cannot elevate or depress their guns enough to engage targets very close to the vehicle or those high up in tall buildings.
• Due to the length of the long barrels, such as a tank main gun, the turret will not rotate if a solid object is encountered, for example, a wall, post, and so forth.
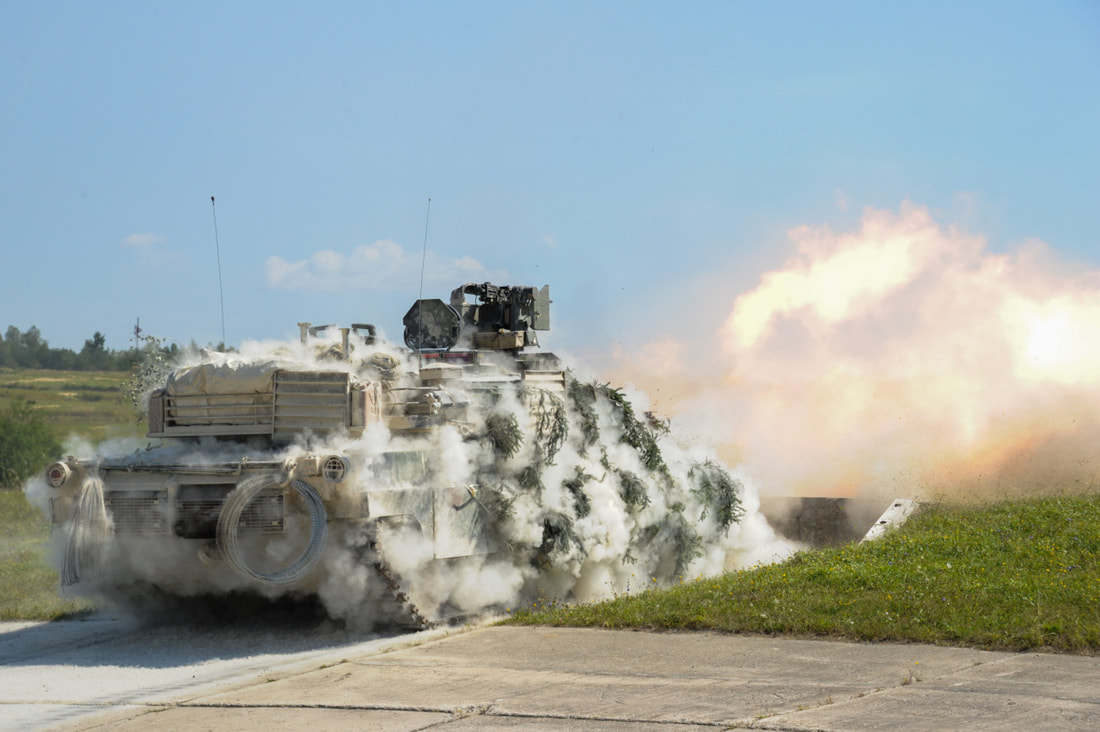
• Tank cannons create an overpressure and noise hazard to exposed infantrymen as seen in various modifications.
• When the tank main gun fires, it creates a large fireball and smoke cloud. The smoke and dust of the explosion further obscure the target. Depending on local conditions, this obscuration could last as long as two or three minutes.
• The best anti-tank weapon on the battlefield is the tank. The tank's main gun is accurate and lethal at ranges out to 2,500 meters. The stabilized gun allows effective fires even when the tank is moving cross-country.
• The various weapon systems found on tanks, IFVs and MRAPs provide a high volume of fire for self-defense and provide supporting fires for the infantry and armor movements.
Limitations
• Armored vehicles cannot elevate or depress their guns enough to engage targets very close to the vehicle or those high up in tall buildings.
• Due to the length of the long barrels, such as a tank main gun, the turret will not rotate if a solid object is encountered, for example, a wall, post, and so forth.
• Tank cannons create an overpressure and noise hazard to exposed infantrymen as seen in various modifications.
• When the tank main gun fires, it creates a large fireball and smoke cloud. The smoke and dust of the explosion further obscure the target. Depending on local conditions, this obscuration could last as long as two or three minutes.
Target Acquisition
Capabilities
• The ability to acquire targets exceeds that of all other infantry systems. On-board optics and sighting systems enable the crews to acquire and destroy enemy armored vehicles, infantry and fortifications using their weapons to suppress enemy positions, personnel, and lightly armored targets. The thermal sights on armored vehicles can detect enemy activity through darkness and smoke, conditions that limit even the best-equipped infantry.
Limitations
• Armored vehicle crews, especially those in tanks, are blind to infantry near their vehicle. This limitation is worse during limited visibility or when the hatches are closed. This causes the crew to focus on the enemy or on potential enemy locations rather than on friendly infantry moving close to the vehicle. Fighting with closed hatches reduces the crew's ability to see, acquire, and engage targets. Crewmen inside armored vehicles have poor all-round vision through their vision blocks; they are easily blinded by smoke or dust.
• Because of the abundance of cover and concealment in urban terrain, armored vehicle gunners may not be able to easily identify enemy targets unless the commander exposes himself to fire by opening his hatch or infantrymen directing the gunner to the target.
• Dust, fires, and thick smoke significantly degrade a armored vehicle's thermal sights.
Protection
Capabilities
• Provide excellent protection. Typically across the frontal 60-degree arc, the armor is safe from all weapons except heavy anti-tank missiles or guns and the main gun on enemy tanks.
• When inside an armored vehicles, the crew is safe from all small-arms fire, artillery rounds (except direct hits), and antipersonnel mines.
• An armored vehicles smoke grenade launcher compliment and on-board smoke generator provide fast concealment from observation (other than by thermals).
• Can provide dismounted infantry cover from direct-fire weapons and fragments. With coordination, they can provide moving cover for infantrymen as they advance across small open areas.
• Smoke grenade launchers may be used both to protect the tank from enemy fire and to provide concealment for the friendly infantry forces as they either move across open areas or recover wounded.
Limitations
• Are vulnerable to the weapons effects of other armor, mines, ATGMs, anti-tank guns, and close attack aircraft.
• The vehicle's top, rear, and flank is vulnerable to lighter anti-tank weapons and (especially) to handheld anti-tank weapons. The top is also vulnerable to precision-guided artillery or air-delivered munitions. Anti-tank mines can destroy or disable the vehicle.
• Enemy fire striking a tank but not penetrating is a major threat to nearby infantry. Fragmentation that is generated by anti-tank rounds and ricochets off tank armor have historically been a prime cause of infantry casualties while working with tanks in urban areas.
• The use of smoke must be carefully coordinated. Although most modern thermal sights can see through most smoke, friendly infantrymen are at a significant disadvantage when enveloped in dense smoke clouds. The smoke grenade launchers on armor provide excellent, rapidly developed local smoke clouds, but in some modifications the grenades may produce burning fragments that are hazardous to infantrymen near the tank and that can ignite dangerous fires in urban areas.
Communications
Capabilities
• Use of visual signals and radios facilitates rapid and secure communication of orders and instructions. This capability allows crews to quickly mass the effects of their weapon systems while remaining dispersed to limit the effects of the enemy's weapons.
Limitations
• Communication between the infantry on the ground and the crewmen on the tank is difficult. Voice communication with any tank crew while a vehicle engine is ruining is restricted to shouting at the commander or climbing up to talk to him. In either case, the infantryman has to get the attention of the commander first. Unplanned visual signals may work, but it is better to use preplanned signals. Short of these measures, the dismounted infantry and armored forces must communicate by radio.
Armored Vehicle Roles
Armored vehicle roles differ somewhat from those of soft vehicles, primarily because they are intended to be aggressively employed in a combat role. The drivers, commanders, loaders, and gunners of armored vehicles must be knowledgeable on what that means, and capable of carrying out the following responsibilities with competence.
Driver
The armor driver is typically the junior member of the crew. He is the one who will get in and out of places especially when you are severely damaged.
His basic responsibilities include:
• Moving the armor in a tactical fashion from one tactical position to another, at the commander's orders. This includes bounding from cover to cover.
• Locating and positioning the armor in hull-down and other protected positions when possible, with the assistance of the Vehicle Commander (VC) or Tank Commander (TC). If possible, Always look for a good hull-down location. Taking good cover will protect your vulnerable hull from incoming fire, remember that ammo storage and engine compartment are all below your turret.
• Scanning to the front for mines, satchels, IEDs, and other threats or suspicious objects (such as oddly parked cars) that may be placed in his path.
• Turning the tank to face the greatest threat. Since armored vehicles can easily be destroyed with side or rear shots, the driver should better place the thickest armor in front of those incoming armor-piercing rounds. IFVs with guided missiles are also as dangerous as any stationary missile launchers. It is inadvisable to expose the vulnerable rear armor to them.
• Listening to the commander or gunner for movement orders.
• Stay away from urban area. If there is a need have to use armored vehicles inside an urban area, make sure that there is friendly infantry nearby or the armored vehicle crew are just canned meat for enemy anti-tank troops. Remember: The more windows inside a town, the more dangerous it is.
• Staying alert of friendly infantry positions and attempting to avoid them when tactically sound. The driver should also attempt to communicate his intent to reverse when in tight terrain with infantry nearby (ie: MOUT).
Gunner
The armor gunner is responsible for employing the bulk of the armor's armaments. The gunner must have good eyes and ears. The second someone yells a target position, he must know immediately where to snap his turret to.
His basic responsibilities include:
• Scanning for the enemy. A gunner who is not scanning constantly is not doing his job.
• Calling out contacts as he sees them. This helps the armor commander prioritize his fires as needed.
• Listening for and acting on the vehicle commander's orders. An armor gunner oftentimes has a restricted view of the surroundings compared to what the commander sees, so it is important that he listens for orders and direction from those that can see more than him.
• Engaging the enemy and communicating what he is doing to the armor commander and driver. This includes letting the driver know when he is reloading the main gun, so that the armor can go turret-down if possible.
• Using the correct weapon for any given threat. The gunner should have the familiarity and judgment to not employ SABOT rounds against enemy infantry, as one example.
• Covering his sector and taking cues from other vehicles to know what sectors he should pay the most attention to.
• Having AP loaded when armor is expected. If enemy armor is expected, expect it behind every corner or ridge line. In close quarters, whichever armored vehicle fires the first shot typically wins. The time wasted switching ammo type can be catastrophic.
• Picking the right spot to shoot. If the gunner can score a hit on enemy tank's turret, engine or ammo storage, why waste ammo on other areas? A direct hit on ammo rack usually results in ammo cook off and one-shot kill.
• Not being trigger happy with enemy infantry. It may be fun to blow somebody high up in the sky but the gunner should try to avoid engaging a single soldier with their weapons. The loud noise from their weapons is way too iconic, and everyone who heard that will send their anti-armor units to hunt the vehicle down.
• Looking for tracers from enemy infantry and vehicles. The gunner can see their fire easily, and, vice versa, enemy forces may locate friendlies if the gunner fires the coax too much.
• Tracking targets for few seconds before opening fire, this helps a lot with moving targets by allowing the turret to fully adjust to the target.
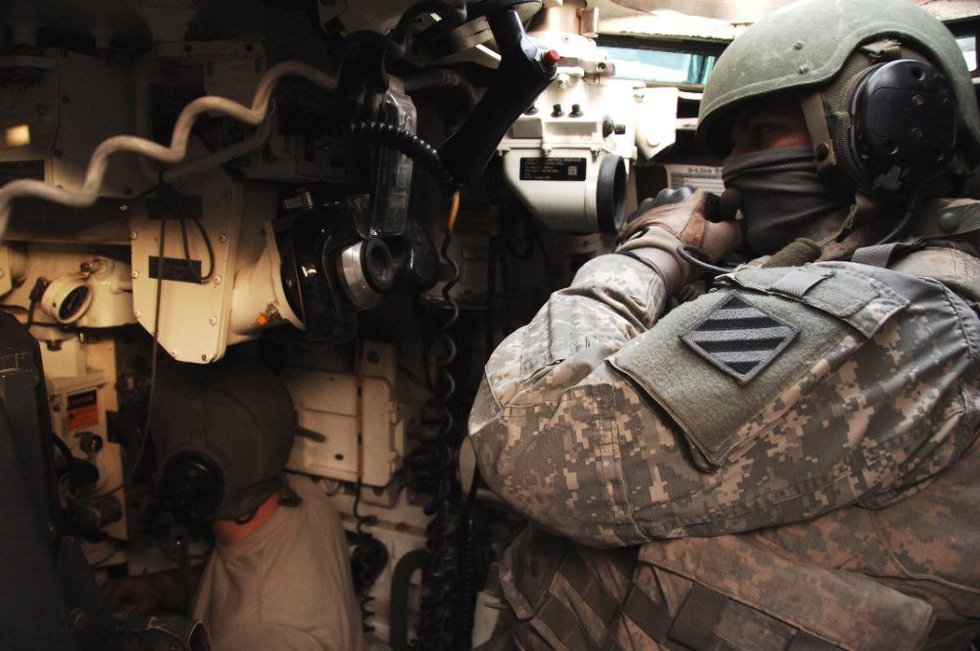
Loader
Though not present in many armored vehicles, the loader stills presents a role in tanks such as the M1 Abrams, as the tank does not feature an autoloader system. Loaders in Arma do not maintain an active role except for providing the gunner the ability to load his rounds faster, and the crew with handling secondary tanks. Because the loader is ideally positioned both to observe around the tank and to monitor the tank's digital displays, TCs should give strong consideration to assigning their second most experienced crewman as the loader.
His basic responsibilities include:
• Loading the vehicle's weapons, such as the main gun and coaxial gun
• Using the loader's machine gun if the vehicle is equipped with one.
• Replenishing ammunition whenever possible. This is done by various methods such as ammo trucks and vehicle ammo boxes.
• Repairing the vehicle if damaged. The loader should ideally be the one equipped with a toolkit if there are no other crew members with one.
• Assisting in searching for targets and acting as air or anti-tank guided missile warning.
• Telling friendly units to keep a distance from the vehicle. Gun blasts and collisions kill.
• Assists the commander as needed in directing the driver so the vehicle maintains its position in formation.
• Assists other crewmembers as necessary. This can include using the radio, performing recon, taking over other roles if a casualty is sustained, etc.
Commander
Often referred to as the 'vehicle commander' (VC) or 'tank commander' (TC), the armor commander is the senior member of the crew. He is in charge of his armor, and gives orders to both the gunner and driver in order to carry out whatever mission they have been tasked with.
His basic responsibilities include:
• Directing the movement of his armor. He does this by giving move waypoints to the driver and giving guidance on how and where the vehicle should be moving.
• Coordinating with other armored vehicles or other friendly forces.
• Scanning for and designating targets for his gunner, specifying the method of engagement if needed.
• Employing the commander machinegun for close-in defense of the vehicle, or fire against light targets at other ranges.
• Coordinating the use of vehicle smoke to cover friendly units during attack, or cover yourself while retreating. It covers more area and lasts longer than any other form of smoke.
• Staying with friendly armored vehicles if there are other elements. It's always better to have covering fire then engaging the enemy alone.
• Staying behind friendly units and wait until friendlies have found out the enemy's location. It's way easier to play the flanking game when the opponent has no idea where the armor coming from.
• Using the Hunter-Killer system, On modern tanks, the commander and gunner use different observation devices, like the CITV (Commander's Independent Thermal Viewer). The commander can assign a new target for gunner, even he's already engaging a threat. The result is reduction in time searching for new targets. The commander has watch a wider area with his gunner. The commander should not fall into tunnel vision, if the gunner and commander are both focused on a single target, another one may be trying to flank from behind.
• Checking his map frequently and ask for enemy locations with his radio.
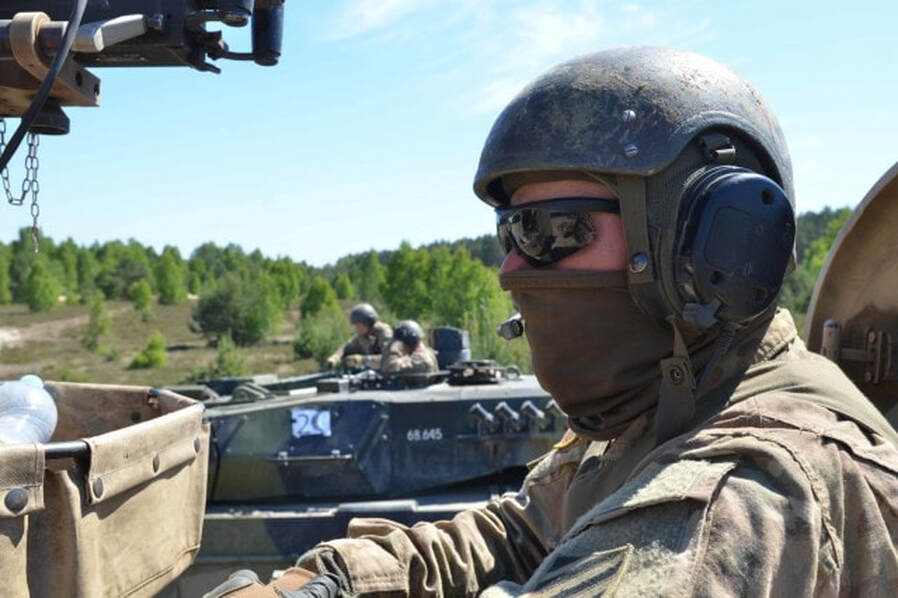
A typical crewman loadout may look similar to this...
Weaponry
1. Standard Rifleman Fighting Kit
• Similar to a normal rifleman
• For emergencies
2. Optional Sidearm
• Faster
• Quieter
• Good in Tight Spaces
• 2 – 3 magazines (approximately 20 – 35 rounds)
• Similar to a normal rifleman
• For emergencies
2. Optional Sidearm
• Faster
• Quieter
• Good in Tight Spaces
• 2 – 3 magazines (approximately 20 – 35 rounds)
Gear & Equipment
1. Standard Rifleman Fighting Kit
• Similar to a normal rifleman
2. Special suit
3. Optional rangefinder / binoculars
3. Helmet with ear protection
5. Repairkit
6. Long-range radio linked to ground elements
• Similar to a normal rifleman
2. Special suit
3. Optional rangefinder / binoculars
3. Helmet with ear protection
5. Repairkit
6. Long-range radio linked to ground elements
Tasks
• Vehicle Dependent
Difficulty
Armor Crew Coordination & Comms
Maneuvering
• Orient.
Command to get either the vehicle or gunner to align themselves to a specific direction. There are different orientation methods possible, described in the next section.
• Hull down.
Command to get the tank into a hull down position. More details (such as orientation direction) are given as necessary.
• Turret down.
Command to retreat the tank into a masked, turret-down position.
• Jockey left/right.
Command to maneuver the tank into concealment, shift left or right, then pop back up. Described in more detail later.
Engagement
• Firing / On The Way.
Gunner alert to let the crew know he is firing his weapons.
• Long/Over.
Commander or gunner has observed a shot that went over the target. Gunner must adjust lower to hit the target.
• Short.
Commander or gunner has observed a shot that landed in front of the target. Gunner must adjust up to hit the target.
• More lead / less lead.
Gunner needs to apply more or less lead to hit the target, based on the fall of his previous round.
• Hit.
Commander or gunner has observed a shot that hit the target directly.
• Up.
Main gun is ready to fire. Typically given after a reload.
• SMOKE, SMOKE.
Emergency command from the driver or gunner to have the commander deploy smoke immediately and have the driver maneuver evasively. Note that if smoke needs to be employed in a non-emergency situation (ie - to screen infantry movements), the command becomes "Deploy smoke" and is spoken with less of an "oh shit!" intensity.
Readiness
• On target.
Gunner is on-target and ready to fire. Can also use "Tally", an air brevity term.
• Don't see/Not seen/No vis.
Gunner cannot see the target that has been described to him. Can also use "No joy", an air brevity term.
Gunner is on-target and ready to fire. Can also use "Tally", an air brevity term.
• Don't see/Not seen/No vis.
Gunner cannot see the target that has been described to him. Can also use "No joy", an air brevity term.
Orientation
When directing the movement or gunnery of a tank or armored vehicle, several methods of orientation can be employed. They are as follows.
Orient
The command "Orient" informs the gunner or driver to align with the commander's orientation using the vehicle radar. This method is extremely quick and easy for the commander and gunner/driver but will not be as accurate as giving a bearing. Example usages follow.
• "Gunner, orient." Gunner turns turret to face the direction of the commander turret.
• "Driver, orient." Driver turns vehicle to face the direction of the commander turret.
• "Driver, orient on gunner." Driver turns vehicle to face the direction of the gunner's turret.
Compass Bearing
Using the digital compass the commander will read off his bearing to allow the gunner/driver to traverse to the same bearing. This method is very accurate and generally the preferred method to use. Example usages follow.
• "Gunner, orient 235". Gunner will orient to a heading of 235.
• "Gunner, target, 115, tank." Gunner must traverse to 115 degrees to spot and engage a tank.
• "Gunner, your sector of fire is from 070 to 165." Gunner will scan an arc stretching from 070 to 165 degrees until directed otherwise.
Clock Orientation
When using the clock method, the hull of the vehicle forms the 12 o'clock reference. Note that this method is not terribly accurate and should only be used at close ranges. It can also be used by any crew member (driver, passenger, loader) that spots a target which the turret crew hasn't seen yet.
• "Driver, friendly truck in trail at our 5 o'clock". Driver becomes aware of the fact that a friendly vehicle is nearby in a given direction. If he needs to back up unexpectedly, he can attempt to avoid maneuvering to the 5 o'clock position in the hopes of avoiding hitting friendlies.
Relative Direction
Relative directions are the simplest and most coarse orientations possible - this is simply the act of saying "Left", "Right", "Front-left", et cetera. Relative directions are most commonly used when guiding the driver or shifting fire from a known point. Example usages follow.
• "Driver, friendly infantry on our left, very close." Driver becomes aware of friendlies nearby, which causes him to be more cautious in his maneuvering.
• "Gunner, orient right, scan the treeline." Gunner will maintain an orientation to the right of the vehicle as it moves, scanning the designated treeline for enemy targets.
• "Gunner, from your last shot, shift right one hundred meters and engage that bush line." Gunner will shift his fire to a bush line near where his last shot landed and engage it.
Tank/Vehicle Commander In Detail
Tank/Vehicle Commanders have a great many responsibilities and things they must stay aware of in order to effectively employ their vehicles and keep their crews alive. The following sections detail some of the more significant aspects of what they are expected to do.
Tips for Tank Commanders
• Ensure your crew is aware of where likely enemy threats are, and is oriented as best as possible before any contact is made. Predicting where the enemy is and looking in their general direction is far better than being caught by surprise and having to react to their fire.
• Prioritize your threat selection and engagement based on the capabilities and imminent danger posed by the enemy. Enemy armor and ATGM systems are always the highest priority, followed by unguided rocket soldiers, and finally everything else.
• Once your hull-down tank has been spotted and has received or is likely to receive incoming fire, go turret down and jockey to a new position. Jockeying is described in further detail a bit later on - it is simply the act of changing positions in a concealed manner so that the tank can pop up in a different location each time it engages the enemy.
• Avoid moving straight forward from an over watch position or battle position. Jockeying to a new position or backing away from the position and going around on the low ground are usually better choices.
• Stay on low ground as much as possible. Moving on top of ridge lines and over hilltops will skyline the vehicles.
Directing the Driver
• You should only move as fast as your gunner can accurately observe and engage targets. Blitzing through an area will generally result in you taking fire that could have been avoided with a more deliberate movement scheme.
• Commanders must remember that the driver has restricted field of view. When referencing landmarks, bear in mind that they must be between 11 and 1 O'clock and at roughly the same elevation for the driver to be able to see them, unless he is turned out. Some tanks, like the Slammer, do not allow a driver to turn out due to the design of the turret.
• When moving, taking the time to explain the desired position for the tank to end up at as well as the route to use will allow the driver to carry out the movement with minimal supervision. This may not be possible at all times, but when there is time for it, it can increase situational awareness by allowing the commander to scan for threats instead of focus so much on navigating the driver.
• While driving in formation with other vehicles, or in close support of friendly infantry, keep in mind that your driver will not be able to see them. Commanders must guide the driver in such situations.
• There will be a short delay when ordering the driver to stop, or execute any other command, due to the time it takes for armored vehicles to come to a stop. Give commands 1-2 second in advance or give commands such as "Driver, advance 10m" or "Driver, advance to the next intersection".
Directing the Gunner
• As a vehicle commander, you should always be communicating the gunner's area of responsibility. Using bearings, clock ray or landmark reference are some of the many methods to set your gunners left and right of arc.
• Set your gunner's rules of engagement and keep them updated as the situation evolves. "Hold Fire", "Priority Targets Only" or "Fire at Will" are the most common. "Priority Targets Only" will inform the gunner to only engage targets that pose a threat to your vehicle or other friendly forces. It is generally advised to have a gunner set to "Fire at will" to ensure the quickest reaction to threats.
• Use your gunner's improved optics to observe distant targets. Your gunner will be able to aim at anything suspicious that you can't identify through the commander periscope and get a clearer ID on it - you simply need to orient him on such suspicious things in the first place.
• Continually inform your crew of the positions of friendly elements to maintain their situational awareness. As the vehicle commander, the rounds that come from your vehicle are ultimately your responsibility. Ensure that they're only being sent towards the enemy.
• Your view through the commander's periscope will be different from the gunner's view through the primary gun sight, due to the commander being elevated somewhat. Remember this when working with your gunner, as terrain features could block line of sight from one of the view ports for him without necessarily obstructing your view.
• Keep the gunner's orientation in mind when moving in close terrain or urban areas. The cannon extends past the side of the vehicle when at the 9 or 3 o'clock and can collide with passing objects. While this will not damage the cannon in Arma 3, it will jar the vehicle and disrupt movement.
Commander Initiated Engagement
A commander initiated engagement (CIE) is similar to the contact report used by infantry, but tailored towards the equipment and requirements of armored vehicle crews.
It is important that the commander is quick, clear and concise when giving a Commander Initiated Engagement. Passing the vital information in a timely matter will ensure the safety of yourself, your vehicle and other friendly elements. To this end, let's take a look at the different components of a CIE.
It is important that the commander is quick, clear and concise when giving a Commander Initiated Engagement. Passing the vital information in a timely matter will ensure the safety of yourself, your vehicle and other friendly elements. To this end, let's take a look at the different components of a CIE.
1. Alert
Identifying the position "Gunner" is the standard alert; however, the infantry word "Contact" or "Target" is also acceptable. This will alert the gunner a CIE is about to follow.
2. Orient
There are three common methods to orient the gunner on target. Choosing which method will be determined by the VC's preference and the difficulty for the gunner to find the target. They are the same as those detailed above in the "Orientation" section. In addition to giving the direction, the distance is also give, typically with the assistance of the vehicle's laser rangefinder.
3. Describe
Quickly describe what exactly the target is - for example, whether it is a tank or an enemy squad in the open. This will confirm for the gunner what his precise target is, which is of particular importance when multiple threats may be present in a given area. Brevity should be exercised in this step as speed is very important in a CIE.
If the gunner observes the target, which should hopefully be the case, he will verbally state "On" to inform the VC he is observing the target. If the gunner cannot find the target the command "Not seen" will be used to inform the VC he needs to expound on the CIE to get on target.
Once the gunner is on target, the commander will finish the CIE by designating the weapon system to be used (Coax, SABOT, HE, etc.) and end with the command "Fire".
In the interest of saving time, which in turns saves lives in vehicle engagements, the commander can give the weapon system and "Fire when ready" command after step 3. This will inform the gunner to fire as soon as the target is in sight.
Once you have given a CIE and the gunner is engaging the target, begin to scan for other targets. Your gunner will be able to observe the target and finish it, while you should be worried about any other enemy threats that may be around. Ideally, you will spot a new threat and give your follow-on CIE commands just after the gunner has finished destroying the initial threat.
Armor in Different Environments
Armor In Urban Areas
Tank-heavy forces could be at a severe disadvantage during urban combat, but a few tanks working with the infantry can be very effective, especially if they work well together at the small-unit level. Armor, infantry, and engineer task forces are normally formed to attack a fortified area. Individual armor or pairs of armor can work together with infantry elements. Armor needs infantry on the ground to provide security in urban areas and to designate targets.
The first and most fundamental lesson learned from recent operations in urban areas is the value of the fully integrated combined arms team. There is no denying the value of light infantry forces during urban combat. However, urban combat never should be considered a purely infantry task. Fighting in urban areas is centered around prepared positions in houses and buildings. Such positions cover street approaches and are protected by mines, obstacles, and booby traps. Therefore, bridges, overpasses, and buildings must be inspected and cleared of mines before they are used.
Armor needs infantry support when the two elements are working together. Do not leave armor alone because they are not prepared to provide security. Armor is extremely vulnerable to dismounted attack when operating on urban terrain. Armor is most vulnerable and need security when infantry are in the process of clearing buildings. Armor typically must remain relatively stationary for prolonged periods allowing threat AT teams to maneuver to a position of advantage.
The infantry normally leads movement through urban areas. The armor follows and provides close overwatch. If the infantry discovers an enemy position or encounters resistance, the armor immediately responds with supporting fire to fix the enemy in place or suppress him and allow the infantry to develop the situation. After sufficient time to develop the situation or conduct short-range reconnaissance, the infantry leader directs the armor to move, if necessary, and identifies specific targets for the armor to engage.
Armor can also be used to carry ammunition, and other supplies to support the urban fight.
If fields of fire are restricted to streets, hull-down positions should be used to gain cover and fire directly down streets. From those positions, tanks are protected and can move to alternate positions rapidly. Buildings collapsing from enemy fires are a minimal hazard to the armored vehicle and crew.
At times, armor may be required to transport infantrymen. This is done only when contact is not expected. If the armor is moving as part of a larger force and is tasked to provide security for the move, the lead section or element should not carry infantry.
Armor In The Jungle
Densely forested areas, where tree trunks are close and heavy above-ground root systems exist can make movement difficult. Many jungles exist in rugged mountainous areas which will impede armor. Swamps, coastal river basins, and other areas intersected by waterways pose obstacles to tanks because of their frequent deep channels.
Because armor mobility is greatly restricted on jungle terrain, its role is different in the jungle than that on more open terrain. Instead of rapid envelopments and deep penetrations, armor primarily provides fire support for infantry in jungle fighting.
Armor and mechanized infantry are often restricted by jungle terrain, but where they can be employed, they complement each other well. For this reason, mechanized infantry and armored units are often teamed. The two most common uses of armor-infantry teams in the jungle are for movements to contact and for convoy escorts.
Armor can perform the following missions in the jungle:
• Support attacking infantry. In the movement to contact, infantry will normally lead, supported by tanks from overwatch positions whenever the terrain permits. Terrain and vegetation will dictate distances between the forces, but the tanks should be close enough to the infantry to be able to move forward quickly to provide immediate fire support.
• Provide heavy fire support in the defense and conduct counterattacks. Armor in the jungle defense is vulnerable to infiltrators; consequently, all-round security and close coordination with infantry are essential.
• Support infantry in retrograde missions. Contrary to general practice, in jungle retrograde missions armor will often disengage first, covered by the infantry.
• Secure convoys and protect lines of communications and key facilities.
• Attack or defend against enemy armor.
Armor In The Desert
The desert offers excellent fields of fire. Armor should be sited to take advantage of their long range and accuracy. Firing first and accurately are the most important considerations in desert environments.
In the desert, hull and turret defilades for tactical vehicles are essential. This allows a defending force to take advantage of their long-range weapon systems in the face of enemy fires. Dispersion and frequent moves are other survivability techniques that can be used.
Because the desert is an outstanding environment for employing aircraft, forces fighting in the desert should be reinforced with additional air-defense weapons.
Typical Armor Threats
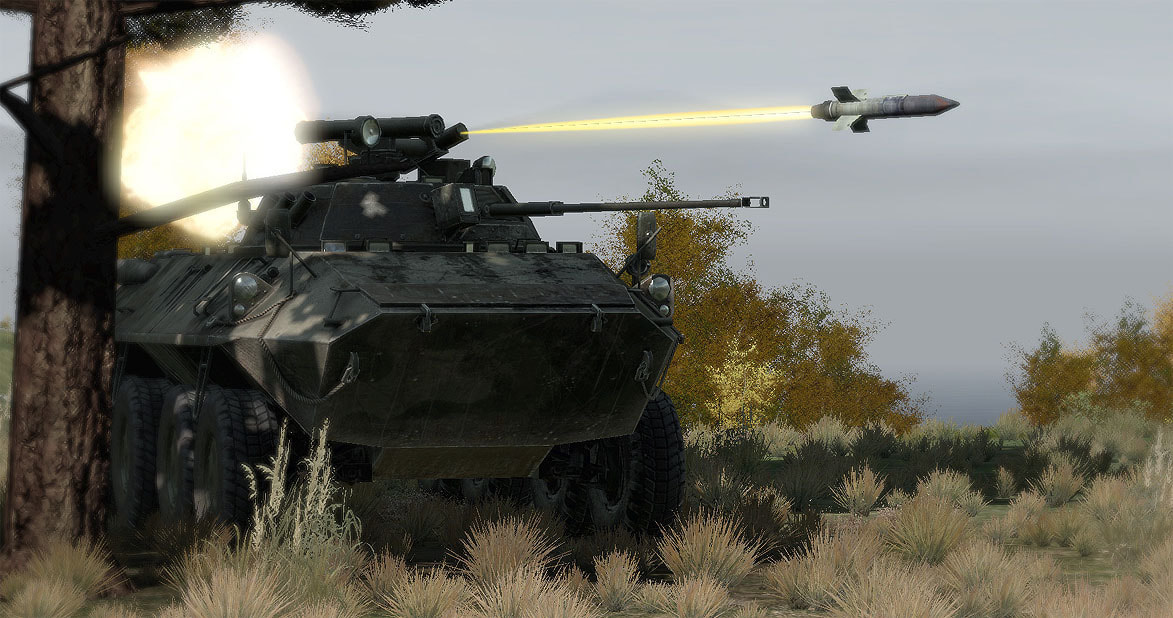

The following threats are the most common ones encountered by armored vehicles. I have avoided mentioning two other possible threats - cannons and artillery - which can be read about in other sections.
Infantry Anti-Tank Rockets (AT)
Infantry anti-tank rockets are the unguided weapons most commonly found in infantry units to protect them against enemy vehicles and armor. They come in a variety of types, with some being single-shot disposable systems (AT-4, RPG-22, LAW), while others have a reloadable component with a variety of warhead types to select from, like the RPG-42.
Depending on their size and warhead, these can cause significant trouble for most armored vehicles. They will not outright destroy main battle tanks with a single shot as a general rule, but their stronger variants can do that to light and medium armored systems, and massing multiple launchers can greatly enhance their effectiveness.
Due to their unguided nature, AT rockets tend to have a relatively short effective range, particularly when employed against moving or obscured/masked vehicles. A long shot is considered to be beyond 400m, and none of them are capable of reaching a kilometer.
Anti-tank rockets are capable of causing mobility and firepower kills, as well as injuring any personnel embarked in a vehicle. The best way to avoid them is to be vigilant in scanning, utilize proper movement techniques, and be able to think like an enemy AT soldier and predict how they might be employed against you.
Anti-Tank Guided Missiles (ATGM)
ATGM's come in three main types on the ground - infantry carried, such as the Javelin, crew-served, such as the TOW, or crew-served vehicle-mounted. They are also featured on rotary- and fixed-wing aircraft, like the TOW, Hellfire, Skalpel, and Maverick missile systems.
ATGM's are guided missiles with powerful warheads that can wreck armored vehicles with ease. They are incredibly dangerous weapon systems. The only defense against them is doing whatever you can to not be shot at - once they're in the air, nothing short of vehicle armor and active defense systems can save you, and neither is 100% effective. Driving into thick concealment like trees or an urban area is the best option if either are nearby, as there's a chance that the missile might impact a building or tree before it can make it to your vehicle.
ATGMs such as the Stryker's & Bradley's ATGM variants can be fired in a wire-guided mode, allowing them to engage low-flying aircraft without needing to acquire a lock first.
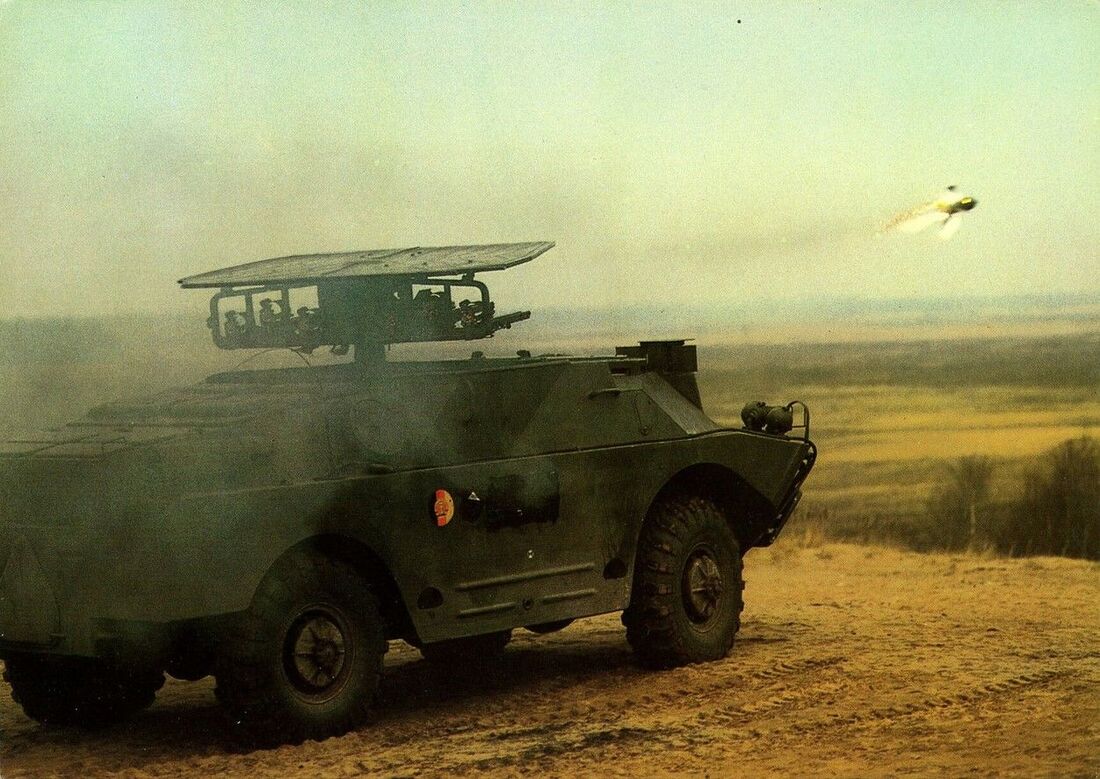
Anti-Tank Mines
Anti-tank mines are heavy, powerful mines that can rip the guts out of armored vehicles or destroy their mobility. They are triggered by pressure and magnetic detection, generally - if a heavy enough vehicle drives over them, they detonate, sending a fierce explosion up into what is typically the weakest armor of any vehicle. Mines are place-and-leave weapons that do not require an enemy to be nearby to detonate them.
Depending on where the mine is when it detonates, a vehicle can either be outright destroyed (such as if it detonates directly under the hull) or simply disabled (such as when it detonates under the wheels or tracks).
Anti-tank mines are best avoided through the careful observation of the vehicle crew and any attached infantry
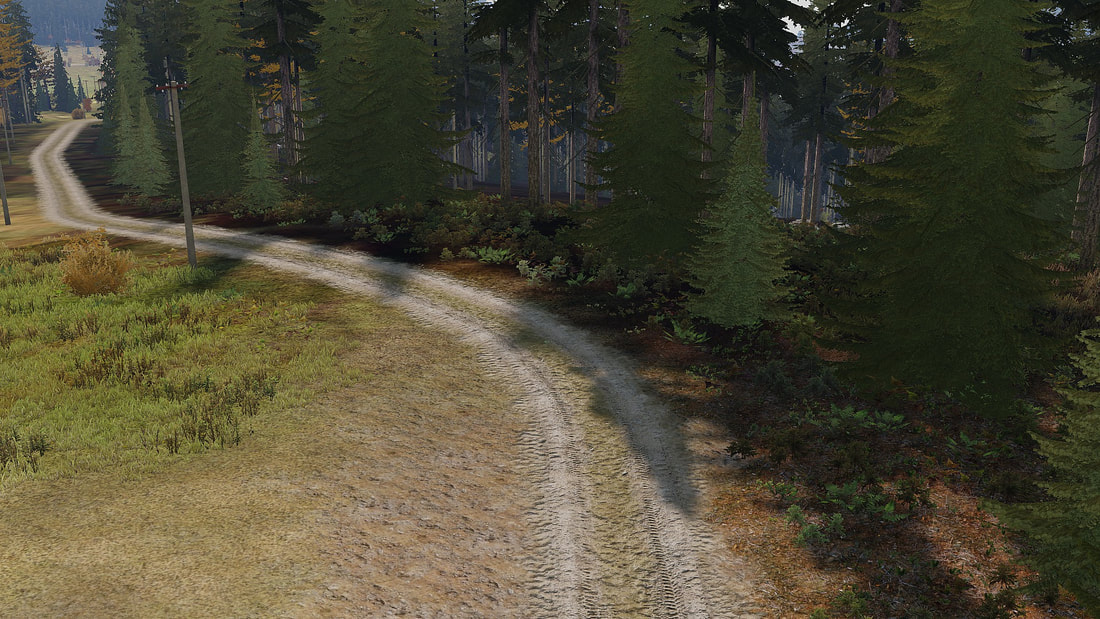
See the mine? No? This is why they're such a danger to tanks - good emplacement makes them almost impossible to spot while moving. This one is placed at a bend in the road to make it hard to maneuver past once it disables a vehicle.
Satchels & Improvised Explosive Devices (IEDs)
Satchel charges are explosive packs that can be used in an anti-tank capability when needed. They are similar to mines in their destructive ability, differing primarily in how they are detonated. A satchel must be either set on time detonation or remotely detonated, and if remote, the triggerman must be within several hundred meters of it to be able to send the signal.
IEDs are similar and can be triggered through a variety of different methods, including infrared, pressure, magnetic, and manual detonation. They can be buried or may be disguised as trash, dead animals, or hidden in vehicles near the side of a road.
By virtue of a manual detonation mode, a satchel charge or IED can lay dormant while lead vehicles pass it, with the triggerman waiting until a vulnerable vehicle gets near it before detonating.
Like mines, these explosives are best avoided through the careful observation of the vehicle crew and any attached infantry.
Tips for Armor
Hull Down
Hull down is the term used to describe when a vehicle (typically a tank) uses the terrain in such a way that only the gun/turret is visible to enemy forces. This provides the enemy with a smaller target, protects the more vulnerable parts of the vehicle from enemy fire, and allows the vehicle to fire more or less unhindered.
The illustration below shows an Abrams MBT in a hull-down position behind a small rise. From this location, the tank had perfect visibility of a major enemy avenue of approach and had a clear line of fire down that approach without having to expose anything more than the turret to enemy return fire.
The illustration below shows an Abrams MBT in a hull-down position behind a small rise. From this location, the tank had perfect visibility of a major enemy avenue of approach and had a clear line of fire down that approach without having to expose anything more than the turret to enemy return fire.
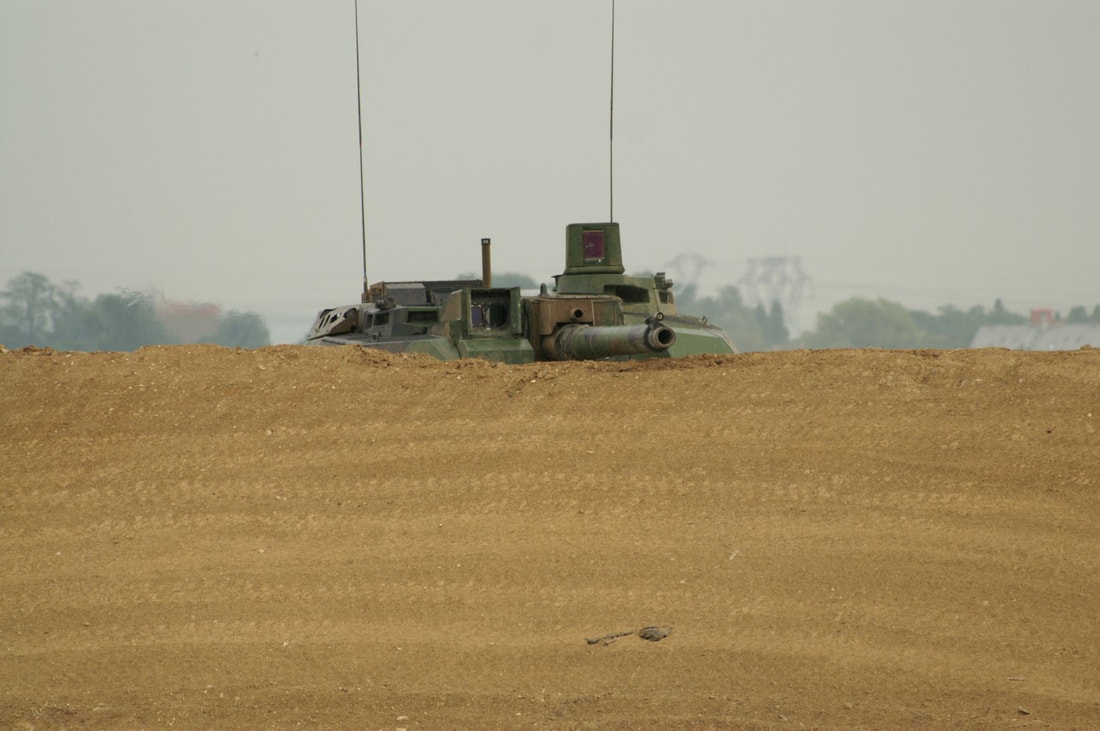
Hull down positions can be used by any vehicles that have weapon systems atop them - even a light vehicle with a RWS can benefit from a hull-down position.
In the best-case scenario, a tank can utilize a hull-down position when firing, and then retreat back below the cover (i.e. down the slope that provides the 'hull-down' possibility in the first place) to total protection during the reload before popping back into a hull-down position for the next shot. Whenever possible, a tank should not pop back up at the same location it used last - a new one should be picked each time to prevent any enemies from zeroing in on their next exposure point.
Remember that a hull-down position is relative to the location and distance from the enemy. The greater the distance of the engagement, the more likely you can get into a hull down position even in a small elevation decrease.
"Turret down" is when the entire tank is hidden behind the terrain or an obstacle.
Turning Out
Unbuttoning is possible in most armored vehicles from the driver or commander position. It simply involves opening and standing in the hatch. This is very useful for keeping a high level of situational awareness and should be used whenever the situation allows for it. The main drawback is that many of the unbuttoned crew members are highly vulnerable to enemy fire due to the high-profile stances they take. However, if you exercise good judgment and only unbutton when it's safe to do so, you should be fine and will definitely benefit from the increase in situational awareness.
Make sure that you have your turn-in/turn-out keys bound to something readily accessible - "stance up" and "stance down" are great for this. Having these keys bound makes it much easier to duck at a moment's notice, and generally increases the ease and usefulness of turning in/out.
Note that in some vehicles a commander may have to turn out to employ a machinegun on the vehicle. For vehicles that require the TC to stand in his hatch to use the machinegun, a careful assessment must be made as to when and where it is safe to do so.
Jockeying
"Jockey left" or "Jockey right" are commands that a vehicle commander can use to have his driver move the vehicle laterally left or right behind cover without exposing the larger and weaker side profile to enemy observation or fire.
Jockeying is accomplished by backing the vehicle up to mask it from frontal fires, then turning left or right and driving a short distance laterally from the previous position. Once a suitable distance has been reached, the vehicle reorients towards the threat and advances up and back into a hull-down position from which it can resume engaging the enemy. This allows a vehicle to continually appear at different locations before firing, making it hard for the enemy to predict where it will appear and thus making it more survivable.
Jockeying is accomplished by backing the vehicle up to mask it from frontal fires, then turning left or right and driving a short distance laterally from the previous position. Once a suitable distance has been reached, the vehicle reorients towards the threat and advances up and back into a hull-down position from which it can resume engaging the enemy. This allows a vehicle to continually appear at different locations before firing, making it hard for the enemy to predict where it will appear and thus making it more survivable.
Tank Buddy Cover
Armored vehicles can use their impressive hardiness and engine power in some rather unconventional ways. Foremost among these is the concept of 'buddy cover' as applied to vehicles. A tank or IFV can push an immobilized or destroyed vehicle hulk in front of it, albeit at a reduced speed. This can be used to shove disabled vehicles out of the way, but can also be employed as additional protection against frontal enemy fires. A knocked-out piece of armor pushed along in such a fashion can absorb enemy fire and shelter the pushing vehicle from damage – forcing the enemy to aim more precisely to hit any exposed portions of the pushing vehicle.
Armor Crew Operating Procedures
1. Manage Your Crew
If not preassigned, choose who you are going to assign on which position inside the armor piece. It's preferable to have people you know in your crew so that you know what they are capable of.
At this stage:
• Find reliable crewmembers .
• Assign team for each armor.
• Set up movement plan.
At this stage:
• Find reliable crewmembers .
• Assign team for each armor.
• Set up movement plan.
2. Find a Stand-By Location
A 'stand-by location' is a place where you can have eyes on friendlies via visual or map reference without the enemy spotting you easily. There you will gather for intel from other elements or via scout elements about where the high value threats are. Killing hostile armor should your top priority if you confirmed their existence, because it will make it easier for friendly forces on completing their mission. If you decide to defend an objective, it's always good to operate under friendly anti-tank team coverage.
At this stage:
• Access the tactical map (Any updates to the situation? Any marked enemy armor?)
• Protect surrounding friendlies
• Request and establish fall-back repair areas
• Scan battlefield for any contacts
At this stage:
• Access the tactical map (Any updates to the situation? Any marked enemy armor?)
• Protect surrounding friendlies
• Request and establish fall-back repair areas
• Scan battlefield for any contacts
3A. Conduct Active Engagement / Search and Destroy (Optional)
If no other friendly force is around or has eyes on potential targets for a while, you can risk prowling around behind enemy lines to flank and find the enemy enemy positions. This is a much more risky maneuver and takes a lot of coordination within your crew to work properly. Your driver is also crucial to this step. If possible, try to at least have on-foot recon or a drone to identify enemy positions, as this step requires seeing the enemy first in order to be highly successful.
At this stage:
The side with the most accurate intelligence always win the battle!
• Access the tactical map frequently (Any marked enemy threats?)
• Keep armor together and under each other's covering fire
• Plan and update escape route according to situation
At this stage:
The side with the most accurate intelligence always win the battle!
• Access the tactical map frequently (Any marked enemy threats?)
• Keep armor together and under each other's covering fire
• Plan and update escape route according to situation
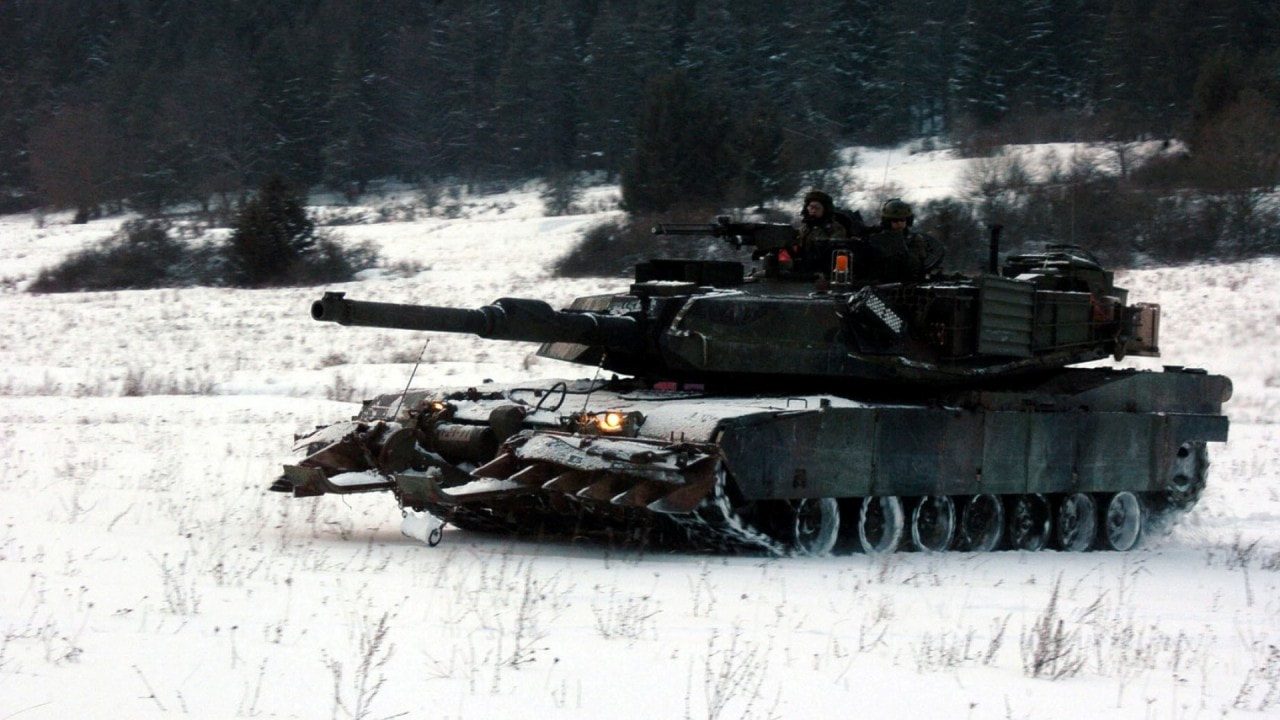
3B. Conduct Passive Engagement / Hunter-Killer
If enemy positions are confirmed accurately, you can now move out and find a safe path towards the enemy. You can choose to flank them or go straight for them. Either way, you won't have to worry about the worry of spotting them. All you need now is your crew skills.
At this stage:
• Make sure everyone knows where enemy is (mark and speak up).
• Ask friendly forces to keep marks updated.
• Be ready to react to false alarm (Is it a lone infantryman or a T-72?).
At this stage:
• Make sure everyone knows where enemy is (mark and speak up).
• Ask friendly forces to keep marks updated.
• Be ready to react to false alarm (Is it a lone infantryman or a T-72?).
4. Engagement
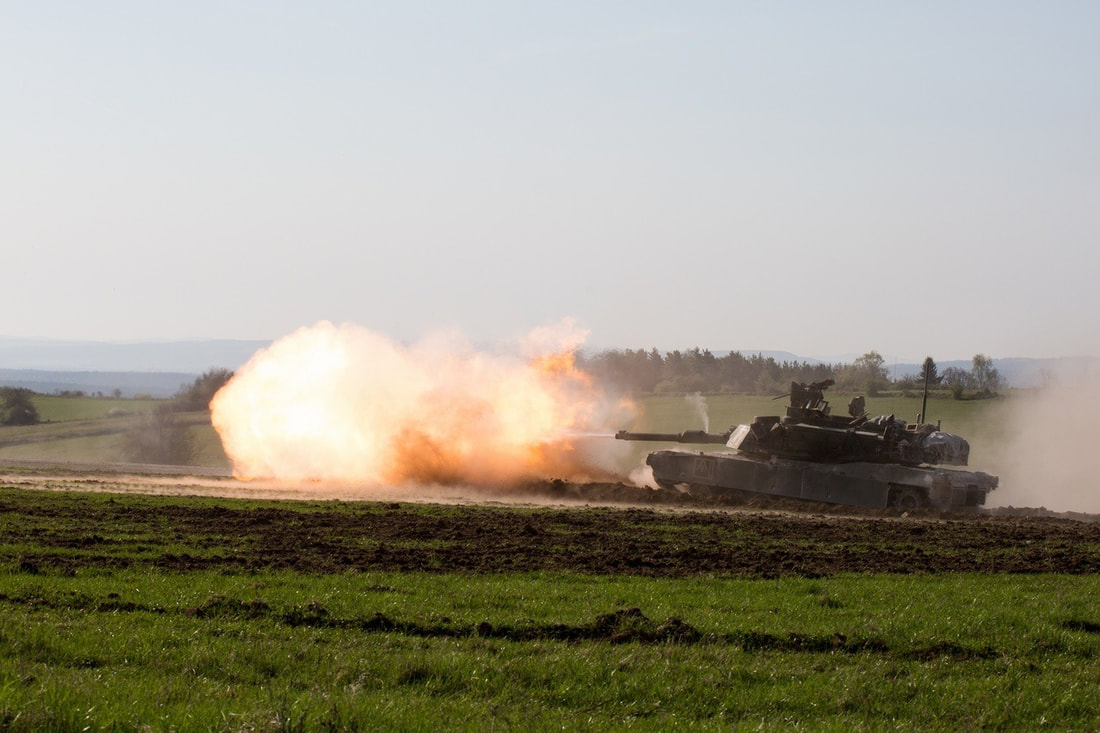
Where to shoot and when to pull out - If you now find yourself engaged by enemy armor the gunner and driver must now put their skills to the test. A good driver knows when to stop the vehicle and when to get out.
Most of the time if your vehicle's status reaches to light-yellow status (75%) damage, a driver should ask whether they want to pull back or not. If the vehicle's health is at orange (50%) and below, the driver must automatically pull out or reposition for repairs. The gunner must know how to shoot on the move or at least get some hits.
A gunner must also know where to hit an enemy. If engaging an enemy tank, it should go from top to bottom; Taking out the turret ring to destabilize the gun and jam their turret then start hitting their other weakspots. The commander must utilize their smoke canisters at the right times when falling back from an engagement.
At this stage:
• Direct each other, plan tactics if time permits.
• Request support from a friendly AT unit if available and necessary.
5. Assessment
If you do manage to win an engagement, it is time to assess for damages and ammo count. You must ask your driver on the status of the overall hull integrity and the engine health. Ask the gunner about the ammo count. If you are running more than one armor piece, make sure that the other armor piece assess their status as well. If the commander feels that the armor needs R2 (Repair and Rearm) then the driver must automatically move back to a nearby repair area.
At this stage:
• Taking necessary notes to relay to command
• Check your combat capability (Health/Ammo)
• RTB or make diversion to support infantries
At this stage:
• Taking necessary notes to relay to command
• Check your combat capability (Health/Ammo)
• RTB or make diversion to support infantries
6. Shock and Awe Assaults
If enemy armor is not present or the likelihood of enemy armor is low, you are essentially cleared to wreak havoc against the enemy. Tanks and IFVs are ideal for this, as they a nightmare of enemy troops when they show up. Using tanks and IFVs gives that side an opportunity to rain heavy fire into enemy positions at insane rate. Coordinate with other friendlies and ask them if there are any elements that are willing to push and break the stalemate.
If so, then you can either lead the charge and look for the enemy fortifications to disable it with your main gun with HE / HEAT or hold back and provide an effective base of fire position on enemy targets from a distance.
At this stage:
• Push in with infantry, be their shield and spear head or provide a base of fire from a good position.
• ATGM, Fortifications and Defenses are your top priority.
