This training will take you beyond group firing and teach you how to become a crack shot individually. This guide in no way is meant to reduce the importance of firing in large groups but rather is meant to enhance your value as a soldier of the Union or Confederacy. A line of 20 crack shots will decimate a line of 50 regulars
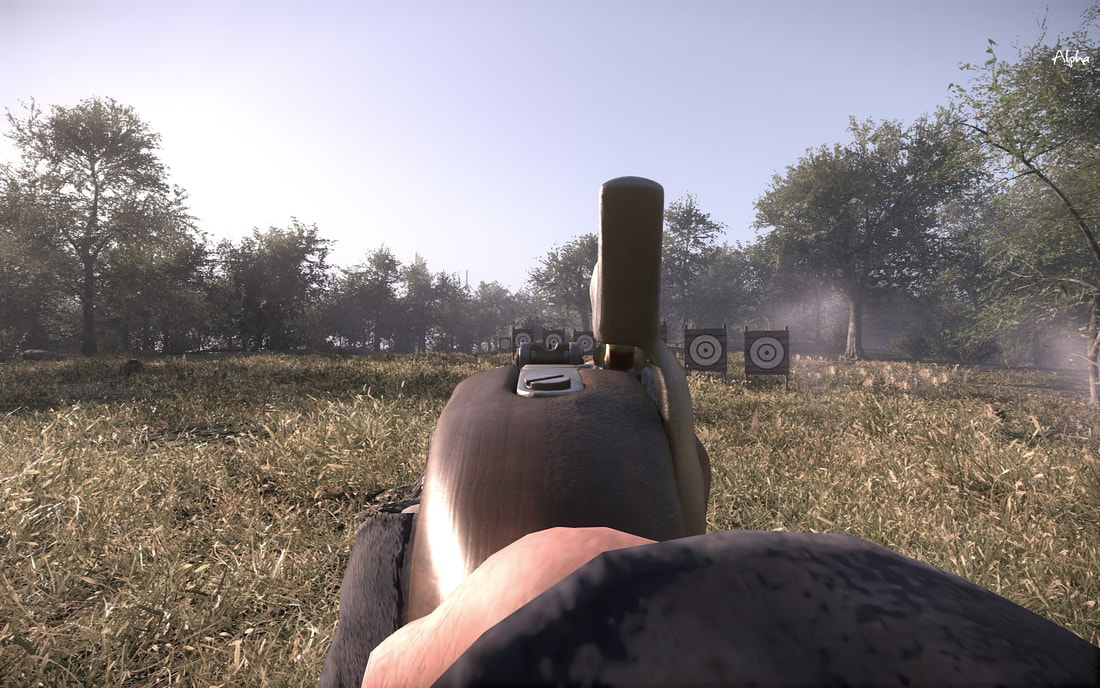
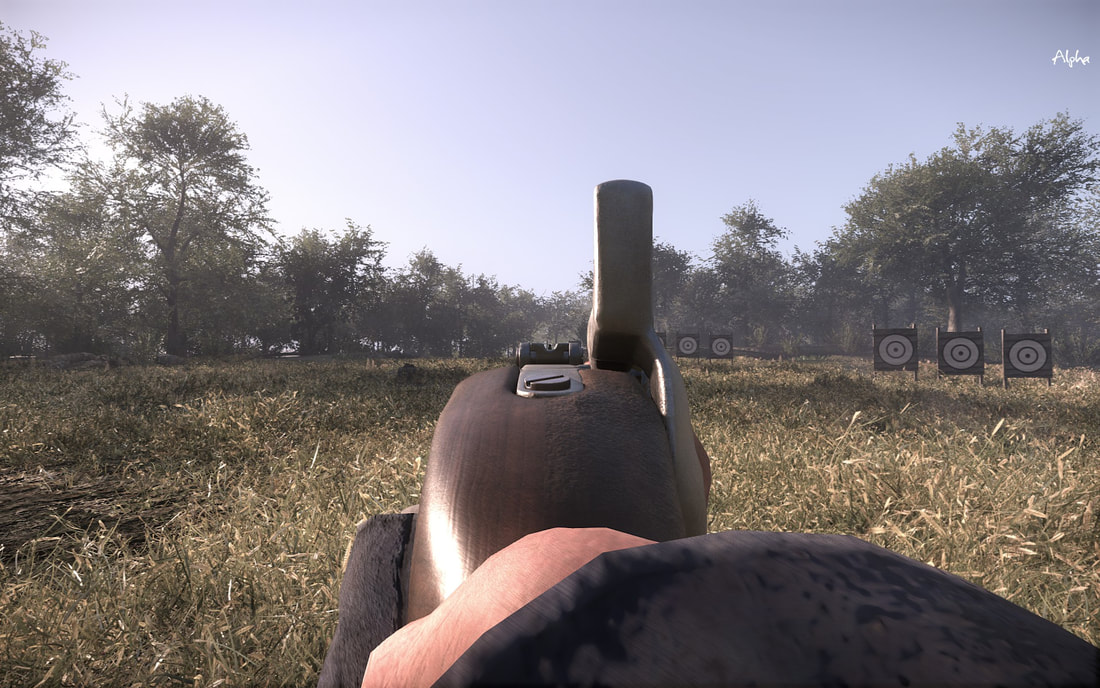
Basics of Sighting

Near Targets
For simplicity's sake, let's assume "Near" means any target within 25 meters. If you are at the range, that is the first set of targets to your right
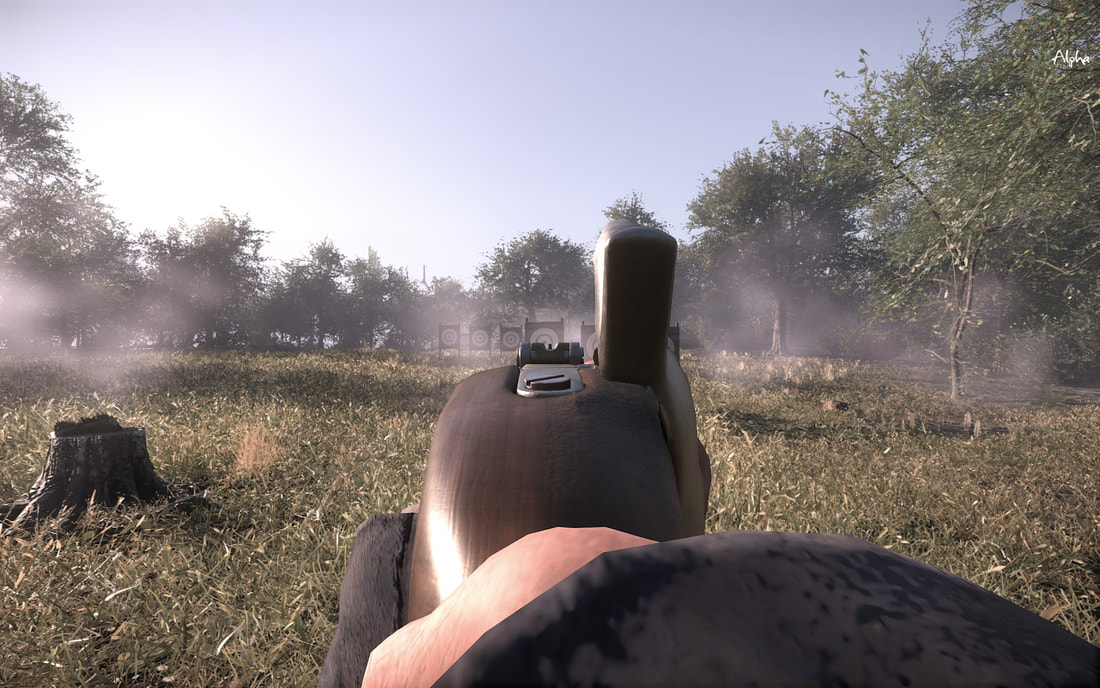
At this near distance, anywhere within your sight is fine, but for max accuracy, use the exact top of your sight. That will guarantee a hit nearly every time.
Mid Range Targets
Anything 50-100 yards is considered to be mid range in War of Rights. The aiming rules are identical at mid range. Use the exact top of your sight/sight pin when aiming.
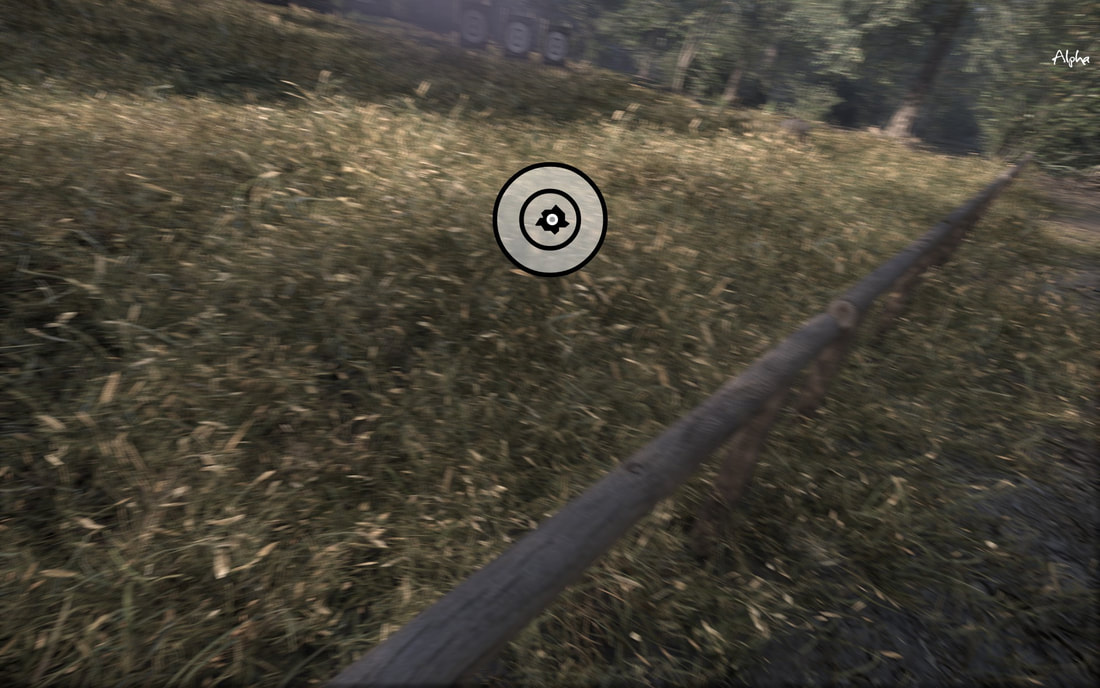
Long Range
Here is where it gets tricky. At long ranges, say 100 or more yards, you have to start competing with bullet drop. Bullet drop is also on the practice servers. When aiming this far out, it is important to wait until the left and right sway of your rifle is at a minimum. You have a bit more play room up and down since us humans are taller than we are wide, but it's not an easy shot. It is recommended to aim near the belt at almost all ranges.
Aim with the top of your sight slightly below the bullseye (except with the Mississippi rifle which uses the center of the sight).
Aim with the top of your sight slightly below the bullseye (except with the Mississippi rifle which uses the center of the sight).
Thus concludes the basics. It really is THAT simple. Up next, external factors.
External Factors
There is much more than simply aiming at the target when it comes to accuracy.
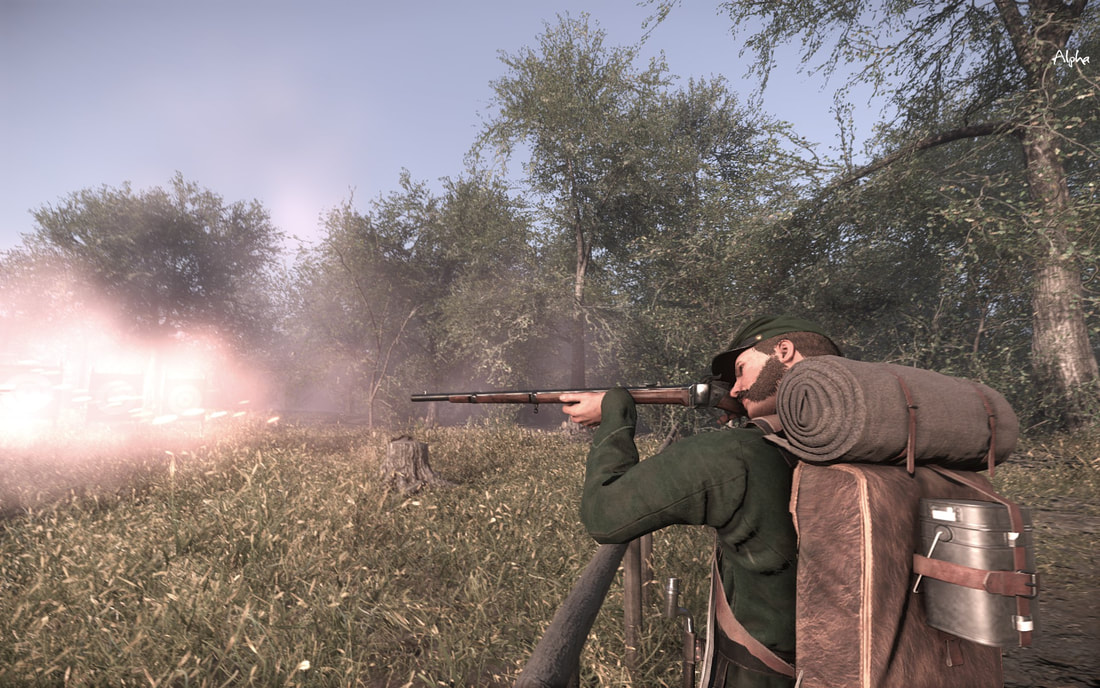
Fix Bayonets!
Fixing a bayonet takes 5 seconds, and it takes 2 stabs to kill. One would assume that the bayonet reduces accuracy, but it actually doesn't. In fact, what it does is increase the sway of your rifle and the time until your rifle "settles" into relative steady aim. You should only fix bayonets when your commanding officer tells you to or when in close quarters combat (obviously). Without a bayonet, if you enter melee mode you use your gun as a bat, it takes 3 hits to kill.
Also, it should be noted that bayonets drag your rifle down at a much higher rate than normal. They are a heavy piece of metal on the end of a heavy piece of metal atop a big chunk of wood after all! For those 100+ yard shots, skip the bayonet. However, if you can learn to be a good shot with a bayonet on, you will be a master with it off.
Also, it should be noted that bayonets drag your rifle down at a much higher rate than normal. They are a heavy piece of metal on the end of a heavy piece of metal atop a big chunk of wood after all! For those 100+ yard shots, skip the bayonet. However, if you can learn to be a good shot with a bayonet on, you will be a master with it off.
Kneeling & Reloading
The accuracy of your projectile is a constant. At long distances, that accuracy is reduced but it still falls within a set of parameters programmed by the developers. That being said, kneeling doesn't technically improve your accuracy. What it DOES do is majorly reduce the sway of your weapon after aiming.
In a standing position, you are looking at 5-7 seconds before your aim is fairly steady. While crouched, it's under 3. However, crouching also increases the penalty to your team if you die. Keep that in mind. Crouching while skirmishing = good. Crouching in formation = bad (except behind walls or when told to by your commanding officer).
Reloading takes 20 seconds (25 if kneeling), and any hit is a one hit kill. Sharps model guns reload in 10 seconds, as breach loaders.
Suppression does not affect reload speed, contrary to popular belief. It takes exactly 20 seconds for you to regain control of your gun after pressing R to reload.
Weapon Type
It goes without saying, the type of weapon you use will also determine how well and how fast you shoot. If you are blessed enough to be given a carbine, God's gift to the trigger happy, you can send a lot of lead at the enemy compared to your brothers with their muzzle loaders.
Also, different weapons have different sight widths. Those with minimalist sights such as the Enfields are typically preferred. Some guns, particularly those belonging to militia companies tend to be smooth bore muskets. These are not very accurate beyond mid range BUT they come with buck and ball. An example of this is the Springfield '42, which shoots OP buck-and-ball (early buck shot) if you press 5 before reloading. There are 4 tiny rounds which exit the muzzle, giving the theoretical possibility of 4 kills with one shot.
NEVER USE ANY SIGHTS FURTHER THAN 100 YDS, which is default.
NEVER USE ANY SIGHTS FURTHER THAN 100 YDS, which is default.
Formation Types
How many players in a radius around you (including you), and what formation you count as:
6+ = In Formation
3-5 or 3+ kneeling = Skirmishing
2 or less = Out Of Line
In formation gives less:
• Tickets Lost on death
— 1 for In Formation
— 3 for Skirmishing
— 5 for Out of Line
• Gun Sway
• Suppression from Enemy Fire (grey screen, more sway)
6+ = In Formation
3-5 or 3+ kneeling = Skirmishing
2 or less = Out Of Line
In formation gives less:
• Tickets Lost on death
— 1 for In Formation
— 3 for Skirmishing
— 5 for Out of Line
• Gun Sway
• Suppression from Enemy Fire (grey screen, more sway)
Earning the Shot
How do I become a better shot? The key is practice. Hours and hours at the in game range will have an effect on improving your shot.
Below are two drills that will improve your accuracy significantly.
Below are two drills that will improve your accuracy significantly.
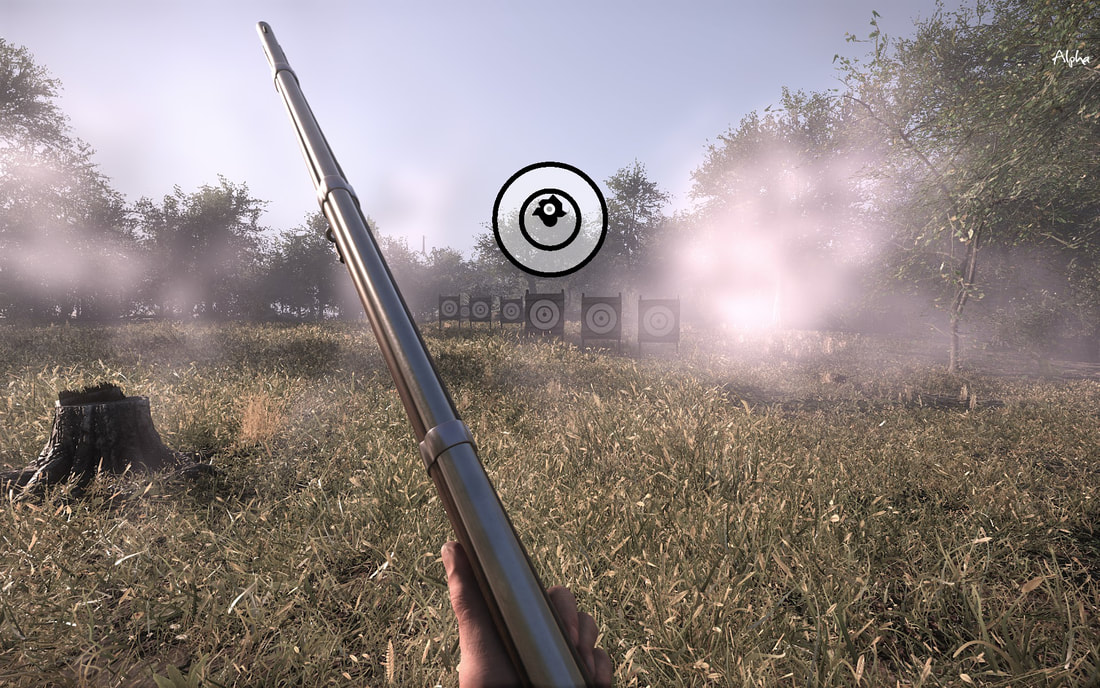
Sprint Drills
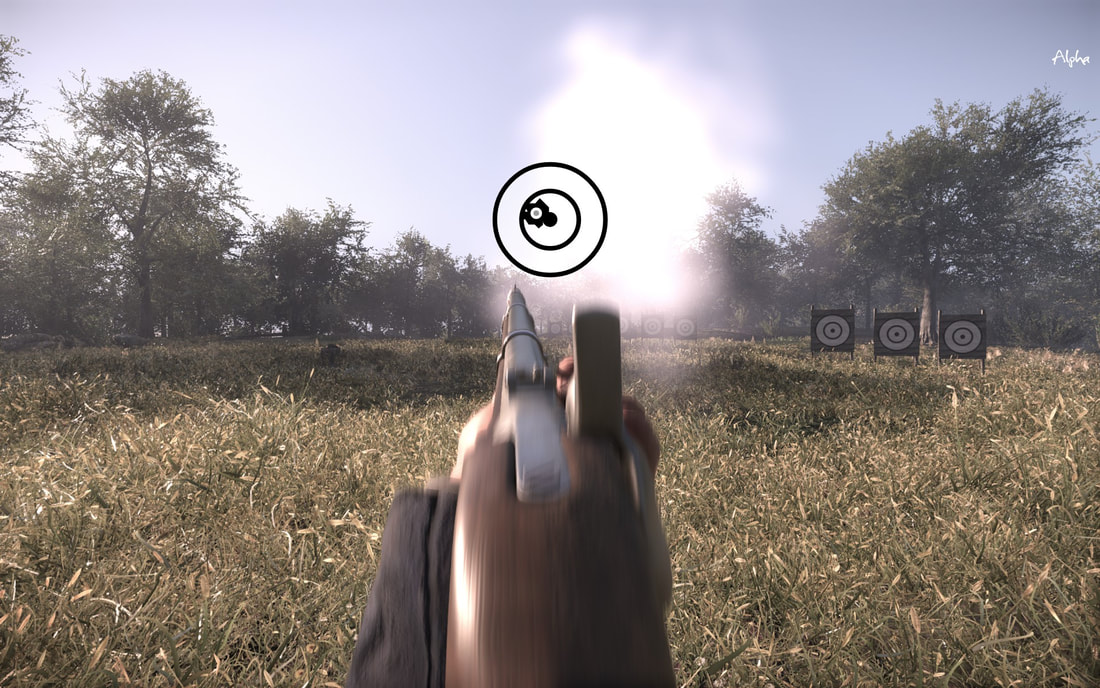
These can be done anywhere on the practice map but are best done at the range since you get to see the results of your shots. From the aiming post, sprint about 20 paces in the opposite direction of the targets. Once you arrive, do an immediate about face and fire WITHIN 3 SECONDS at the middle of the last 3 targets.
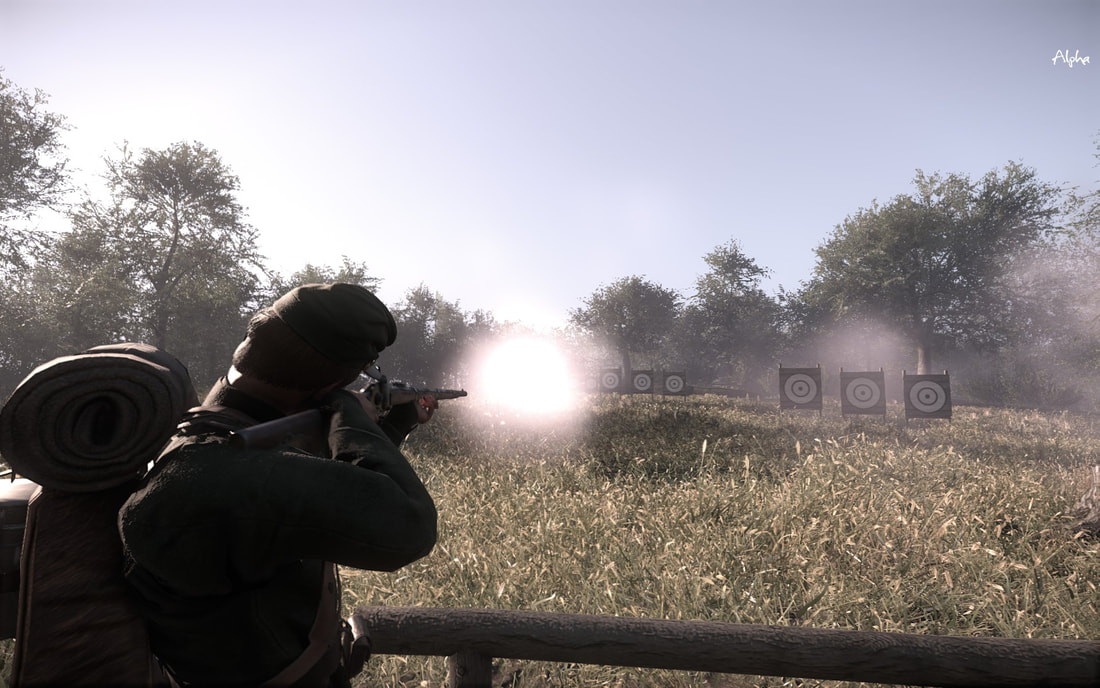
You can see the targets above. Do these sprint drills as often as possible. You will refine your ability to shoot on the run if you do so. Remember, no more than 3 seconds! If you can do it sooner, all the better
Pinpoint Drills
This is probably the on to spend the most time on. At the range (confederate and union) there are 3 sets of targets. However, if you look really hard, there is a 4th set of targets way out in the distance. Do all of your practice with these. The long and mid range ones should be tried with pistols and smooth bores.
