In this guide we'll be looking at flying as part of a formation.
Here we'll talk in-depth about how formations works, as well as some specific things you can do either individually or as a flight leader that should help to smooth it out. To start, here are some key takeaway points.
• Super tight formations are unnecessary
• Do not follow directly behind other aircraft at short ranges
• Evade in the vertical plane before you make a horizontal maneuver, to avoid flying into another ship in the formation
• Give updates to the flight as you're flying as flight leader – cruise speed, speed or heading changes, distance to the LZ, and the transitions into different states
Formation Dynamics
Choosing a Formation
In the real world there are something like nine basic formations you might see a package of helicopters flying in, but for our purposes, we slim this down to three – trail, echelon left, and echelon right. These formations are the most suited to the hot environments we tend to operate in and are the most flexible for defensive maneuvering.
Trail
Trail is simply an aerial column – each aircraft follows the one in front of it, with slight lateral staggering to avoid issues from netcode jitter. Trail is used most often when in transit, as it's a very fast formation and easy to control, and also when flying low-level where the lead can choose the best path and the trailing aircraft can simply follow them. When flying in trail, each aircraft owns the space to the sides of it and can freely swing left and right in that airspace as needed. Trailing aircraft never overrun the aircraft they're following, and if they break formation, they say so and don't attempt to rejoin at their prior spot, but instead state that they're falling to the back of the formation.

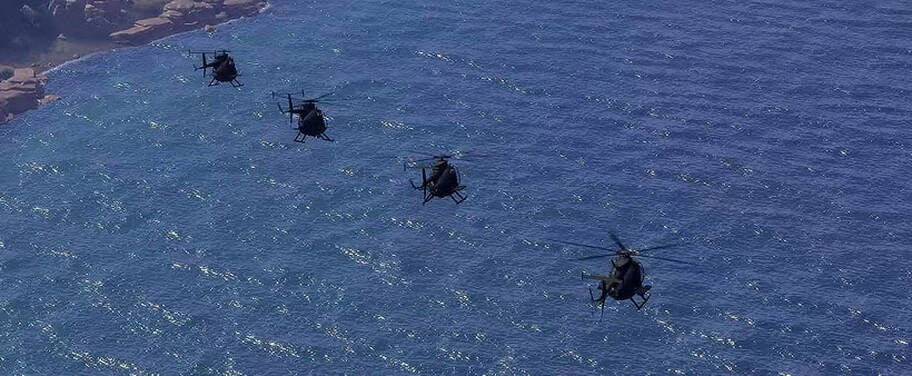
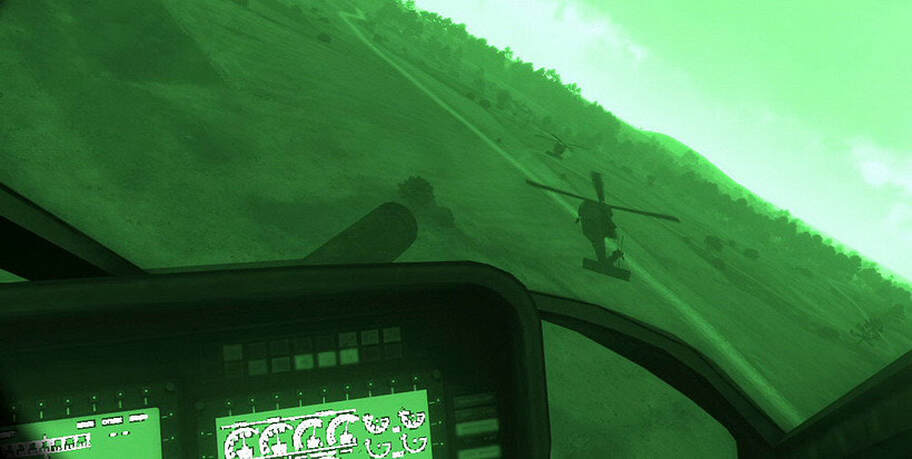
Echelon Left/Right
Echelon is a diagonal formation where each aircraft is further to one side and further back than the one in front of it. Echelons can be to the left or right, and are often chosen based on the side that the pilot is sitting on in their helo, as this makes it easier to see out in one direction compared to the other, or they can be orchestrated such that pilots are looking in the direction of potential threats while at the same time still able to see and guide off of the other ships in the flight.
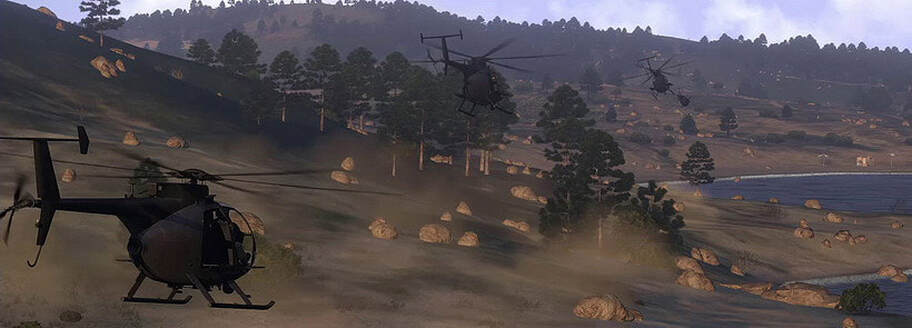
For instance, when flying with the shore off to your left as you see here, an echelon right makes it possible for every pilot to see the shore, whereas an echelon left would have them looking away from it and only seeing the aircraft in front of them. The same concept applies when flying into an LZ – echeloning to where you can see the LZ area helps greatly.
For instance, when flying with the shore off to your left as you see here, an echelon right makes it possible for every pilot to see the shore, whereas an echelon left would have them looking away from it and only seeing the aircraft in front of them. The same concept applies when flying into an LZ – echeloning to where you can see the LZ area helps greatly.
Note that the specific formation used isn't much of an issue – the key things are to remember to avoid flying directly behind another aircraft, and avoid crowding the airspace around another aircraft, giving them room to evasively maneuver as needed.
Formation Intervals
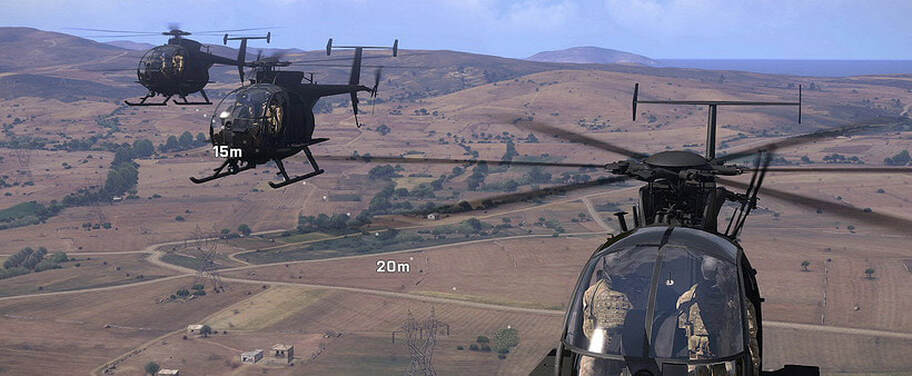
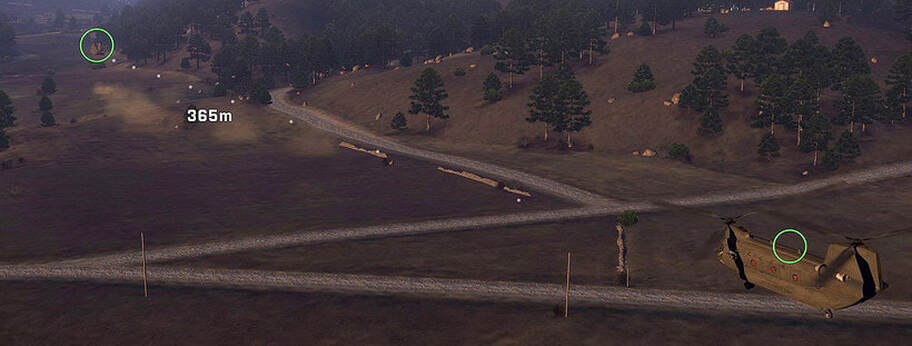
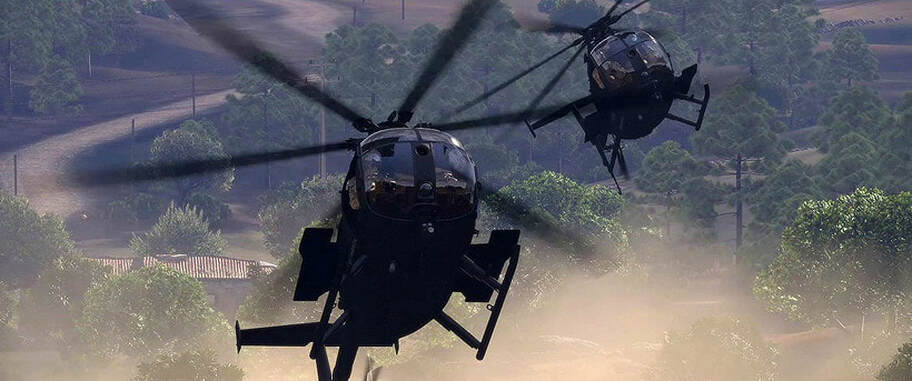
One of the most significant factors to formation cohesion is the interval between aircraft. The common belief is that very tight formations are necessary, but this actually isn't the case. For reference, let's look at a few different intervals as they appear in a Littlebird formation.
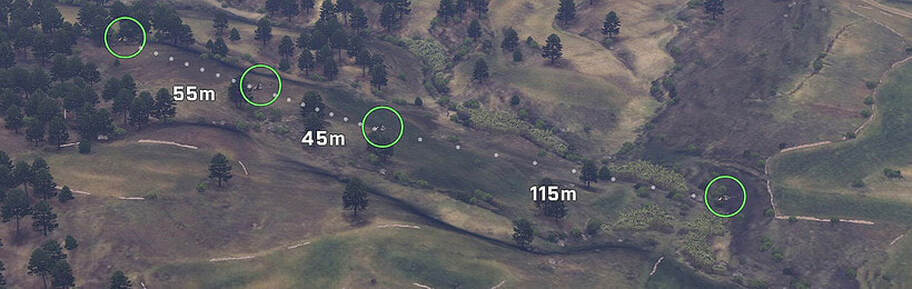
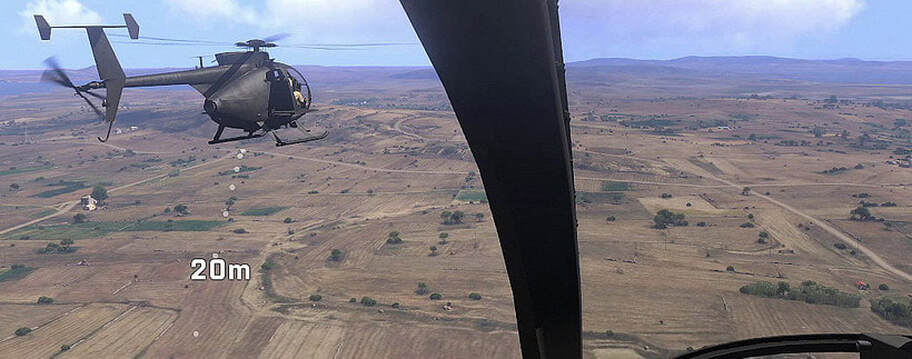
This is a 20-meter interval, or about as close as you ever really want to get.
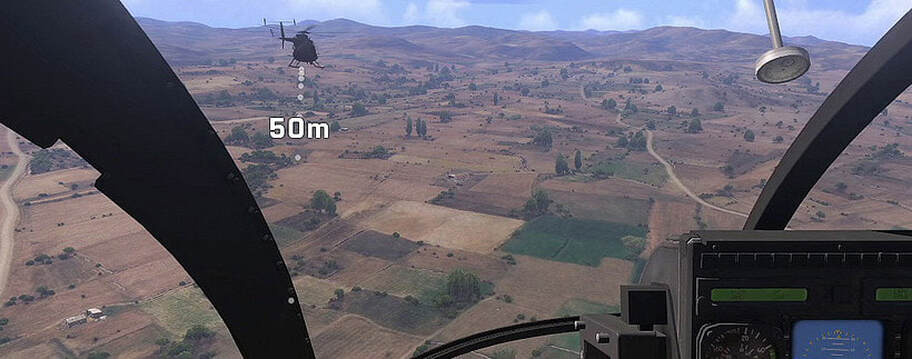
Here's 50 meters.
This is 100.
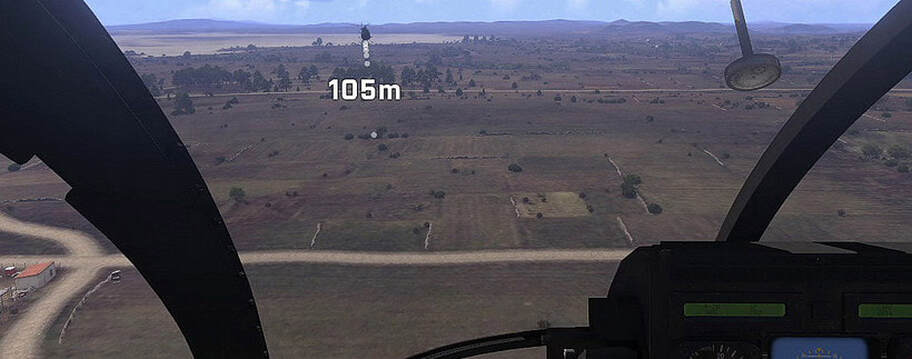
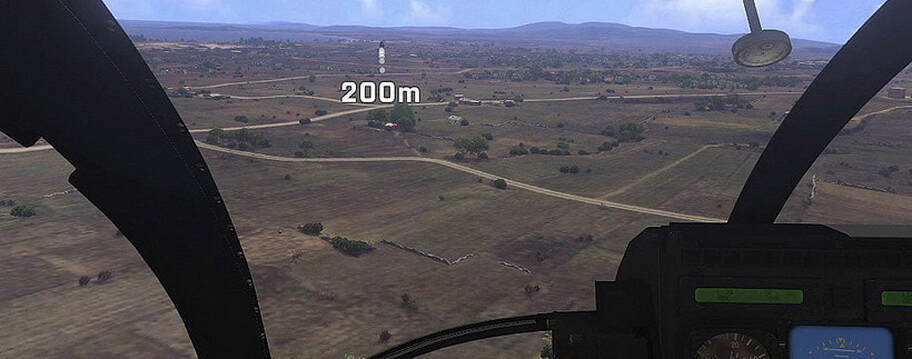
Here's 200.
The tighter the interval, the less of a margin for error there is when maneuvering – particularly for high- or even max-performance maneuvers. It's easy for a tight formation to have the trail aircraft overrun the lead if their timing is off even slightly, and there's very little benefit to having those super-tight formations, such as the 20-meter interval.
It becomes clearer when you consider how a formation typically works. There are four basic phases to any given flight – takeoff, transit, ingress, and landing. Transit, or travel, happens at fairly constant speeds. You find a cruise speed and tend to stick to it, with turns, ascents, and descents happening more gradually. While in transit, a 20-meter formation can be achieved if desired, but it's not required and can lead to pilot fatigue.
It becomes clearer when you consider how a formation typically works. There are four basic phases to any given flight – takeoff, transit, ingress, and landing. Transit, or travel, happens at fairly constant speeds. You find a cruise speed and tend to stick to it, with turns, ascents, and descents happening more gradually. While in transit, a 20-meter formation can be achieved if desired, but it's not required and can lead to pilot fatigue.
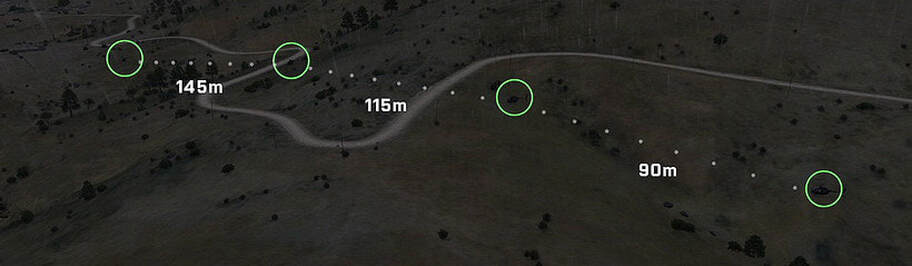
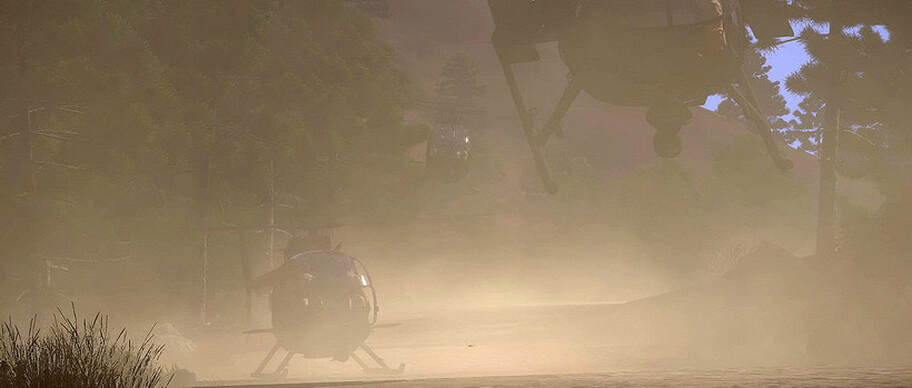
When in the ingress phase – meaning the two or so kilometers prior to the LZ – a formation should widen interval. A 100-meter interval is a very comfortable one to aim for, though it can become wider in some situations. For instance, descending LZs tend to benefit from wider interval, as it gives trail elements more time and space to bleed their speed and altitude.
Does this widened interval mean everyone's going to get to the LZ at different times? Not really, and that's the beauty of it! As the lead helo slows to a flare and touchdown, the trailing aircraft simply extend their time in the balanced state a few moments to tighten up before beginning their own flare and touchdown. With this method, a flight interval of 100 or even 150 meters or more can tighten up to land within a few seconds of each other, with a far lesser risk of overruns or go-arounds in the process, while making a more dispersed target in general, and while being much more flexible if a wave-off is needed.
Does this widened interval mean everyone's going to get to the LZ at different times? Not really, and that's the beauty of it! As the lead helo slows to a flare and touchdown, the trailing aircraft simply extend their time in the balanced state a few moments to tighten up before beginning their own flare and touchdown. With this method, a flight interval of 100 or even 150 meters or more can tighten up to land within a few seconds of each other, with a far lesser risk of overruns or go-arounds in the process, while making a more dispersed target in general, and while being much more flexible if a wave-off is needed.
To compare, here are the terminal phases of what you just saw – a loose-interval approach – and a tighter approach. While the tight approach certainly looks impressive and makes it to the ground almost as one, the looser approach only adds a few seconds to the total landing attempt and has plenty of benefits that outweigh those extra seconds. Those 100-meter-plus intervals also give the lead aircraft plenty of time and space to pick the actual specific point within an LZ that they'll be aiming for, frees them to maneuver aggressively if needed without worrying about running into their trail, and gives trailing aircraft more time to assess their own touchdown points and set up for them.
If the terrain is hilly or the LZ decisions are more dynamic, increasing interval is the way to go.
Finally, remember to adjust your interval based on what kind of aircraft you're flying. While Littlebirds can maintain tight interval, you would certainly want to adjust to a larger interval if flying something bulkier like a Chinook, Merlin, or Hip.
When choosing a flight order, ideally the first two aircraft will be the most experienced pilots. If any pilots don't feel confident in their formation abilities, they can voluntarily fall further back in the flight order – this makes it less disruptive to the overall formation if someone has trouble keeping pace, as people further back can extend their interval to match their comfort level without disrupting the cohesion of the front of the flight. Getting everyone there alive is more important than looking pretty while doing so.
Lead
The actions of the lead pilot in the formation are key to getting everyone to the LZ in a cohesive package, as well as avoiding mishaps. The lead has to keep in mind that they're not just flying to the performance limits of their own aircraft, they're also acting as the guide for everyone else in the formation to follow. This becomes more significant the tighter the formation is, which is why looser intervals are so much more flexible in general. Think of it like this – if you're going into an LZ in a tight formation and do it at the peak of your capabilities, taking your own aircraft to its performance limits, this works fine for you, but what if someone following you is a second off in initiating their own deceleration? If you're pegging the performance limits yourself, and they're a second off, they'll never be able to slow down fast enough – and they'll either overrun you, crowd you, or have to go around.
For this reason it's very important that the flight lead understands this intuitively and not only flies reined in a bit, but also communicates transitions between phases clearly to the rest of the formation . When calling for a bleed/balanced state or a flare, the lead should consider reaction times as well – state what they're intending to do, pause a moment, then initiate the maneuver.
For this reason it's very important that the flight lead understands this intuitively and not only flies reined in a bit, but also communicates transitions between phases clearly to the rest of the formation . When calling for a bleed/balanced state or a flare, the lead should consider reaction times as well – state what they're intending to do, pause a moment, then initiate the maneuver.
This is relevant not only to the inbound but also the outbound phase of an LZ. If a pilot goes full-bore out of the area, the trailing elements can never catch back up. While you might blaze out of a hot LZ, once past the threat, a lead should always pull it back a bit to allow the rest of the flight to re-form.
The lead will describe any maneuvers before they're conducted, using plain language that explains what the flight will be doing next – such as a "shallow descending left into the LZ". Describing the maneuvers allows the other pilots in the flight to anticipate what will happen next, giving them advance notice of the need to decelerate and how to manage their speed through the upcoming maneuvers. The lead will also state when each phase of transition occurs – saying "bleeding" or "balancing" to indicate a bleed flare into the balanced state, 'balanced' when reaching the balanced state, and 'flaring' on the final flare. If an LZ requires hover or pinnacle landings, they'll state this as well, as early as possible. Of all the things the flight lead says, announcing the transition into the bleed flare is by far the most significant. Always remember to do this, else you're likely to cause the aircraft behind you to either inadvertently crowd you or risk an overshoot.
Remember that while the other aircraft in a formation generally make their own decisions about interval based on their own comfort levels, there may be times when a lead specifically wants to dictate interval. For instance, if a lead realizes that the area they're going into is going to require a lot of dynamic decisionmaking and potentially significant maneuvering, they can ask for the formation to open interval in anticipation.
Individual
Staying in Position
On an individual level, there are several things you can do to maintain a good position in the formation and avoid overshooting the aircraft in front of you. Interval is the biggest factor – keep an interval that gives you enough time and space to react and adapt to the movements of the aircraft in front of you. It's easy to condense the formation back down to a tighter interval as the lead begins to slow down for a landing.
Keeping the aircraft you're guiding off of in a specific position on your windscreen can also help to maintain formation stability, as you'll more easily be able to discern changes in their speed and altitude.
If in a tighter formation, if the situation allows for it, being slightly lower than the aircraft in front of you can help to compensate for sudden changes in speed from the lead.
Generally speaking, the solution to most positioning issues lies in maintaining good interval – 50 to 150 meters tends to work well.
Controlling Speed
You also have a few different techniques available to you to help avoid overshooting the aircraft in front of you. The first is pedal usage – you'll decelerate more quickly by being yawed during flight, flying out of trim, so if you feel like you're going to overrun someone, apply full pedal and fly in an offset manner until you've matched their speed.
If that isn't enough, extend to the outside of any turn, or begin a shallow scissors maneuver if the path is straight. Either of these will allow you to increase the distance you need to travel, which will give you additional time to decelerate before rejoining your lead.
If that isn't enough, extend to the outside of any turn, or begin a shallow scissors maneuver if the path is straight. Either of these will allow you to increase the distance you need to travel, which will give you additional time to decelerate before rejoining your lead.
The most dramatic method, for when a severe overrun is about to occur and nothing else will work, is to do a high yo-yo. This involves doing a rapid climb above the formation plane, nosing over, and descending back into formation. This drastically lowers your speed and allows the formation to move ahead of you, at which point you can descend and fall back in as the trail element. Note of course that there are times where this is inadvisable, such as when gaining altitude will reveal the formation or draw heavy fire. In those instances, peeling off and executing a go-around is the better procedure to use.
Knowing your place in the formation helps to set expectations as to how aggressively you can maneuver. If you're the lead, you want to make yourself easy to follow – whereas if you're the trail element, you can do whatever you need to do to ensure you get where you need to go when you need to be there, without causing conflicts with other aircraft in the flight.
Knowing your place in the formation helps to set expectations as to how aggressively you can maneuver. If you're the lead, you want to make yourself easy to follow – whereas if you're the trail element, you can do whatever you need to do to ensure you get where you need to go when you need to be there, without causing conflicts with other aircraft in the flight.
Ingress & Egress
When in the final phase of ingress, as you're transitioning to land, the main hazard is colliding with the aircraft in front of you. This can happen for several reasons, such as being out of sync with their maneuvers, overrunning them, or even them over-flaring and drifting backwards. These are the responsibility of the trail pilots to be aware of. The lead will go for whatever LZ works for them, announcing it and expecting that the trailing pilots will fill in where they can. Interval should be loose enough to allow a margin for error, but close enough that all aircraft can hit the LZ in quick succession, minimizing the total package exposure time in hot areas.
When leaving an LZ, it's important for everyone to communicate when they're lifting as well as where they're going. The direction that was used by the formation to fly into the LZ forms the basis for all relative calls – "lifting left" thus means that the aircraft is taking off and heading left of the direction they flew in from. Compass bearings can be used as well if the situation was muddied by complex turns before the LZ. If an aircraft has to overfly a landed one due to the situation, they announce this very clearly and pay close attention to the actions of that landed aircraft.
As a general rule, aircraft take off in the order they landed. It's important for all pilots to know that order – if there's a tactical need to lift off before an earlier helo, a pilot should make an effort to avoid flying towards that landed aircraft and should announce that they're lifting and what direction they're headed. If flying over another helicopter is required during takeoff, it will always be announced over the radio.
When taking off, always ensure you scan around for other aircraft and lift into clear air.
Closing
So those are some tips and procedures that can help to ensure smooth formation flight. As with everything, practice is essential.
