Working as Mechanized/Motorized Infantry
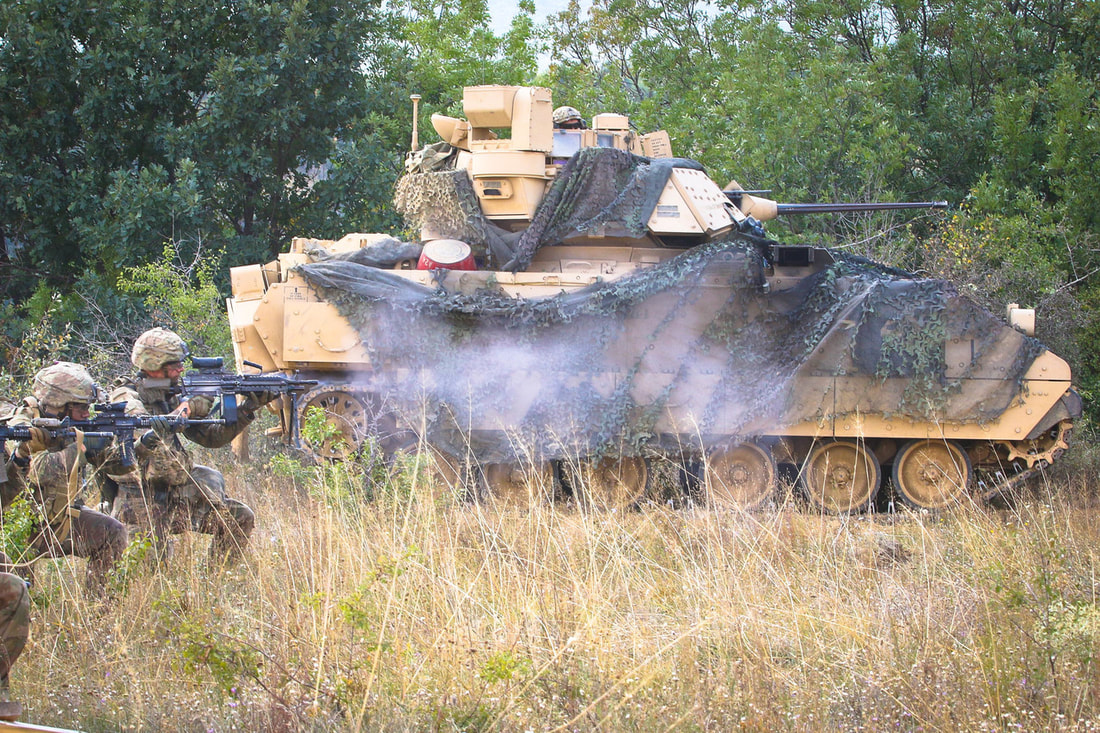
It is generally understood that infantry, armored and other support units working together are far more effective than the same forces used separately. The intent of this section is to be oriented around vehicles that are commonly encountered in missions, and oftentimes are crewed by "non-specialized" players (as opposed to more combat-oriented armored vehicles like tanks). These vehicles are typically intended to be used to safely convey troops to a fight and support them the whole way, including participation in the fight as well as everything leading up to and resulting from it. Closely integrating support forces with infantry results in element which are stronger and suited for most engagements. The terminology most associated with this is a Bridge Combat Team or a Regimental Combat Team, which is an infantry element, typically of company to regiment size closely integrated with supporting units such as artillery, aviation, tanks, and reconnaissance elements to form a small self-sufficient unit which allows for greater flexibility when attacking or defending.
In large scale warfare, regular infantry is often too slow to keep up with, react to, or escape from rapidly moving armored forces. The answer is to focus on motorized or mechanized Infantry which can keep up with the pace of modern warfare. Motorized troops are well and good for reconnaissance and light combat missions, but to lead offensives infantry needs to ride into battle in armored transports which protect them and carry heavy weapons. Mind you, while this is not always the case, it is almost generally preferable to tag along some extra firepower if you're setting off to fight in large battles.
We will start off with a rundown on the pros and cons of mechanized and motorized support, as seen from the eyes of the infantry it is tasked with supporting.
Pros & Cons of Mechanized/Motorized Support in Combined Arms Operations
The pros and cons of mechanized/motorized support in the combined arms role are as follows.
Pros
General
• Mobility and resulting flexibility. Mech/motor assets allow an infantry force to move over most types of terrain at a rapid rate. This gives infantry leaders tactical flexibility and allows them to rapidly react to changing situations in a way that a foot-mobile force would not be capable of.
• Carry extra gear, ammo, medical supplies, etc. Vehicles can carry additional supplies that would not be feasible to ruck in as an infantry force. This can prove key for longer duration missions, and can help to prevent anyone from needing to scavenge from the enemy for weapons and ammo.
• Great as a base of fire/overwatch. Thanks to the weapon systems carried, mech and motorized vehicles can work very well as a base of fire element, or as overwatch. Their mobility facilitates this as well, as it allows them to maneuver themselves to provide the best support in light of the ever-changing tactical situation.
• Keep infantry fresh for the fight. In Arma 3, stamina can play a big role in how an attack is conducted. Mechanized and motorized transportation allows an infantry force to arrive at the battle fresh and ready to fight, instead of tired from having to move and assault on foot.
Motorized
• Crew-served weapon systems. These come in a variety of forms - typically medium machineguns, heavy machineguns, grenade machineguns, and anti-tank missile systems. All of them are useful complements to an infantry force, and provide a nice increase of firepower.
• Provide some protection to mounted infantry and crew. While they will not survive any heavy fire, up-armored vehicles can provide basic protection to anyone mounted in them.
Mechanized
• Heavier weapon systems. Mechanized vehicles often carry cannons in addition to machineguns. Some carry grenade machineguns as well, or ATGMs. The cannons in particular are devastating when employed against enemy infantry and lighter vehicles and act as a major force multiplier.
• Provide protection to mounted infantry and crew. Though they cannot survive serious fire (tanks, ATGMs, etc), mechanized vehicles typically will give some additional survivability over motorized vehicles to anyone mounted in them.
• Amphibious abilities. The AAV provides an amphibious capability to friendly infantry. This can be employed to cross water obstacles such as rivers or lakes, or 'swim in' from a seaborne launch.
• Breaching. Due to their sturdy hulls, mechanized vehicles can smash down walls to open up breach points for accompanying infantry.
• Smoke dischargers. Mechanized vehicles typically are equipped with smoke dischargers. These can be employed to screen infantry movements as well as mislead the enemy about how an attack is being conducted.
• Clearing lanes of fire. Mechanized vehicles can be employed to knock down trees, walls, fences, and any other obstructions that may be preventing a good line of fire.
Cons
• Lose some stealth. The noise of vehicles operating tends to reduce the ability for a mechanized or motorized force to employ stealthy movement. While this is most significant with the tracked vehicles (such as the AAV), on a quiet day or night, even wheeled vehicles may be heard in advance of their arrival. While this does give up some of the element of surprise, the speed and mobility of the mech/motor forces can be used to make up for it and regain initiative.
• Catastrophic destruction of a loaded vehicle can cause horrific casualties. A fully-loaded APC driving over an IED and being destroyed can wipe out an entire squad. It is important to always employ mech and motorized assets with care, ensuring that troops are dismounted when there is any threat that could result in a catastrophic kill of a vehicle.
• Vulnerable to AT assets (mech). Enemy ATGMs, AT rocket systems, and other weapon systems can wipe out mechanized vehicles when employed properly.
• Vulnerable to everything (motor). Motorized vehicles are more vulnerable than mechanized ones as a general rule, and must be even more vigilant in how they scan for threats, move, etc.
Note that mechanized vehicles share many of the traits of armor, and additional information about their strengths, weaknesses, and employment uses can be learned by reading the armor section later on this page.
Convoy Operations & Guidelines
Speed is Life, but Cohesion is Important
Speed in a convoy tends to result in security. This is due to the fact that speed makes it harder to engage the vehicles with threat weapons such as RPGs, command-detonated explosives, and more. However, one must be careful to balance speed with cohesion - if a convoy is spread out too far, the mutual support of each vehicle's weapons, and the security they bring, is lost. This leaves individual vehicles subject to the massed fires of the enemy, which can cause a lot of trouble in short order.
To maintain convoy cohesion, the first vehicle must be aware of their speed and the proximity of those behind him. The convoy commander and other vehicle drivers can facilitate that situational awareness by communicating with the lead vehicle and other vehicles, giving them guidance on their speed, interval, sectors of observation, and more.
If the lead vehicle needs to unexpectedly brake hard for some reason, the driver will say "BRAKING, BRAKING, BRAKING" loudly over comms to help to prevent the trailing vehicles from piling into him when he brakes.
Interval
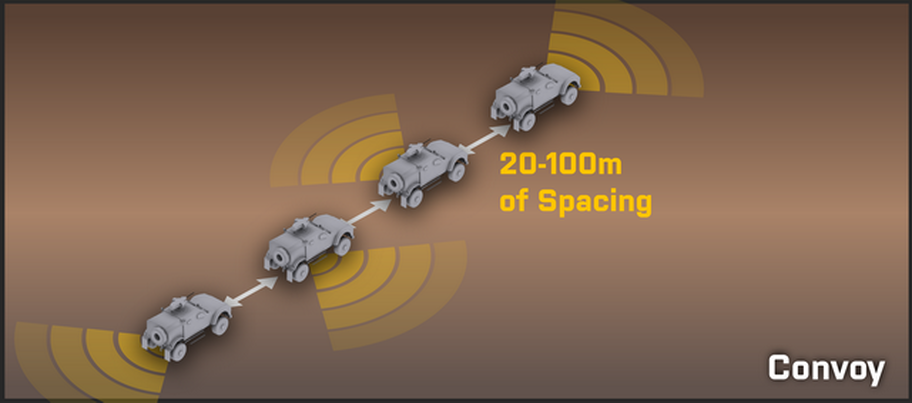
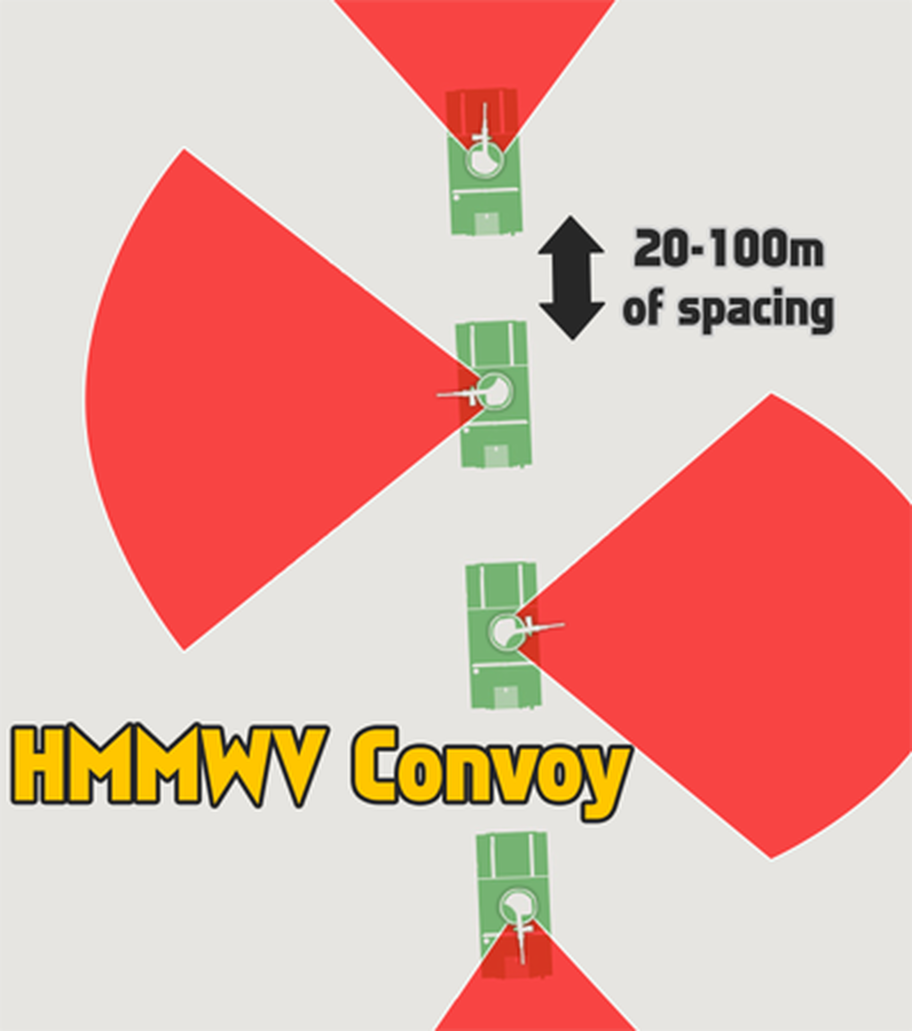
Maintaining good interval is a key aspect of multi-vehicle operations. Depending on the terrain, vehicles should keep from 20 to 100 meters of spacing between each other. This helps to lessen the effects of enemy explosives such as satchel charges and IEDs and makes it harder for the enemy to mass fires on multiple vehicles at once.
It is particularly important to maintain good interval when stopping temporarily, taking corners or other types of turns, and halting the convoy.
It is particularly important to maintain good interval when stopping temporarily, taking corners or other types of turns, and halting the convoy.
Route Selection & Actions-On
• Avoid urban areas whenever possible. It is far too easy for an enemy force to set up a devastating ambush in an urban area. Routes which pass through heavily wooded or extremely rocky areas are likewise dangerous, but due to the nature of some terrains, they cannot always be avoided. Caution is the prime defense in that case.
• The convoy must know where to go, and must be planned out in advance with backup courses of action. If every driver knows the path they're supposed to take, and what the end goal is, they are able to better make tactical decisions and judgment calls in high-stress situations.
• The convoy must know actions-on. If the vehicles take contact, the drivers must know what they are supposed to do. In some situations it will be important to maintain high momentum and fight through every ambush or contact with ferociously aggressive action, while others will benefit from a more deliberate approach which involves clearing each contact with the help of dismounted infantry. It is up to the convoy commander to ensure that actions-on are briefed before the convoy starts rolling.
Situational Awareness & Security
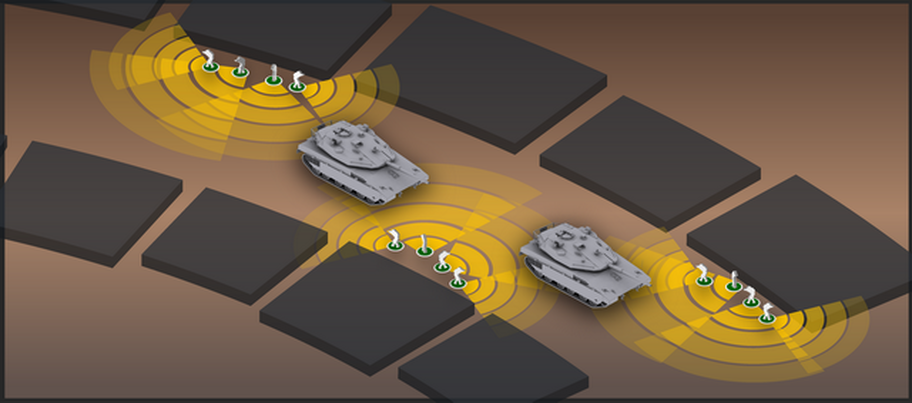
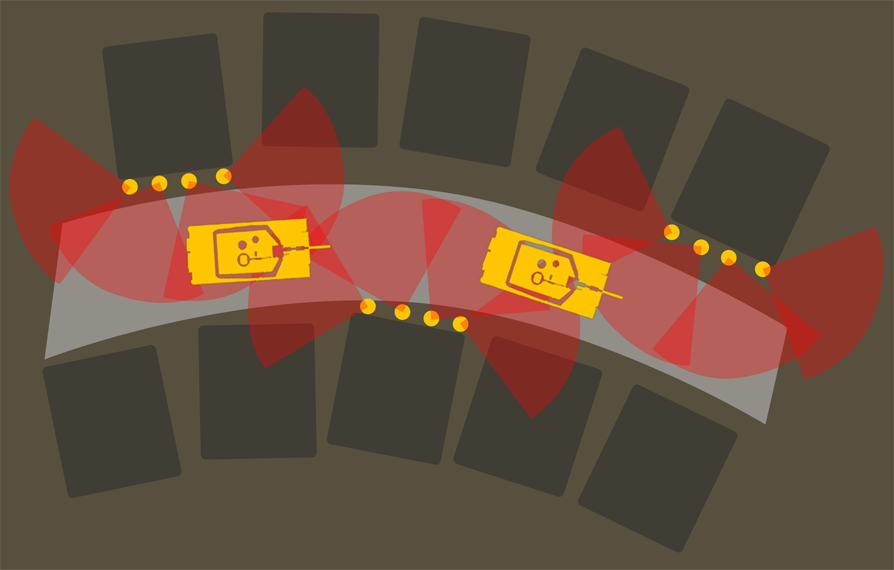
• Gunners must cover appropriate sectors. The first vehicle in a convoy watches to the front, the last vehicle watches to the rear, and vehicles in between alternate left-right-left so that guns are pointed in all threat directions at all times. It is important that gunners maintain their 360° observation even when contact seems to primarily be coming from a specific direction - if not, it is easy for the enemy to exploit this and maneuver into or fire from unobserved areas while the gunners are distracted elsewhere.
• Cohesion and security at halts are critical. Maintaining a cohesive formation and using good security procedures are critical to convoy survivability. If a full halt must be conducted, dismounted infantry must be employed to keep the convoy safe while halted. Cohesion is just as important, as it masses friendly forces and makes it much more difficult for the enemy to endanger the convoy.
• Cohesion and security at halts are critical. Maintaining a cohesive formation and using good security procedures are critical to convoy survivability. If a full halt must be conducted, dismounted infantry must be employed to keep the convoy safe while halted. Cohesion is just as important, as it masses friendly forces and makes it much more difficult for the enemy to endanger the convoy.
Actions On...
Contact - Push Through
If ambushed, our standard procedure is to fight through it while mounted and not stop until we have exited the kill zone. If the enemy begins firing on a convoy, all gunners should immediately bring their weapons to bear and put out a heavy volume of return fire. Even if the gunners cannot see the enemy, they need to be firing in the direction that they are taking fire from. Once an ambush is initiated, the lead vehicle driver needs to be particularly vigilant in his scanning of the road. The odds of an IED or other explosive being placed in the path is extremely high, and it will require split-second timing to avoid such devices.
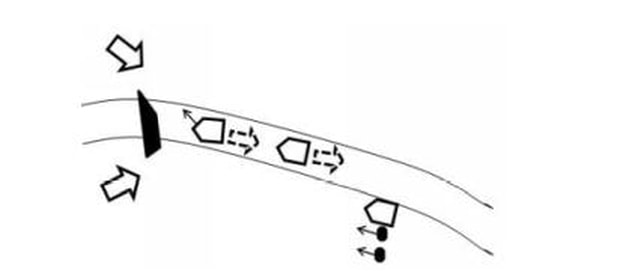
When an ambush occurs, "push through" is done unless otherwise stated. Leaders can also emphasize this by stating "Push through!" upon making contact. The alternative is reverse', if there is an obstacle blocking the road and it is unfeasible to manuever around it, the rear vehicle will dismount and provide covering fire while the first two vehicles reverse away from the area.
When an ambush occurs, "push through" is done unless otherwise stated. Leaders can also emphasize this by stating "Push through!" upon making contact. The alternative is reverse', if there is an obstacle blocking the road and it is unfeasible to manuever around it, the rear vehicle will dismount and provide covering fire while the first two vehicles reverse away from the area.
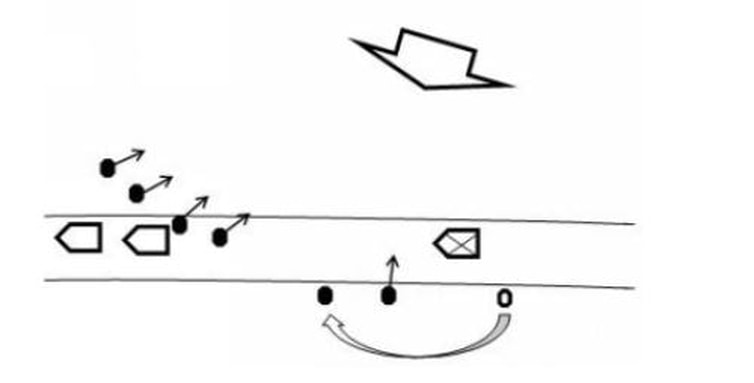
Contact - Dismount & Assault Through
The alternate method of dealing with contact as a convoy is to assault into the contact. This is done with the verbal command of "Assault through!". When this order is given, troops dismount while vehicle gunners lay heavy fire onto the enemy positions. The dismounts and vehicles then proceed to maneuver towards the enemy and decisively engage and destroy them. When the enemy has been defeated, troops remount and continue on with the mission.
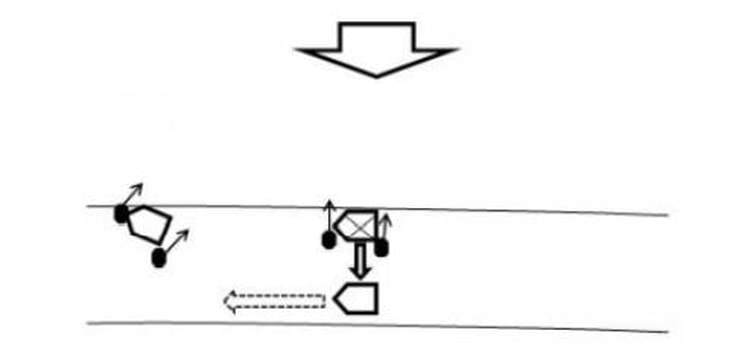
Note that when assaulting through, the infantry and vehicles are still ultimately interested in continuing on the convoy. They have some freedom to maneuver off of the convoy route to take the fight to the enemy, but they do not want to get pulled too far away. If an assault through is not feasible, the element will initiate a break contact drill as shown below.
Note that when assaulting through, the infantry and vehicles are still ultimately interested in continuing on the convoy. They have some freedom to maneuver off of the convoy route to take the fight to the enemy, but they do not want to get pulled too far away. If an assault through is not feasible, the element will initiate a break contact drill as shown below.
Disabled Vehicle
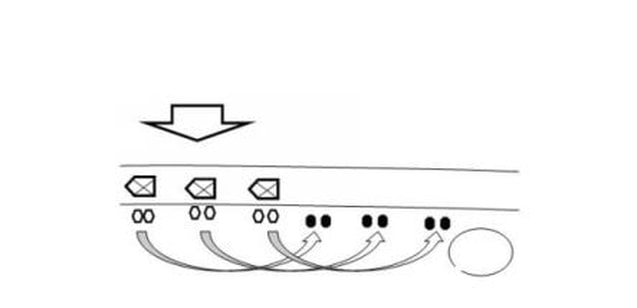
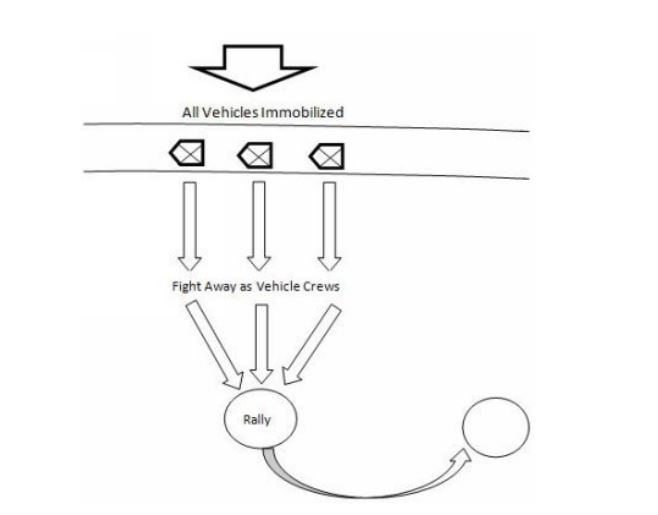
Most of the types of damage that can result in a disabled vehicle cannot be worked around in Arma 3. Because of this, our standard procedure for a disabled vehicle is for the other vehicles to drive around it, halt in a safe area (out of the kill zone, if it's an ambush), and recover the vehicle crew if they're still alive.
It is up to the crew of the disabled vehicle to get out of their vehicle and fight their way to friendly forces. Stopping more vehicles within an ambush kill zone would only result in casualties and more disabled vehicles.
When a vehicle is disabled, anyone who sees it states "Vehicle down!" on comms to indicate it.
In the event that tow ropes are available, disabled vehicles can be dragged out of a killzone. You will generally need to pacify an area before towing becomes a safe option, though desperate situations can force it to be attempted while still under fire.
It may also be possible to push disabled vehicles with a working one - something worth trying if the situation makes it more dangerous for a crew to disembark than be pushed.
Canalizing Ground
Canalizing ground is any sort of ground in which vehicles are heavily restricted in how they maneuver within it. When this sort of terrain is encountered, infantry are dismounted to move ahead and sweep the area before the convoy is committed to moving through it. It is important to keep the dismounted infantry within range of the supporting fires of the convoy vehicles while conducting this sweep, too.
Canalizing ground is any sort of ground in which vehicles are heavily restricted in how they maneuver within it. When this sort of terrain is encountered, infantry are dismounted to move ahead and sweep the area before the convoy is committed to moving through it. It is important to keep the dismounted infantry within range of the supporting fires of the convoy vehicles while conducting this sweep, too.
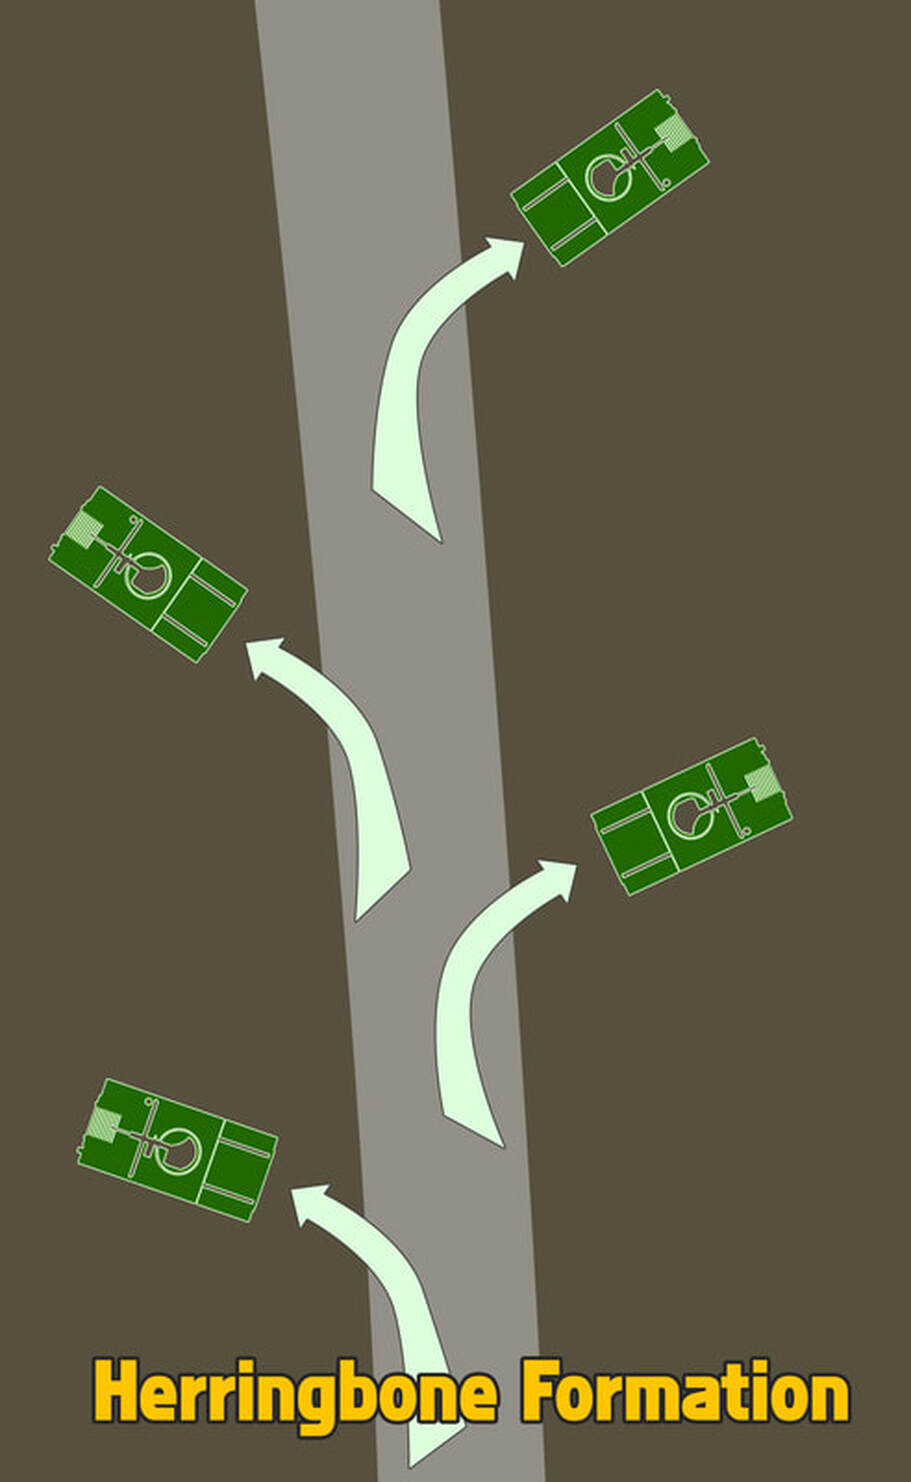
Convoy Halts
When halting a convoy, simply stacking the vehicles up on the road one-after-the-other is not the ideal way to do things. While this can be used for very brief halts, the better choice for reaction-to-contact or longer-duration halts is either the Herringbone formation (preferred, as it's the easiest to do) or the Coil formation.
Note, of course, that infantry should conduct dismount drills and provide local security whenever convoy halts are made, as described previously.
Note, of course, that infantry should conduct dismount drills and provide local security whenever convoy halts are made, as described previously.
Herringbone Formation
The standard formation to use when halting a convoy is known as the "Herringbone". In this, the vehicles pull off to both sides of the road in an alternating manner - the first vehicle pulls off to the right, second to the left, third to the right, and so on. The vehicles stay angled at about a 45° angle relative to the road. This formation is easy to execute and allows for the convoy to get good security when halted while also spreading the vehicles out a bit more than otherwise. This formation can be used in open terrain as well, in which case the direction of movement becomes the "road" and vehicles move relative to it.

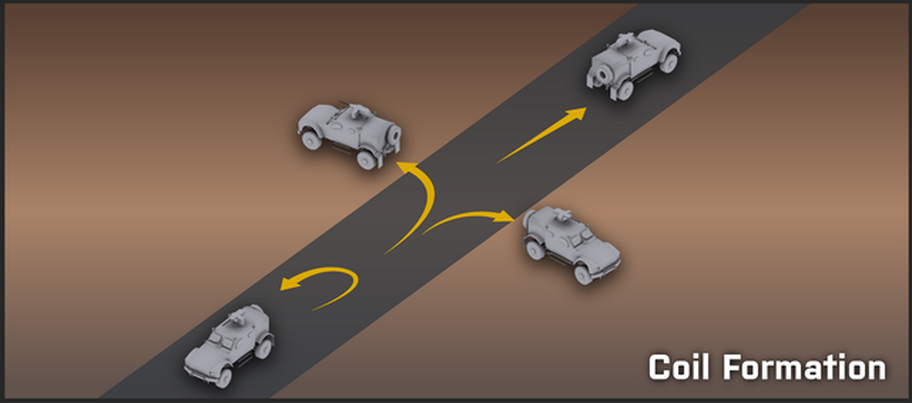
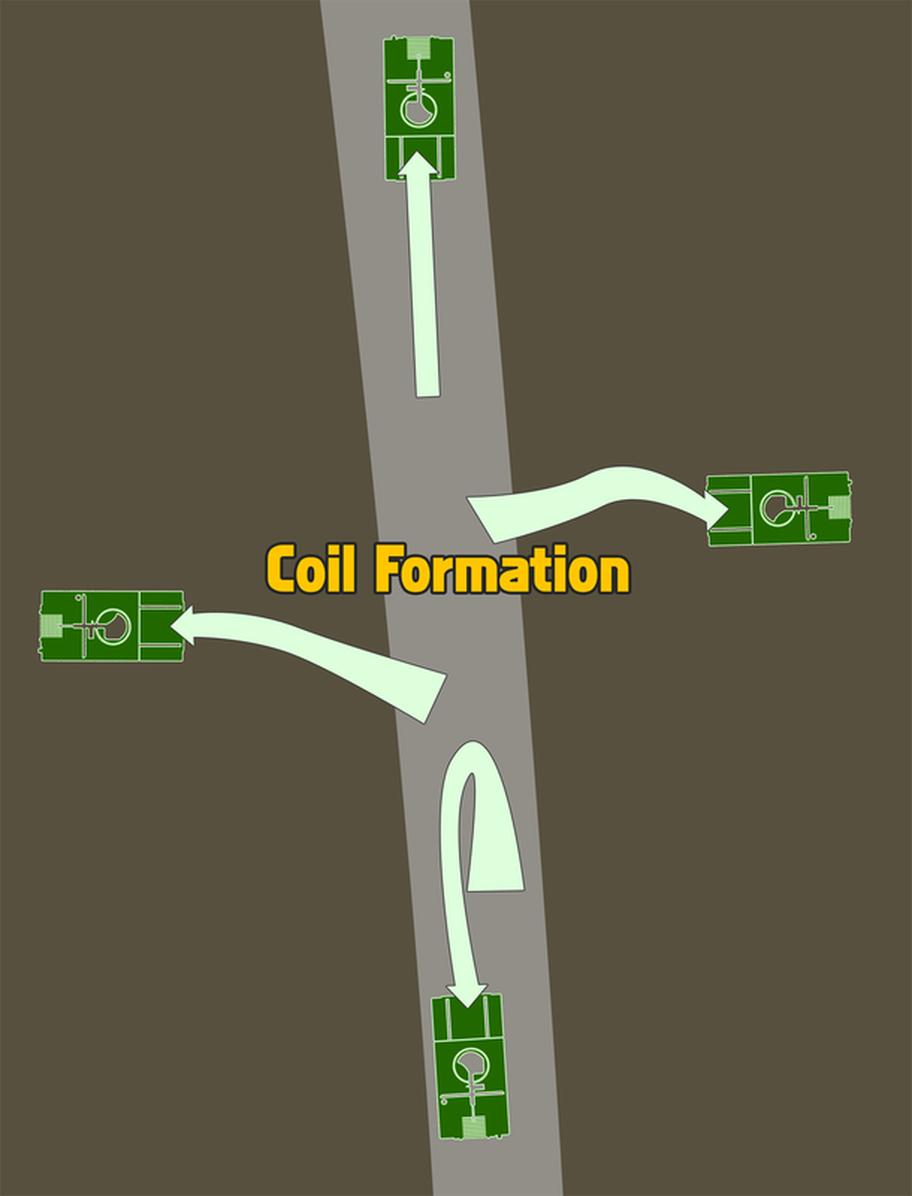
Coil Formation
The other formation that can be used is more geared towards armored vehicles. When executing a "Coil" formation, the lead vehicle stops and faces forward, the second vehicle pulls to the left and faces left (angling his strong frontal armor to the left), the third vehicle pulls to the right and faces right, while the trail vehicle turns around or spins in place so that it is oriented towards the rear. This allows for the vehicles to place their strongest armor in the direction that they're covering and provides excellent 360° security.
Working with Armor
Armored vehicles are powerful force multipliers in the combined arms battle. When properly employed with the support of infantry, the combination is difficult to match.
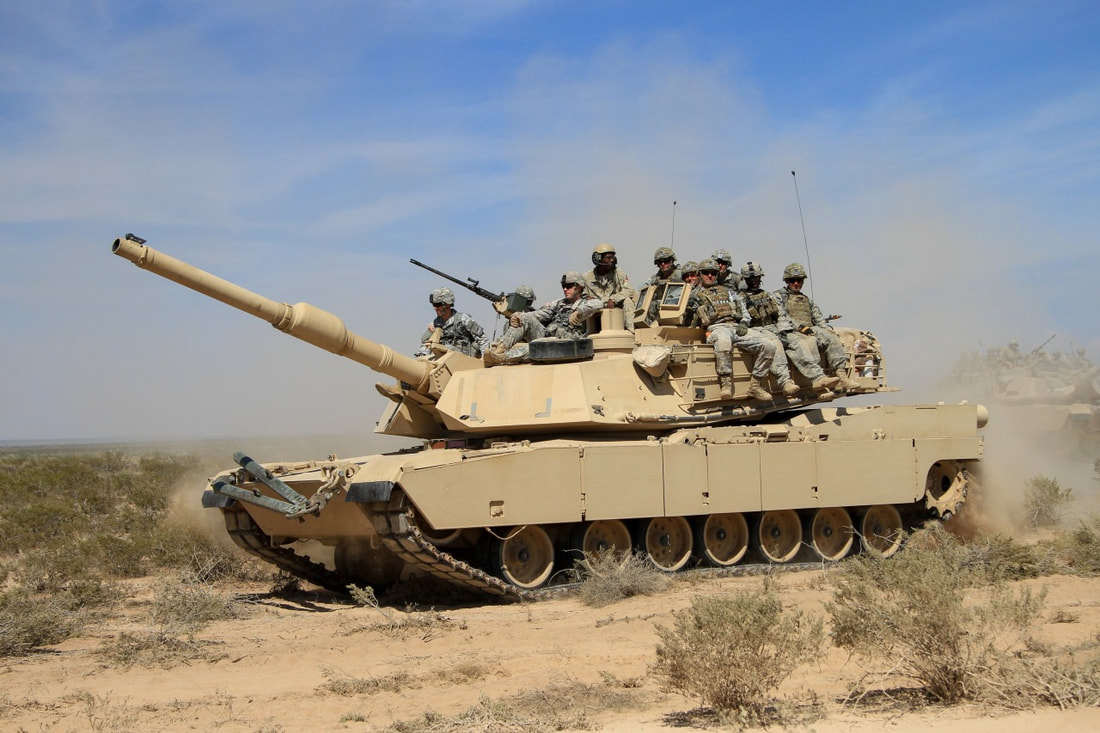
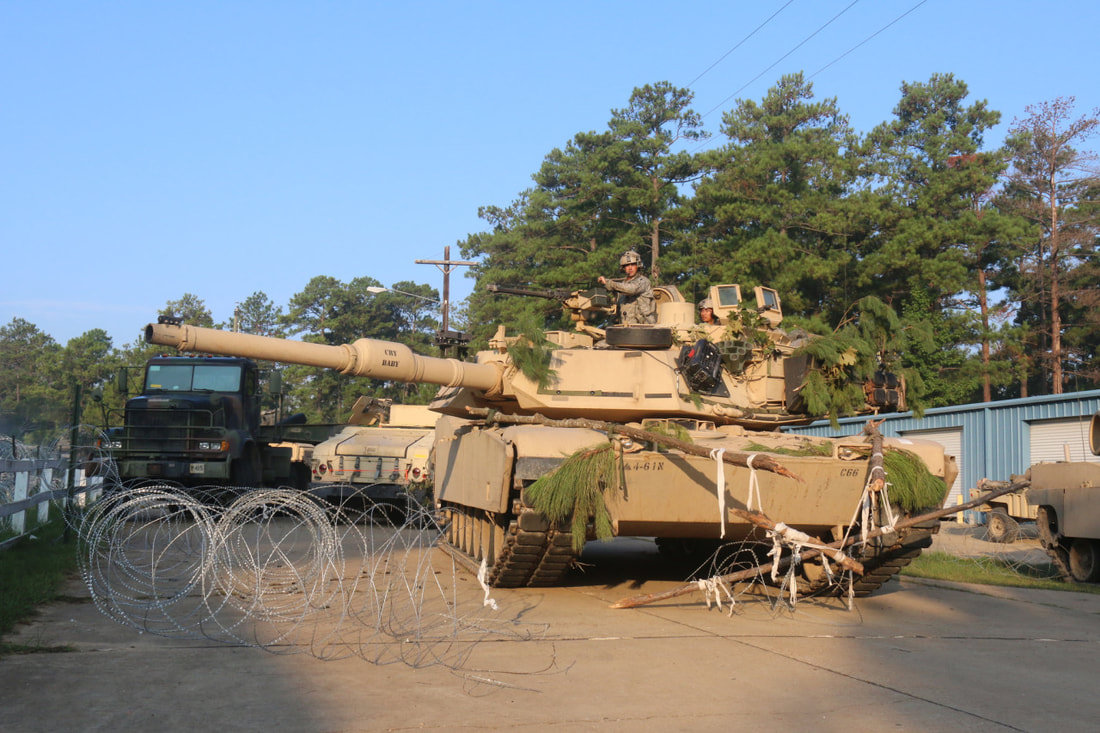
The most common modern armored vehicle assets that BLUFOR, and more extensively, U.S. Army units will have with them, in increasing order of power, are the M1126 Stryker, M2A3 Bradely, and the M1A2 Abrams main battle tank. The Stryker, built on a large combat chassis, is medium armor but lightly armed, while the Bradely is medium armor and armaments, and the Abrams is heavy armor. Vanilla systems include vehicles like the IFV-6c Panther, AMV-7 Marshall, and M2A1 Slammer.
Being familiar with and knowing how to work with armor are critical skills for infantry and vehicle crews to have. It starts with knowing what the pros and cons of armored employment are in Arma 3.
Pros & Cons of Armored Vehicles in Combined Arms Operations
The pros and cons of armored vehicles in the combined arms role are as follows.
Pros
• Powerful weapon systems and optics. Armored vehicles generally have cannons, machineguns, and sometimes even missile systems. These allow them to knock out strongpoints (bunkers, fortified houses), locate and kill snipers, and protect friendlies against enemy armored threats. They also provide excellent overwatch.
• Armored & survivable. Armored vehicles, as their name implies, are capable of taking some punishment. They are generally invulnerable to small-arms fire and require multiple anti-tank rockets to disable or destroy them. Armored vehicles can even be used to screen friendly infantry movement by driving slowly and allowing the infantry to move with them, using the armor as cover.
• Can coordinate closely with infantry. When properly employed, armor is integrated with infantry and works alongside them, allowing the two to mutually support each other and increase effectiveness.
• Fast & responsive. Armored vehicles can move quickly around the battlefield, allowing them to exploit enemy weaknesses at a moment's notice.
• Intimidating to enemy infantry. Unless well-equipped with reliable anti-tank assets, armored vehicles tend to intimidate enemy infantry and cause them to be very defensive and non-confrontational. This is generally due to the infantry not wanting to draw the armor's wrath unnecessarily.
• Breach capability. The tough armored hull of an armored vehicle enables it to smash down walls to make unexpected entry points for supporting infantry.
• Smoke capability. Armored vehicles are often equipped to deploy large smoke screens on short notice. These can mask friendlies from unexpected and sudden enemy contact, or provide concealment for an assault or similar.
Cons
• Loud, large, and visible. Armor typically is a loud, visually distinct and noticeable beast on the battlefield. Loud engines, tracks, turrets, cannons, and other weapon systems tend to make armored vehicles stick out prominently. It requires a great deal of crew skill to move a vehicle in such a fashion that it stays concealed while still remaining effective in the fight. "Hull down" techniques are key to learn if such employment is to be successful.
• Limited observation of close threats. Most armored vehicles have a hard time maintaining awareness of the areas directly around their vehicle. It is possible for their crew members to 'turn out' to see better, but this has the downside of making them vulnerable to enemy small-arms fire.
• Vulnerable to ATGMs, cannons, and enemy armored vehicles. Designed for fighting armor specifically, these weapon systems pose a significant threat to friendly armored forces. ATGMs and cannons can wreck an armored vehicle easily, while enemy armored vehicles can carry a wide range of nasty weapon systems that can do the same. The manner in which these systems can be concealed in defensive or ambush positions makes them all the more challenging to counter.
• Vulnerable in close and urban terrain. Due to their limited observation aspects, armored vehicles are at a situational awareness disadvantage when operating in close or urban terrain.
• Extremely vulnerable to enemy air assets. Attack helicopters and close air support jets pose a serious threat to armored vehicles and can knock them out with ease once located.
Infantry/Armor Coordination
As you can see from the above list, the key to successful infantry/armor integration is mutual support. An armored vehicle without infantry is vulnerable, just as infantry without armored support are vulnerable.
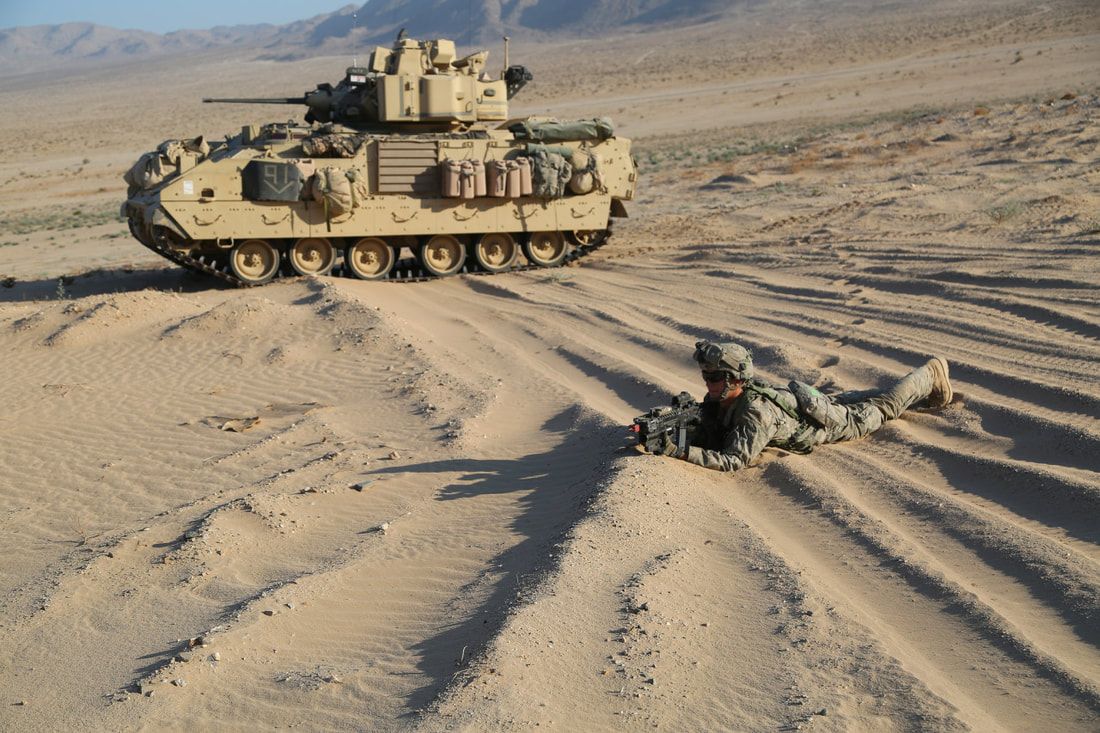
When in close terrain (such as dense woods or urban environments), it is beneficial to have infantry dismounted and moving on all sides of the armor. Infantry should lead the armor in such a situation, to prevent the armor from stumbling into an anti-armor trap or ambush
Armor/infantry coordination in close terrain requires a great deal of communication back-and-forth.
Armor need to know where the friendly infantry are, where the enemy is, while infantry need to communicate to the armor where it should move, whether there are any friendlies close to the armor (perhaps in its blind spot), where they suspect the enemy to be, and so on and so forth.
Infantry bring the following benefits to armored vehicle crews when employed together.
What Infantry Provide to Armor
• Dispersed eyes-on-the-ground which can stay alert for threats such as:
Enemy anti-tank threats - AT gunners, cannons, deployed ATGMs
Enemy armored vehicles
Mines, satchels, and IEDs
• Ability to spot targets without exposing the armor, and then direct the armor's movement and fires to kill the targets efficiently.
• Protection in close terrain.
• Guiding movement in close terrain.

Guidelines for Infantry when working with Armor
• Keep a healthy distance from the armor. Armored vehicles have a hard time seeing infantry close to them. Since you're a squishy infantryman, it's a good idea to keep your distance from the armor. In particular, you want to avoid being behind them unless they are deliberately providing cover for friendly infantry. If not, they are apt to throw into reverse without any warning, which can result in pancaked infantry quite easily.
• Watch out for overpressure from tank main guns. In realism mods, the blast overpressure that comes from the main gun being fired can severely injure anyone nearby. Stay clear of tanks when they are likely to be employing the main gun.
• Screen the tank in close terrain, ensure infantry are moving ahead of it as well. Infantry should be moving in a fashion that allows them to observe and cover any threat avenues before the tank becomes visible to them. This is intended to spot ATGMs, RPG teams, and other infantry threats so that the armor can be warned, or the infantry can kill them before they have a chance to do anything.
• Identify and communicate threats to the armor. Whenever a known or suspected threat is identified, the armor should be informed of it as appropriate. If the threat is high, this typically means that the armor will be told to stop while the infantry clear it out.
• Identify and communicate any threats to the infantry that the armor can instead handle. Some threats will exist that will not be a danger to the armor, but may pose a severe threat to infantry. Typically these take the form of enemy infantry concentrations, snipers, machinegun bunkers, and other forces that can hurt infantry yet do not pose a threat to armor. When these are identified, it is the job of the infantry to direct the armor so that the armor can eliminate the threat.
• Be aware of the armor's breaching abilities, and request them when appropriate. More info follows in the "Breaching with Armor" section, below.
• Armor can act as part of the base of fire, freeing up more infantry to participate in an assault. While you will generally want to keep infantry with the armored base of fire to provide close protection, you won't need as many people in the actual base of fire due to the magnified optics and powerful weapons of the armor being a force multiplier.
Guidelines for Armor when working with Infantry
• Infantry are squishy. Particularly in close terrain, make an effort to not run over them. They really don't appreciate becoming tread grease.
• Be mindful of overpressure dangers to the infantry. When playing realism mods that simulate blast overpressure, don't fire the main gun of a tank when in close proximity of infantry unless absolutely necessary, or if you are positive that supporting infantry are clear of the overpressure danger zone.
• Let the infantry lead in close terrain. An anti-armor ambush will wait for vehicles to present themselves before firing. If infantry are leading, they will have an opportunity to spot the hidden ambush elements before the armor comes into view, since the ambushing elements will typically be waiting to fire.
• If necessary, the armored vehicle commander can dismount to talk directly with the supporting infantry. Do so in cover, of course. This can be useful for 'terrain familiarization' discussions.
Armor as Overwatch
One of the defining attributes of armor when in support of infantry is the ability for it to stand off from the battle and deliver accurate fires from beyond the effective range of the enemy.
This can be brought to bear with infantry by providing overwatch of infantry elements as they move to contact. An armored vehicle can suppress the objective with machinegun fire, take out fortified positions with cannon fire, and provide immediate accurate fire upon any threats that might emerge to oppose the infantry. This allows for the infantry to rapidly move up to the enemy positions with the minimum of risk.
Having an armored vehicle many hundreds of meters away from suspected enemy positions also helps to lessen the likelihood of enemy anti-tank gunners being able to engage the armor. This comes most into play with unguided anti-tank rockets like the RPG-7; guided weapons tend to have much longer effective engagement ranges and are not as easily defeated by range.
In short, armor is much more effective against infantry at a distance than infantry are against armor at a distance. Take advantage of this at all times, and especially when providing support to dismounted infantry elements.
Breaching with Armor
Breaching a wall with the help of an armored vehicle is a good way to surprise defending enemy forces and give your infantry a fighting chance. Typical enemy defenses focus on natural "choke points" such as a central entry to a compound that is otherwise walled off. Breaching a wall in an unexpected place and attacking through the breach is an excellent way to catch the enemy off guard and destroy them before they can shift their defenses.
General Procedure for Mechanical Breaching
The process for breaching with any armored vehicle is fairly simple.
1. Assess the situation, decide on a breach location. Be on the lookout for mines, satchel charges, IEDs, or any other devices that might be in place to protect against the possibility of a breach at the location chosen.
2. Once the breach point is finalized, the breach vehicle proceeds towards it at full-speed and smashes a hole in it. When about to impact the obstacle, the breach vehicle fires smoke dischargers if available. This will mask it upon breaching and provide concealment to the infantry.
3. After creating the hole, the vehicle immediately reverses out of the breach point to clear a way for the infantry. The reasoning behind having the breach vehicle withdraw after creating the breach versus charging into the unknown is simply that it increases the survivability of said vehicle. While a tank might be able to drive through the breach point, plant itself on the other side, and obliterate everything that opposes it, lighter infantry fighting vehicles will end up being disabled or outright destroyed by things like AT-4s, RPGs, and other light anti-tank weapons. It's a safer bet to simply have the infantry secure the area before bringing light armor in.
4. Infantry proceed in from either side of the breach and assault through it while the breach vehicle provides overwatch.
Notes about Ballistic Breaching
Bear in mind that walls can also be breached with cannon and machinegun fire. HEAT rounds from tanks will flatten walls, while a box of .50cal bullets will crumple some as well. Note too that "prepping" a breach point with .50cal rounds from an APC can soften up a wall and make it easier to breach.
When breaching a wall from a stand-off location via cannon or machinegun fire, the breach vehicle simply ensures that no friendly forces are within a danger radius of the breach point. Once that is confirmed, they direct fire onto the breach until it opens, at which point they shift fire to allow the infantry to storm in.
When breaching a wall from a stand-off location via cannon or machinegun fire, the breach vehicle simply ensures that no friendly forces are within a danger radius of the breach point. Once that is confirmed, they direct fire onto the breach until it opens, at which point they shift fire to allow the infantry to storm in.
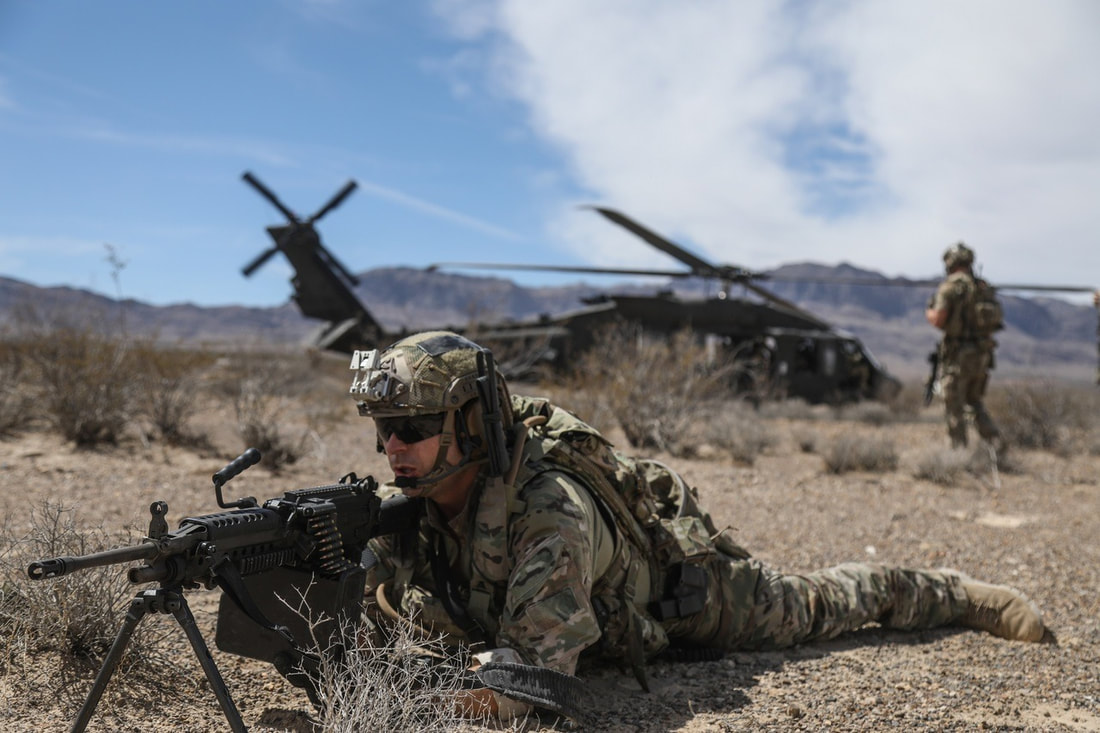
Working with Helicopters
Helicopters provide infantry with both transportation and fire support. They are the most tightly-integrated air asset available to ground troops and act as a major force multiplier. Helicopters are commonly employed in a support role, and all players are expected to be familiar with their employment in the combined arms fight. That familiarity begins with knowing the pros and cons of their combined arms role.
Pros & Cons of Helicopters in Combined Arms Operations
The pros and cons of helicopters in the combined arms role are as follows.
Pros
• Observation. Helicopters are great at reconnaissance and security. This is in part due to their relatively low speed and the low altitude that they operate at, combined with observation pods on many of the most common helicopters employed.
• Insertion/extraction capability. Helicopters can airlift troops and drop them at will nearly anywhere they want. This allows for great flexibility in planning operations.
• Orbit capability. A helicopter can stay "on station" over the ground forces it is supporting with ease, due to the dynamics of helicopter flight as compared to what jets are able to do. A helicopter that is orbiting over friendly forces is available to provide support in the form of machineguns, cannon fire, rockets, ATGMs, or observation, depending on the variant and armaments.
• Rapid reaction to Close Air Support requests. Due to the ability to orbit as described previously, a helicopter acting in a CAS role can rapidly react to any support requests made. This reduces the time between a CAS request being made and rounds landing on target. This, in turn, makes it more likely that the CAS will be able to suppress or kill the enemy threat before it can do harm to friendly forces.
• Precision. Helicopters can be very precise in their employment of fires, due to speed, altitude, magnified optics, the capability to hover, et cetera.
• Stealth. Helicopters can get low to the ground and can hide in terrain in a fashion similar to ground vehicles or even infantry. They can transport troops in a concealed fashion, as well as sneak around in a combat capability, popping up into view only when they're ready to kill something.
Cons
• More vulnerable to most threat weapons. Helicopters can be taken down by a wide range of weapon types if they're not carefully employed. They fly low and slow relative to jets, and transport variants can be very vulnerable when flying into or out of a landing zone.
• Weaker armament than jets. Helicopters cannot lift as much ordnance as jet aircraft, meaning that they almost never have anything that can pack the same kind of punch as a 500lb or 2000lb bomb from a jet. However, they make up for this with the precision of their fires.
• Loud. The enemy will definitely hear helicopters coming in, unless in the midst of a major battle.
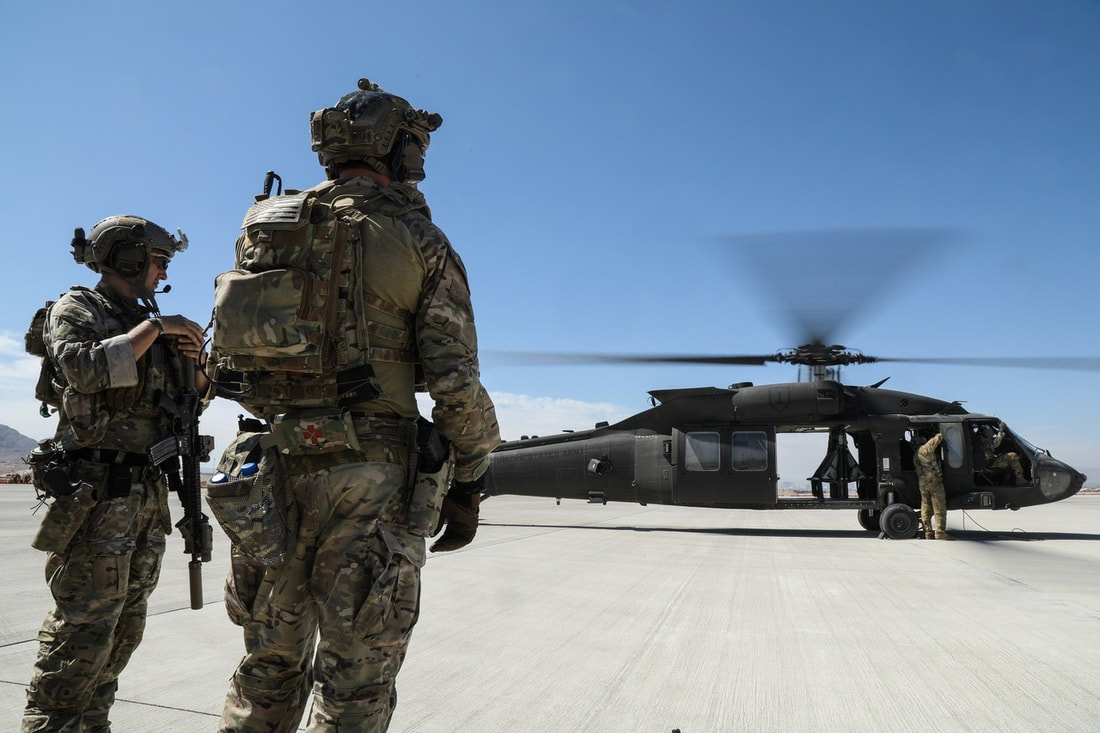
Roles & Positions When Working With Helos
When infantry are embarked in helicopters, they will typically end up taking roles that complement those of the standard helo crew. This includes two primary roles - the Navigator and the Door Gunner. Since these roles are only typically used when ferrying troops to combat, it makes sense to use those same troops to man the positions that benefit them.
Navigator
A variety of issues make it beneficial for each helicopter pilot to have a passenger act as a navigator. This typically will take the form of the senior passenger (ie squad leader or fireteam leader) acting as the navigator. The navigator will board the helo first, into the passenger seat, or copilot seat if there is no copilot available. This gives him the ability to see clearly in the direction of flight, as well as use the imaging turret sensors on those aircraft that have them.
A navigator allows the pilot to concentrate on flying without having to try to switch back and forth between his map to try to watch his route, which helps to reduce the risk of 'controlled flight into terrain' (CFIT). The navigator also acts as an additional set of eyes that can scan the terrain for enemy threats, suitable LZs, and more. Navigators do not plot the helicopter's route to the LZ - instead, they help guide the pilot and copilot along the route that was chosen during planning, allowing the pilot/copilot to focus more fully upon their flight duties.
A navigator allows the pilot to concentrate on flying without having to try to switch back and forth between his map to try to watch his route, which helps to reduce the risk of 'controlled flight into terrain' (CFIT). The navigator also acts as an additional set of eyes that can scan the terrain for enemy threats, suitable LZs, and more. Navigators do not plot the helicopter's route to the LZ - instead, they help guide the pilot and copilot along the route that was chosen during planning, allowing the pilot/copilot to focus more fully upon their flight duties.
Navigator Guidelines
Navigators use several verbal techniques to help assist the flight.
On My Mark - When a navigator gives a pilot a heading, he may precede the heading with "On my mark", which indicates that the pilot does not turn to that heading until the navigator has given the word.
For instance:
Navigator: "On my mark, make your heading two seven five."
(The navigator watches the map and waits for the aircraft to reach a specific point)
Navigator: "Mark, make your heading two seven five."
(The pilot makes his course correction after hearing the navigator say 'mark')
For instance:
Navigator: "On my mark, make your heading two seven five."
(The navigator watches the map and waits for the aircraft to reach a specific point)
Navigator: "Mark, make your heading two seven five."
(The pilot makes his course correction after hearing the navigator say 'mark')
Time/Distance to Action - A navigator can assist the pilot by telling him approximately how far he has to go to reach a given waypoint, landing zone, or other important point. Most people seem to be able to estimate distance better than time, and thus it's best to give these heads-up calls in distances instead of seconds.
For instance:
Navigator: "Maintain this heading. In one kilometer you will cut due west... 500 meters to turn... Stand by to turn on my mark... Mark, make your heading due west."
For instance:
Navigator: "Maintain this heading. In one kilometer you will cut due west... 500 meters to turn... Stand by to turn on my mark... Mark, make your heading due west."
Terrain Visualization - A navigator who can accurately tell the pilot what terrain features he will be seeing next, and how to guide himself to the next waypoint with their help, is an invaluable asset. This only requires that the navigator can read the contours of a map with accuracy.
For instance:
Navigator: "When we exit this valley there will be a small hill to our front-left. Pass it on the southern side and then prepare to make a hard right turn to the south. The landing zone is a large field in front of a forest that will be visible after your turn, set down as close to the treeline as you can."
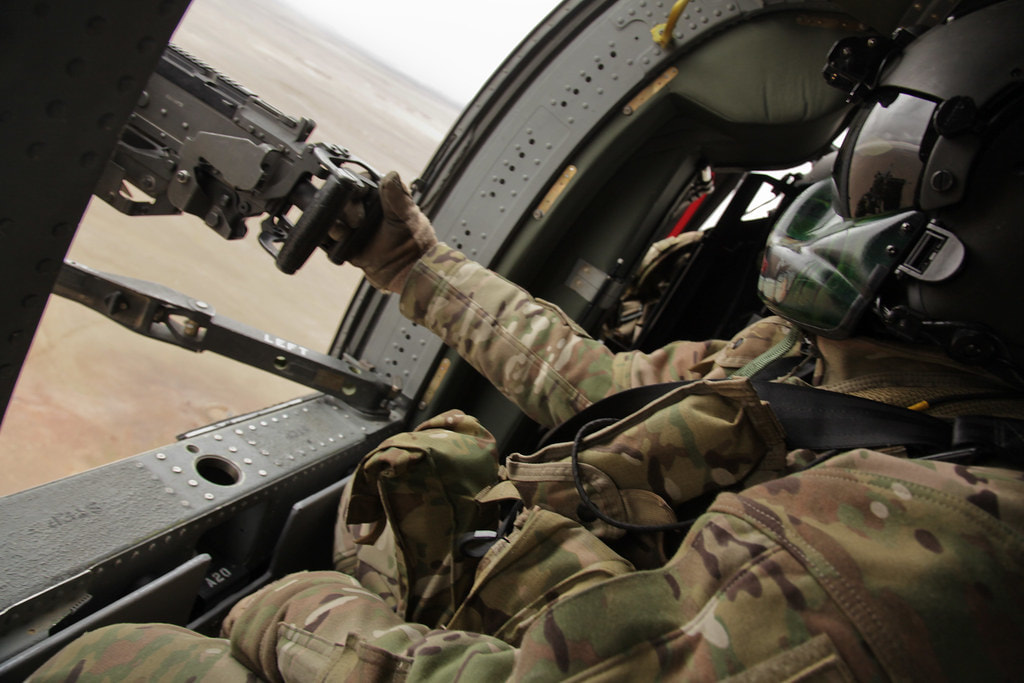
Door Gunners
Not to be confused with a "Crew chief", who is part of the helicopter's crew, "door gunners" are instead typically apart of the squads or teams embarked upon the helo, though door gunners are usually otherwise subsidized by a member of the helicopter crew. These gunners help to maintain security during flight, and debark with their parent unit once at the LZ. If engaged en route, the door gunner communicates with the crew chief and pilot and assists them in returning fire on enemy contacts.
Like the crew chief, the door gunner is also responsible for communicating the proximity of obstacles to the pilot when in close terrain and attempting to land. This can be done with simple concise verbal commands to the pilot to tell him which way to move the helo to avoid obstacles, such as "Tree left, move right 10 meters". Infantry leaders ensure that the most level-headed and competent players end up as door gunners.
Like the crew chief, the door gunner is also responsible for communicating the proximity of obstacles to the pilot when in close terrain and attempting to land. This can be done with simple concise verbal commands to the pilot to tell him which way to move the helo to avoid obstacles, such as "Tree left, move right 10 meters". Infantry leaders ensure that the most level-headed and competent players end up as door gunners.
Door Gunner Guidelines
• Scan for threats & communicate them to the pilot. The gunner must be constantly scanning for hostile threats. He watches for: Upon spotting any of these he immediately informs the pilot. The gunner can use either clock directions or relative directions (ie: front, left, right, etc) when calling these targets or objects out.
• Enemy personnel and vehicles
• Muzzle smoke
• Tracers
• Smoke trails from missiles or rockets
• Trees, large rocks, and other obstacles when descending into an LZ
• Be proficient with helo door gunnery. This includes knowing how to correctly lead targets when the helicopter is moving at a variety of airspeeds. As a general guideline, one must lead in the direction that the target is moving relative to the gunner's perspective. If a target is crossing from right to left, the gunner must lead the target by aiming to the left side of the target.
• Disembark once the helo has landed at the LZ. The door gunner, being part of an infantry fireteam and squad, does not stay mounted in the helo. Once at the LZ, he jumps out and rejoins his fireteam.
Airborne Assaults
An airborne assault is simply an assault which uses helicopters to move the infantry into position. Airborne assaults are planned by the highest leadership element in game - usually the Platoon or Company Commander in a cooperative environment. Note that a good number of these guidelines can also be used for fixed-wing transport aircraft for parachute drops.
Planning the Assault
Landing Zone (LZ) Considerations
The first thing that must be considered for a airborne assault is where the landing zone(s) will be. Things like equipment loadout, force composition, main objectives, etc are typically done on the mission-makers side, so they are not generally planned for at the platoon level. The platoon gets the orders [in the form of a mission operation order] and acts on them.
When choosing a landing zone, the following must be taken into consideration. In short, you use METT-TC and OCOKA, but specific emphasis is made on the following elements of it.
• Terrain. What kind of terrain is around the objective? Is it hilly, flat, mountainous, etc? Flat terrain makes LZ selection difficult and generally forces you to land further from the objective. Hilly, rough terrain can allow for a closer LZ to the objective, but makes it harder to find a good LZ to set down at - which increases the usefulness of being able to drop troops without setting the helicopter down.
• Approaches. Being able to approach the LZ and never come into visual of the enemy is highly desired. If they cannot see you, they cannot hit you with direct-fire weapons, and you may be able to confuse them as to your precise landing spot. Terrain depressions, hills, and even forests can be used to mask the helo on the approach.
• Cover/Concealment availability. Once the troops are on the ground, what kind of cover and concealment will they have? The more the merrier. At the same time, landing in an area with too much hard cover can be tricky for pilots, increasing the risk of damaging the aircraft.
• Proximity of the enemy. The closer you try to land to the enemy, the riskier things get. While 'hot' landings can be done, they require the element of surprise to be effective, and benefit greatly from CAS and artillery fires being used to suppress or otherwise occupy the enemy during them.
• Likelihood of patrols. The more likely enemy forces will be patrolling far out around the objective, the further the LZ should be, or the more the LZ should be prepped (by artillery or CAS) before the landing occurs.
• Enemy anti-air capabilities. If the enemy has MANPAD missiles or AA vehicles, a masked approach becomes critical. If that is not possible, the LZ must be far enough away from the enemy that there is no reasonable chance of being engaged by the enemy anti-air at or near the landing zone.
After the primary LZs are chosen, a set of alternate LZs should be determined based on the possibility of enemy contact at the main LZs. Alternate LZs should typically be positioned 500 or more meters further away from the expected enemy positions than the primary LZs, as an additional safety measure.
Coordination
Once the LZ(s) and alternate LZ(s) are decided on (and clearly marked on the map), the next step is to coordinate the overall assault. At this point, the following needs to be hashed out.
• What squads will be in what helos? As soon as this is known, the squad leaders will oversee the embarkation of their troops into their assigned helos.
• What helos will go to what LZs, and in what order will they fly? Establishing an order of flight is critical if one wants to get to the LZ in any sort of organized fashion.
• What is the planned route to the LZ? High/low alt, terrain following, etc. Mapping out the route with map marks is always useful. Note that pilots can use the 'vehicle' channel to place detailed waypoints on the map for their own reference during flight. When time is available to do this, it should always be done, as it greatly reduces the workload on the pilot/copilot/navigator and allows them to concentrate more fully on situational awareness.
• What order will the helos land? Simultaneously, staggered? Are waves necessary? The pros/cons of each are as follows:
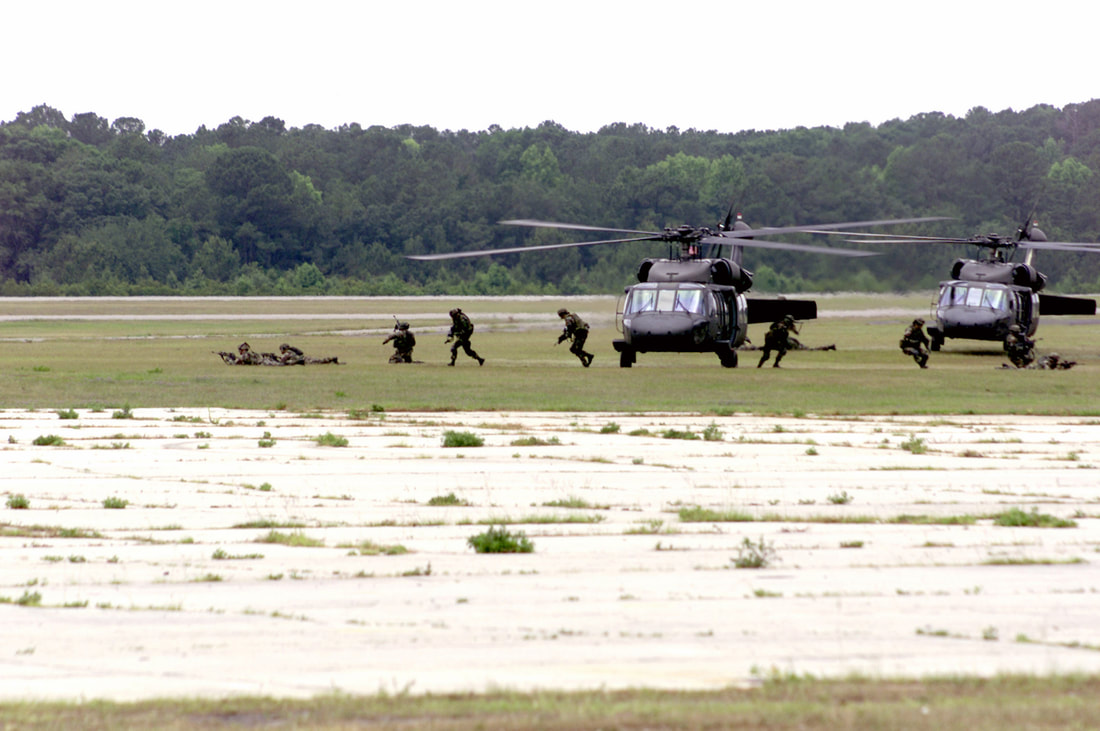
Simultaneous. A simultaneous landing is when all aircraft hit the LZ within about fifteen seconds of each other. This puts a lot of boots on the ground very rapidly and forces any defending forces to split their fires between multiple helicopters. Simultaneous landings typically cover a decent stretch of ground, which further dilutes the effectiveness of any defensive enemy fire. The number of guns on the helos also helps to suppress the landing zone on the way in, and provides support on the way out.
Staggered. Staggered landings occur when helicopters hit the LZ one after the other, with 30 seconds to a minute or more between each landing. This allows one squad to get on the ground, establish the security of the LZ, and provide coverage as the next helo comes in. Staggered landings are sometimes forced by the terrain - if there is only a small LZ in a clearing that is suitable for landing, you may not be able to orchestrate a simultaneous landing.
Waves. Waves occur when the number of helicopters available cannot airlift the entire assault force in one go. The key characteristic of wave landings is that the initial force will be alone on the ground for as long as it takes for the aircraft to return to the staging area, pick up the next wave, and fly them in. If the enemy becomes aware of the fact that waves are being used, they are likely to try to ambush successive waves. It is important to not become predictable in flight path/ingress directions when using waves.
• What are the responsibilities of the various squads and fireteams upon landing? Each squad needs to know where to go immediately upon landing so that they clear the LZs as quickly as possible and provide security for the assault force. Security must be given high-priority consideration, as it is critical to the success of getting all friendly infantry onto the ground safely. Each fireteam should know what area of responsibility it has, and the squads should be given clear orders regarding what areas they are responsible for covering at the landing zone.
• What squads will be in what helos? As soon as this is known, the squad leaders will oversee the embarkation of their troops into their assigned helos.
• What helos will go to what LZs, and in what order will they fly? Establishing an order of flight is critical if one wants to get to the LZ in any sort of organized fashion.
• What is the planned route to the LZ? High/low alt, terrain following, etc. Mapping out the route with map marks is always useful. Note that pilots can use the 'vehicle' channel to place detailed waypoints on the map for their own reference during flight. When time is available to do this, it should always be done, as it greatly reduces the workload on the pilot/copilot/navigator and allows them to concentrate more fully on situational awareness.
• What order will the helos land? Simultaneously, staggered? Are waves necessary? The pros/cons of each are as follows:
Simultaneous. A simultaneous landing is when all aircraft hit the LZ within about fifteen seconds of each other. This puts a lot of boots on the ground very rapidly and forces any defending forces to split their fires between multiple helicopters. Simultaneous landings typically cover a decent stretch of ground, which further dilutes the effectiveness of any defensive enemy fire. The number of guns on the helos also helps to suppress the landing zone on the way in, and provides support on the way out.
Staggered. Staggered landings occur when helicopters hit the LZ one after the other, with 30 seconds to a minute or more between each landing. This allows one squad to get on the ground, establish the security of the LZ, and provide coverage as the next helo comes in. Staggered landings are sometimes forced by the terrain - if there is only a small LZ in a clearing that is suitable for landing, you may not be able to orchestrate a simultaneous landing.
Waves. Waves occur when the number of helicopters available cannot airlift the entire assault force in one go. The key characteristic of wave landings is that the initial force will be alone on the ground for as long as it takes for the aircraft to return to the staging area, pick up the next wave, and fly them in. If the enemy becomes aware of the fact that waves are being used, they are likely to try to ambush successive waves. It is important to not become predictable in flight path/ingress directions when using waves.
• What are the responsibilities of the various squads and fireteams upon landing? Each squad needs to know where to go immediately upon landing so that they clear the LZs as quickly as possible and provide security for the assault force. Security must be given high-priority consideration, as it is critical to the success of getting all friendly infantry onto the ground safely. Each fireteam should know what area of responsibility it has, and the squads should be given clear orders regarding what areas they are responsible for covering at the landing zone.
Loading Up
Leaders load their troops and get accountability
When it comes time to board the helos, element leaders will direct their teams to the appropriate helos and get everyone loaded up. The element leaders board last, after getting accountability for their troops, and then tell the pilot that all troops are loaded. The squad leaders report to the Platoon Commander when their squads are fully loaded.
How to approach a helo when loading
When boarding helicopters, approach them from the side and crouched. This is for two reasons, one of which is modeled by default, and one of which is modeled in some realism mods.
The first reason is because many helicopters have door gunners, and a good practice is to avoid crossing their line of fire. This may not come into play much during boarding at a friendly location, but it will be a large factor of hot extractions and disembarking. Get in the practice of not crossing the gunner's line of fire when embarking or disembarking from a helo.
The second reason, seen in some realism mods, is so that the tail rotor does not turn you into flying chunks of meat. Being off to the right or left of the helo means that the tail rotor would have to move a great deal to strike you, which means you'd likely have enough time to get the hell out of the way before being minced.
Spread loading
It is important to ensure that critical elements such as anti-tank, demolitions, and other mission-essential roles are spread-loaded throughout the different helos. This is done to ensure that the loss of one helo does not cripple the assault. Squad leaders are each in a different helo, and the Platoon Commander (or Company Commander) spreads his PltHQ element out through all of the helos to ensure that the PltCo, PltSgt, and Plt Corpsman are not all lost if their bird goes down.
Contingency Planning
It is important that the overall assault coordinator clarifies the actions that will be used for any unexpected situation in advance. I will describe the standard procedures for them, which are standard operating procedure (SOP) and thus in effect unless the assault coordinator specifically says otherwise.
Actions On: Downed Helo
One of the most damaging events to an airborne assault, particularly one done at the platoon level, involves a helicopter being shot down before reaching or upon reaching the landing zone. Thanks to the damage model of Arma 3, helicopters can oftentimes land semi-successfully after taking heavy damage. While this will likely result in many wounded and likely several killed in the helo, the chance for people to survive is significant and must be acknowledged. Just because a helo goes down does not mean that all hands aboard were lost!
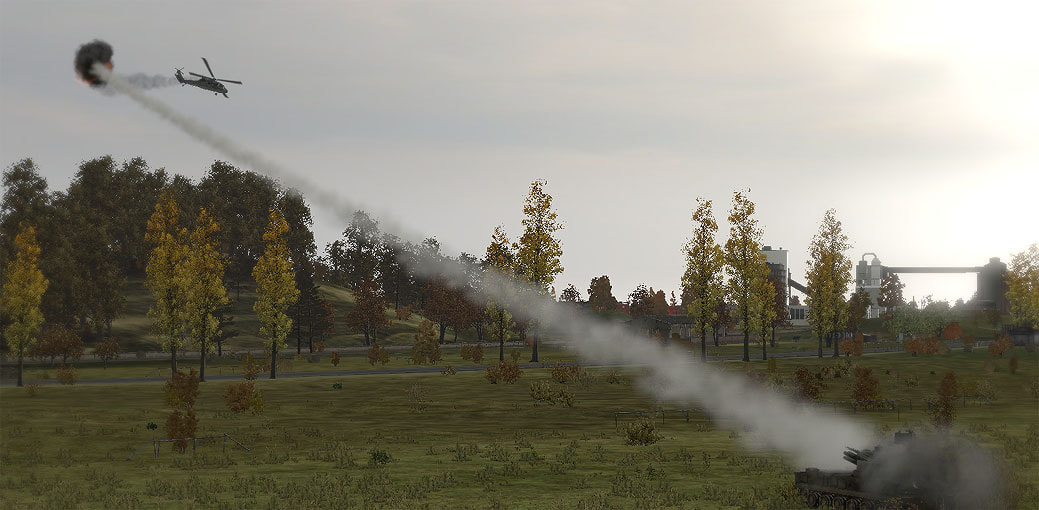
A Tunguska scores a hit on a Blackhawk via an AA missile. The helo went down hard into a collection of trees immediately thereafter.
The steps for reacting to a downed helo start as soon as it looks like an aircraft is going down. These steps are typically carried out by the pilot, navigator, copilot, or door gunner - the roles most likely to have a good visual on things.
1. Observe the crash. If the helo goes down in view of others, the speed of the helo upon impacting the ground, as well as whether it landed in trees/on rocks/etc, can give a good rough idea of whether any survivors are likely.
2. Identify the manner in which the helo was shot down. It could have been from SAF, HMGs, RPGs, missiles, etc. Knowing what caused the crash helps the other helos to change their tactics accordingly.
3. Communicate the threat type if known, and that a helo went down. Identify the helo if known (ie: "Bravo's helo"). Give an idea of whether there are any likely survivors.
4. If necessary, call out an LZ shift for the troop transports. For example, "LZs shift 500m west!", spoken so that all aircraft pilots can hear it, to ensure that the landing is not made in an area with unexpectedly heavy enemy activity. All that is needed is a compass direction and a distance, or a verbal description if appropriate to the terrain. This call requires a rapid evaluation of the enemy threat posed as well as sound judgment.
5. Continue with the landing. Getting troops on the deck becomes even more important if a helo has been lost - the longer they stay in the air, the more likely it is that another helo will go down.
6. If CAS is available, it can proceed to do a visual recon of the downed aircraft, to see if survivors are visible and provide close air support if so.
7. Once all troops are offloaded, if no CAS is supporting, a transport helo can be dispatched to do a visual recon of the downed helo. This aircraft can provide support via their defensive machineguns, but the enemy threat may make it impossible to orbit the area. For example, if a Tigris shoots down a helo, there's no reason for another helo to fly into that danger area - they can't help against a threat like that.
Bear in mind that the mission commander will be involved in the decision-making process for a downed helo scenario and will be giving orders as needed. The ultimate goal is to rescue any survivors of the crash, but it will be up to the commander as to how exactly that will be done, given the tactical situation at the time.
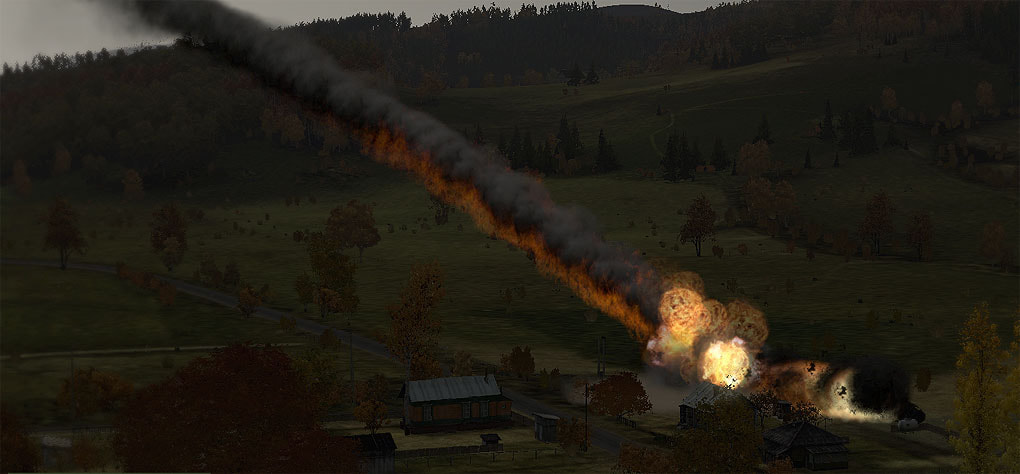
Sometimes it will be rather obvious that nobody walked away from a crash...
Actions On: Heavy LZ Contact
The other "worst case" scenario involves landing in heavy contact, where the helicopters are coming under concentrated and accurate fire before they get on the ground, or are ambushed upon landing.
The threat to the landing force must be rapidly evaluated. If the helos can land safely and offload their troops, and the troops will be in a position to effectively engage the enemy, the landing should continue as planned. If the threat is particularly high or the LZ has been compromised by the positioning of enemy forces, shifting LZs becomes necessary. Announcing an LZ abort or shift of LZs is critical to ensuring that trailing aircraft know not to continue their approaches.
Note that consideration must be paid towards any friendly elements that are already on the ground - if one helo disembarks troops and the second is shot down, the third should make every reasonable attempt to land close enough to support the players already on the ground. If all helos are on the ground and disembarking troops when an ambush is sprung, they may be faced with a tough decision - offload the rest, or abort the drop, hope that the people on the ground can hold out, and drop the rest of the troops close enough that they can move to support their comrades in short order and potentially attack a vulnerable flank or rear of the ambushing forces. Whatever the case, the decision must be made rapidly and announced clearly so that a coordinated response can occur.
Actions On: Emergency Landing
An emergency landing is typically the result of unexpected damage to the aircraft. Fuel leaks or damaged tail rotors can cause this, as can outright engine failure. It can happen anywhere - at the LZ, over random enemy territory, in friendly territory, and even over water.
The steps for dealing with an emergency landing are as follows.
1. Identify the type of emergency and begin immediate actions to deal with it.
• Fuel leaks are a problem when they make it impossible to get to the current destination. Fuel leaks are relatively easy to deal with, provided that you have time to fly out of hostile fire before setting down.
• Damaged tail rotors make landing very tricky. It is best to maintain a high speed to lessen the effect of the tail rotor, get out of enemy territory, and then find a nice, open field to land in.
• Engine loss is the most serious emergency. Autorotation must be immediately executed for there to be any hope of survival. Autorotation is covered in detail in the helicopter chapter of this guide.
2. Declare an emergency. The pilot will communicate on command channel that his aircraft is having a serious problem which requires an emergency landing.
3. Communicate where you are attempting to land, so that other helos and the Platoon Commander are aware of where to search for you.
4. Upon a successful landing, immediately get mounted infantry out and into defensible positions. Security is the immediate concern. If the landing position allows for the defensive guns of the helo to be employed, use the helo crew to man them.
5. Communicate with higher as to where the landing was made, the status of forces on the ground, and anything else relevant.
6. If wounded are present, establish an aid position from which any accompanying medical personnel can provide aid.
7. Make a decision to either guard the crash site and await pickup, or push out to a more defensible area. Act upon that decision and communicate it to higher.
8. Continue with the mission if possible, or await further guidance from the Platoon Commander.
Executing the Assault
Preflight
The final step before lift-off is the pre-flight checklist. This is done by the Air Assault Coordinator to ensure that every relevant step has been completed.
• Pilots have been given their LZs.
• Emergency drills, if different from SOP, have been decided on and briefed to all elements.
• Areas of responsibility upon landing have been given at both the platoon (per squad) and squad (per fireteam) levels.
• Rally points have been assigned.
• Elements have embarked as planned.
• Crew chief and door gunner positions are manned.
• Navigators, if required, are positioned appropriately.
• Element leaders have given confirmation and have accounted for their troops.
Conducting the Assault
Once the pre-flight checklist has been mentally and verbally run through (as necessary), the air assault coordinator gives the order and the helos take off to begin the airborne assault.
At this point the pilots of the assault elements move via their assigned routes to their respective landing zones, maximizing their use of the terrain to conceal their approach. Depending upon the forces available, an attack or recon helicopter may precede the transport helicopters to the LZs to sweep the area for enemies. Artillery can also be used to "prep" an area or lay smoke to conceal the landing from known or suspected enemy positions.
Having an attack helo orbiting the landing zone during an insertion allows for rapid support should the aircraft take fire near the LZ.
At the Landing Zone
Assuming that none of the above-listed contingencies happen (downed helo, heavy contact, emergency landing), the following steps take place at the landing zone.
1. The helo comes into range of the LZ and prepares to land. Speed and altitude drop accordingly. It is important that the pilot's approach is smooth and fast, as it minimizes the amount of time the embarked troops are in a vulnerable position.
2. The doorgunner and crew chief scan the LZ area and suppress any contacts as necessary. The helo crew scans vigilantly to ensure that the helo is not about to set down into an ambush. If they see anything suspicious, they immediately report it to the pilot.
3. Helo touches down at the LZ.
4. Pilot announces "Go, go, go!" loudly, which the senior infantry leader on the helo repeats. It is important to let the pilot make this announcement, since he is the one that knows whether or not the landing is complete. "Jumping the gun" and hopping out too soon can result in rather nasty falls.
5. Upon hearing "Go, go, go!", all infantry immediately dismount, and the door gunner and crew chief hold fire to avoid hitting any dismounting infantry. The door gunner, if apart of the infantry, dismounts after his fellow infantry are safely out. Note that when disembarking, every player should avoid crossing the door gunners' lines of fire if possible. Even though the door gunner and crew chief are supposed to hold their fire when troops are debarking, there may be times when they have to risk it and fire anyway. Obviously, running in front of something like an M134 can end your day in a real harsh way. To play it safe, players should do their best to avoid crossing the lines of fire of the doorgunner and crew chief. As a door gunner or crew chief, you should exercise a great deal of caution when firing in the five seconds after touchdown during which the troops are disembarking and moving out.


6. Senior element leader (ie: squad leader) oversees the dismounting process. He steps away from the aircraft a few paces, takes a knee if possible, and watches the passenger section of the aircraft.
7. All infantry immediately head to their assigned areas. A typical squad insertion involves the fireteams spreading out on either side of the landing zone to provide 360° security. Each fireteam moves away from the aircraft, spacing out and orienting outward to defend against any nearby threats. If hard cover and concealment is around, the infantry naturally integrate it into their movement and defensive plans.
8. When no troops are left on the helo, the senior element leader tells the helo pilot that ground forces are clear of the helo. The crew chief is also observing the cargo area and will tell the pilot as well - either can be used as the signal for lifting off.
9. The helo takes off. Upon hearing that ground forces are clear, the crew chief & door gunner resumes firing suppression of any enemy forces around the LZ. The pilot then begins his post-insertion mission, which oftentimes is that of aerial reconnaissance and support.
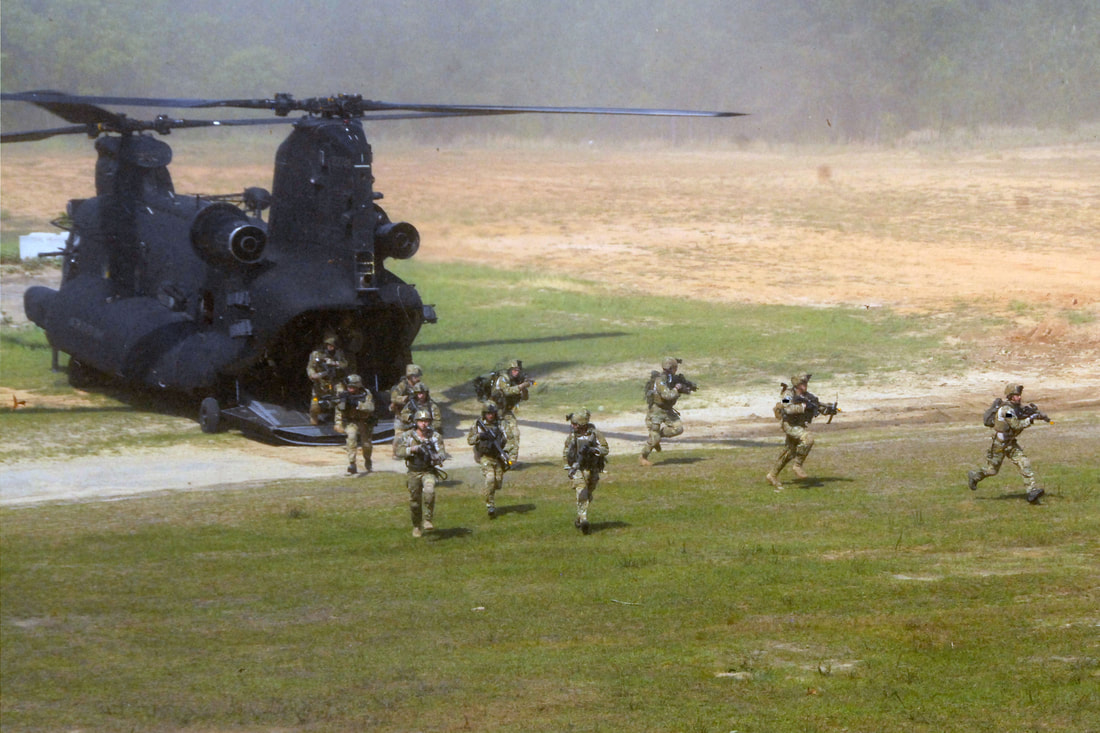
Assuming that everything goes according to plan, an entire platoon can hit an LZ, unload, set up a perimeter, and have their transport aircraft flying out of the LZ area in under a minute.
Extractions
Getting troops on the ground is only part of the problem. Oftentimes they will need to be extracted as well - sometimes from a clear LZ and sometimes from the midst of a heated firefight.
Helo extractions can take several forms. At the highest level you have a full multi-squad extraction of all friendly elements that requires several helos to achieve. At a lower level you may see an extraction of something like a scout/sniper team, forward observer, or other small element. The main point for the infantry on the ground is to do everything they can to minimize the risk of the helo being shot down when it comes in to make a landing. This requires good choices of landing zones, posting security, good lanes of fire and observation, and good communication and coordination with the helo.
Helo extractions can take several forms. At the highest level you have a full multi-squad extraction of all friendly elements that requires several helos to achieve. At a lower level you may see an extraction of something like a scout/sniper team, forward observer, or other small element. The main point for the infantry on the ground is to do everything they can to minimize the risk of the helo being shot down when it comes in to make a landing. This requires good choices of landing zones, posting security, good lanes of fire and observation, and good communication and coordination with the helo.
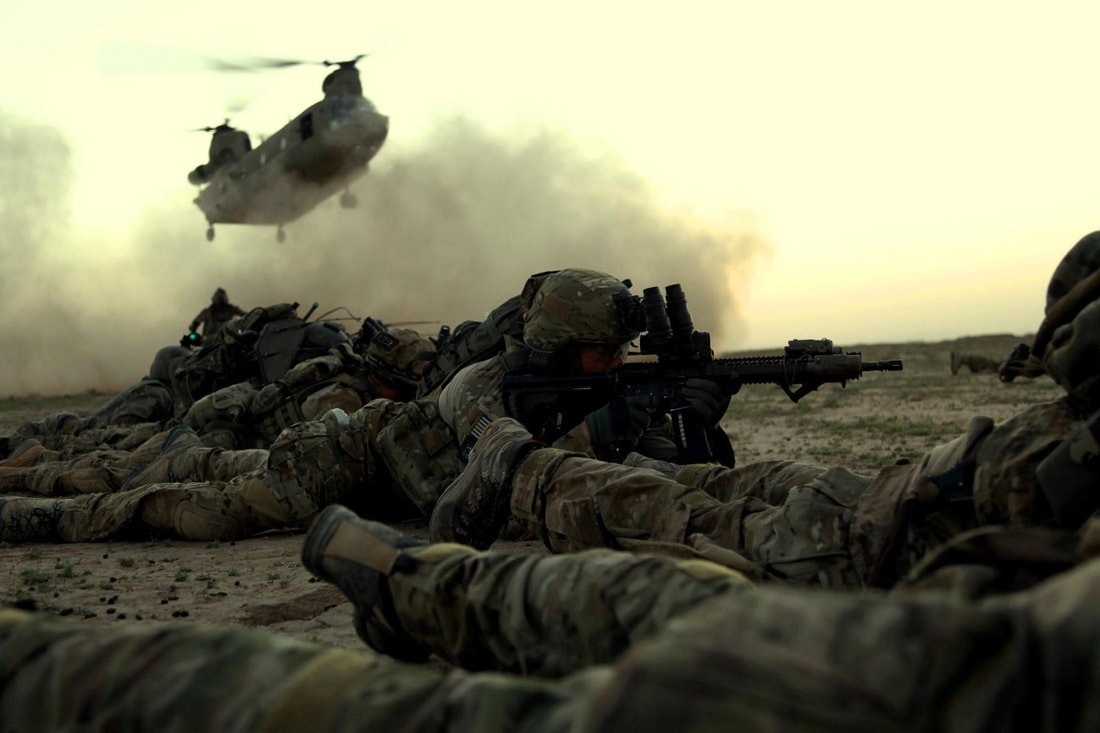
Procedure for Calling an Extract
1. First, give a heads-up to the pilot along with a general area he should start to head for. This allows the aircraft to be making progress towards the area before the specific LZ has been decided on.
2. Identify a good extraction area and mark an LZ on the map. Oftentimes the tactical situation will require you to choose an LZ that is difficult to observe and fire into. Forcing the infantry to run a bit further, provided that it reduces the chance that the helo will be shot down, is an acceptable side effect.
3. Communicate the LZ position to the extract helo(s). Use clear and concise language and ensure that you tell the helo about the situation at the LZ - specifically, mention any expected threats, whether the LZ is hot or cold, the terrain, and the intent in choosing it. For example - if you picked an LZ on a specific side of a hill, make sure that the pilot(s) know that you did so because you expect an enemy threat to exist on the other sides of the hill.
4. Move to and secure the landing zone. Clear the area of hostiles and think about where enemies could position themselves that would be a threat to the incoming helicopters.
5. Post security. Security elements will watch for the enemy and hold them off if necessary. They will be the last to board the helos. Security elements must be confident that their leaders will tell them when to board the helos, so that they can focus on providing security and not being distracted by watching the aircraft come in, land, et cetera. Typically the entire squad will be employed as the security element.
6. Guide the helo in verbally and visually and deploy a form of signal if available to help it on final approach. The senior element leader on the ground will communicate with the pilot to ensure that he is coming to the correct LZ. If operating in visually cluttered terrain, smoke can be deployed to help reduce the amount of time it takes for the pilot to locate the LZ. The senior leader on the ground will talk to the helicopter pilot until he has touched down, giving him feedback on where he is landing, where friendly troops are, where the enemy is expected to be, and correcting him as necessary.
7. Board rapidly and get out of there. Once the helo is on the ground, security elements are called in and board the helicopter. The process of boarding must be done very rapidly, with each team leader guiding his teammates to the helicopter as quickly as possible. The last person in should be the overall element leader, who is accountable for his troops. Once they're in, he boards the aircraft and loudly states "We're in, go, go, go!", at which point the helo takes off and the crew chief and door gunner, if available, fire heavy suppression to cover the aircraft as it gains speed and altitude.
Working with Close Air Support
Close air support (CAS) is the use of aircraft to directly support ground forces. It comes in two main forms - that of fixed-wing (jet) support, and rotary-wing (helo) support. Both have their pros and cons, and both are major force multiplies for the infantry. This section will cover the basics of CAS and how it is employed by the Fighting Eleventh.
Pros & Cons of Close Air Support in Combined Arms Operations
The pros and cons of CAS in the combined arms fight are as follows.
Pros
• Great effects on target. CAS assets carry tremendously powerful munitions. When they are delivered accurately, they are capable of destroying anything on the battlefield.
• Hard to defend against as ground forces. Unless the enemy has organic or supporting anti-aircraft defenses such as surface-to-air or MANPAD missiles, defending against good CAS pilots is incredibly difficult for them. Combining CAS pressure with ground force pressure is an even more difficult threat for the enemy to try to deal with.
• Can be very precise when employed properly. With a good FAC and a good CAS pilot, powerful munitions can be delivered with extreme accuracy. Throw in laser-designation and it becomes even better.
Cons
• Vulnerable to enemy anti-aircraft defenses, particularly SAMs and MANPADs. It is often mandatory to destroy any enemy anti-aircraft sites in an area before CAS can operate freely in an area. Some threats - such as MANPADs - are much harder to purge from the battlefield, which forces the CAS aircraft to continually keep an eye out for the threat indicators that such systems present.
• Can cause significant friendly fire incidents if good air-ground comms are not maintained. If the FAC cannot properly describe friendly locations to the CAS aircraft, or give good target indicators to guide the CAS aircraft onto the enemy, the risk of friendly fire becomes significant. Considering the power of most CAS munitions, a bad drop can wipe out an entire friendly squad or more in the blink of an eye.
• Can take time to get them onto the right target. The more confusing the on-the-ground situation is, the longer it can take to 'talk' a CAS aircraft onto the right enemy target. Rushing this can easily cause a friendly-fire incident, too.
• Can take time for them to get on-station. CAS aircraft may not always be able to orbit the battlefield for the duration of a fight, due to fuel or rearming considerations. It is important for the FAC to know the status of each CAS aircraft and the likely delay between calling for a strike and having it occur.
• Without laser designation for some munitions, effects may be unpredictable. Laser-designation is by far the best way to get reliable, on-the-mark terminal effects. Without it, depending on the terrain, visibility, and the ground situation, the effects of some munitions - particularly bombs - may not be as predictable as otherwise.
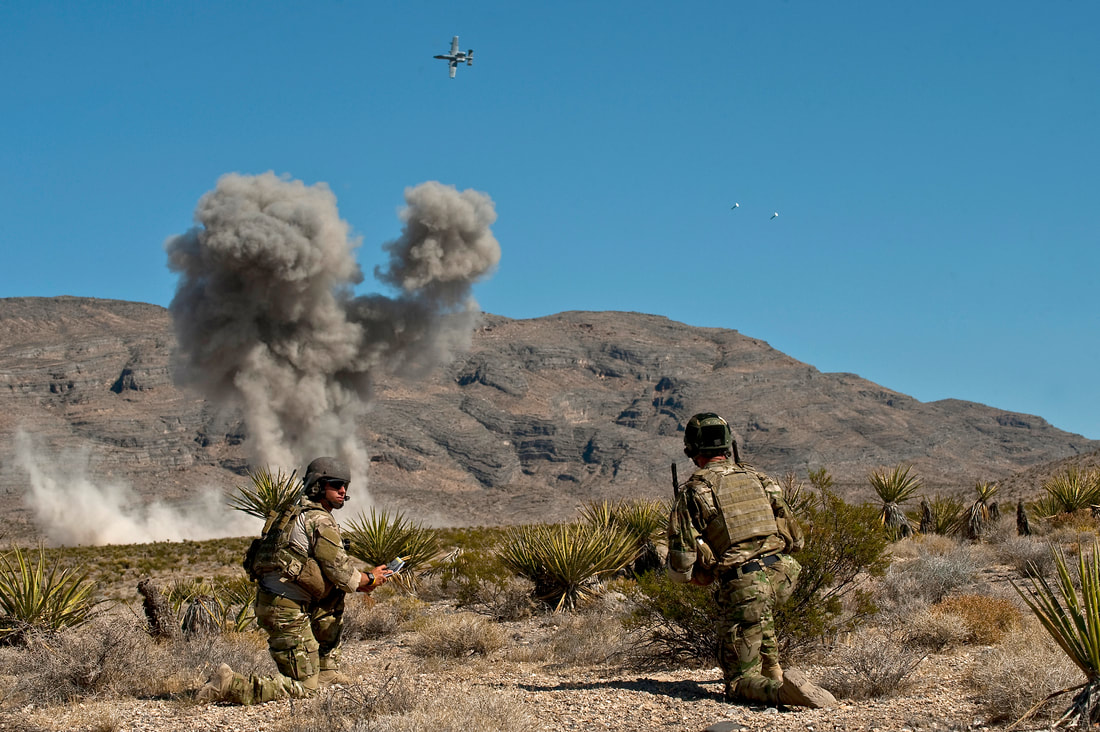
The Forward Air Controller (FAC)
A "Forward Air Controller " or "FAC", otherwise known as a "Joint Terminal Attack Controller" or "JTAC" is a player who is tasked with coordinating air elements in the support of ground forces. The FAC is expected to be knowledgeable in the employment of any CAS elements, be they fixed-wing (jets) or rotary-wing (helicopters). The more familiar the FAC is with the aircraft, the better he will be able to direct its employment. The best FACs typically have extensive experience as a CAS aircraft pilot.
The primary job of the FAC is to locate enemy targets and call in air strikes on them. He acts as the 'eyes on the ground' for the CAS aircraft and increases the effectiveness of the air support with the information he is able to relay to the aircraft.
It is of great importance that a FAC is used when player-controlled aircraft are operating in a close air support role. Without his support, the CAS aircraft cannot reach the same level of responsiveness and effectiveness.
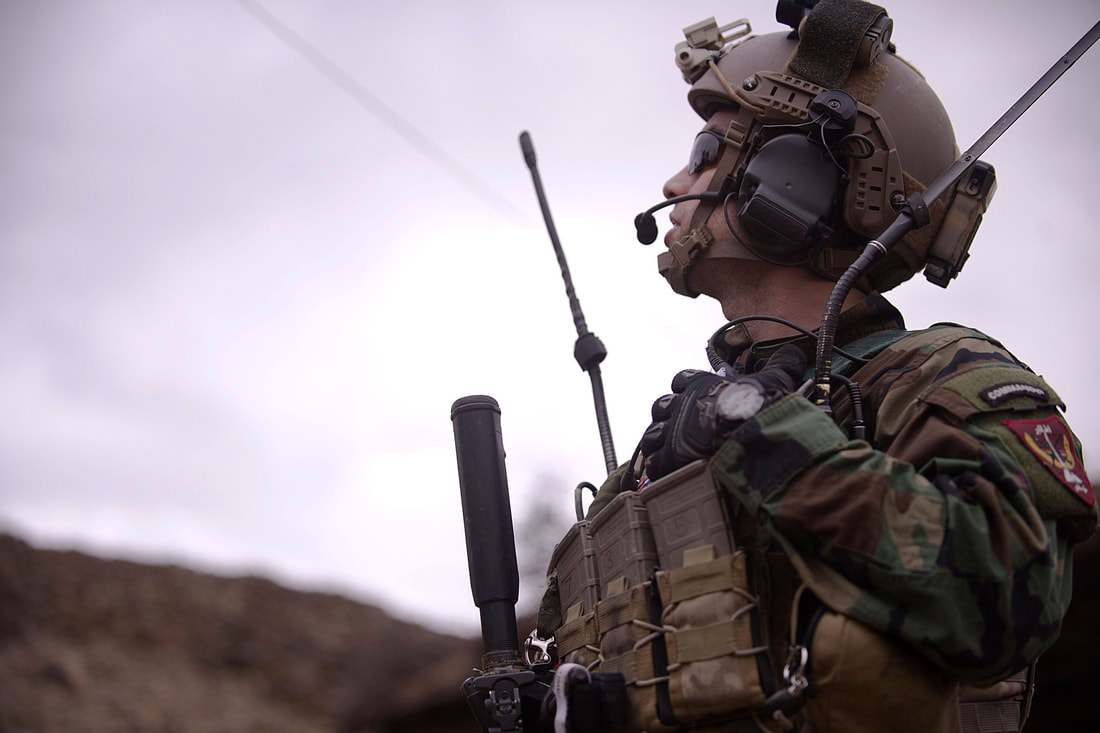
Considerations for the Forward Air Controller
• Ensure that friendly forces are clear of the target being attacked. 300 meters worth of distance is usually sufficient.
• If the strike is going to land within 300 meters of friendly forces, ensure that you inform the CAS Aircraft of this. This is known as a "Danger Close" strike and requires extra coordination and finesse to ensure that friendlies are not struck.
• Ensure that the CAS Aircraft makes his run parallel to friendly positions when employing bombs, rockets, or guns. This lessens the likelihood for a 'short' round to impact friendly forces and cause casualties.
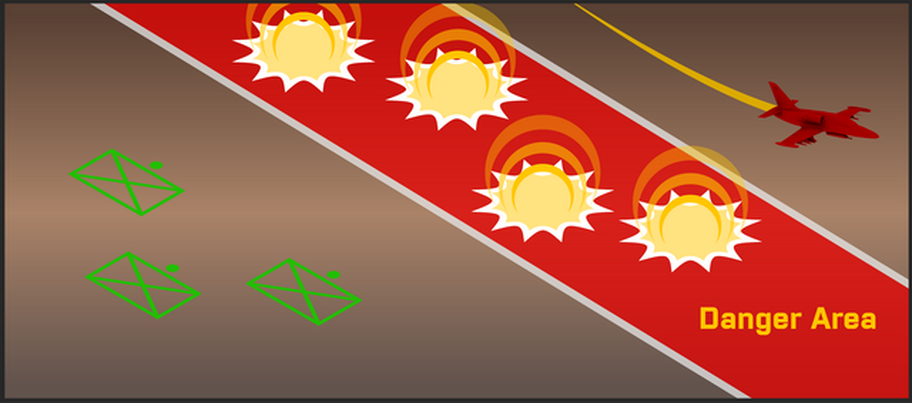
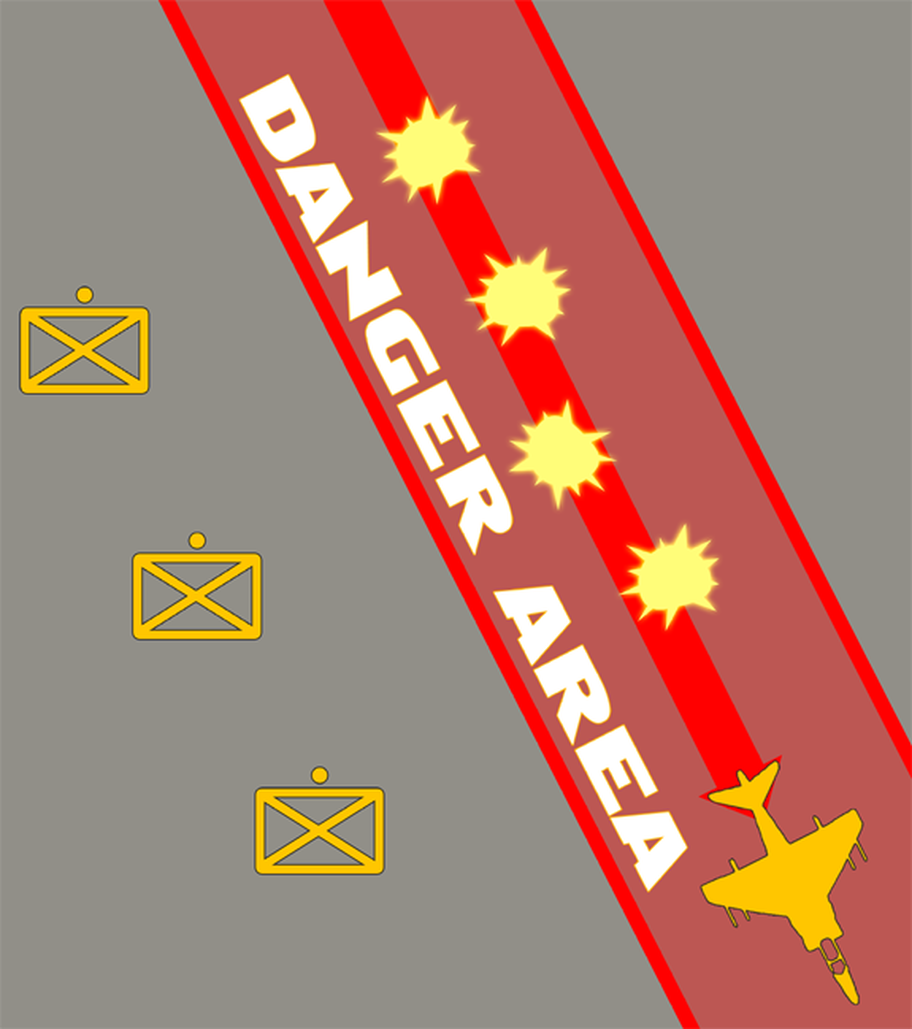
• Give the CAS aircraft an approach/egress direction if necessary. For instance, if you suspect that there are anti-aircraft guns positioned in one direction, give the aircraft an egress direction that will keep them from flying into that danger area.
• Give a battle damage assessment (BDA) after each run. This lets the aircraft know the effects of his munitions. Tell the pilot what he hit, how much damage he did, and let him know how accurate his attack was. "Good bombs"/"Good hits"/etc can be used to quickly and concisely tell the pilot that the strike was on-target without having to wait to determine the precise results of the attack (assuming that visibility even allows for precise BDA). An example of a more in-depth BDA is as follows:
• Give a battle damage assessment (BDA) after each run. This lets the aircraft know the effects of his munitions. Tell the pilot what he hit, how much damage he did, and let him know how accurate his attack was. "Good bombs"/"Good hits"/etc can be used to quickly and concisely tell the pilot that the strike was on-target without having to wait to determine the precise results of the attack (assuming that visibility even allows for precise BDA). An example of a more in-depth BDA is as follows:
FAC: "Hawg, good bombs on target, BDA 50/50. One APC knocked out, the other is currently running north by north-west along the canal. Repeat your attack and take out the fleeing APC. Advise you approach from the south south-east if possible, over."
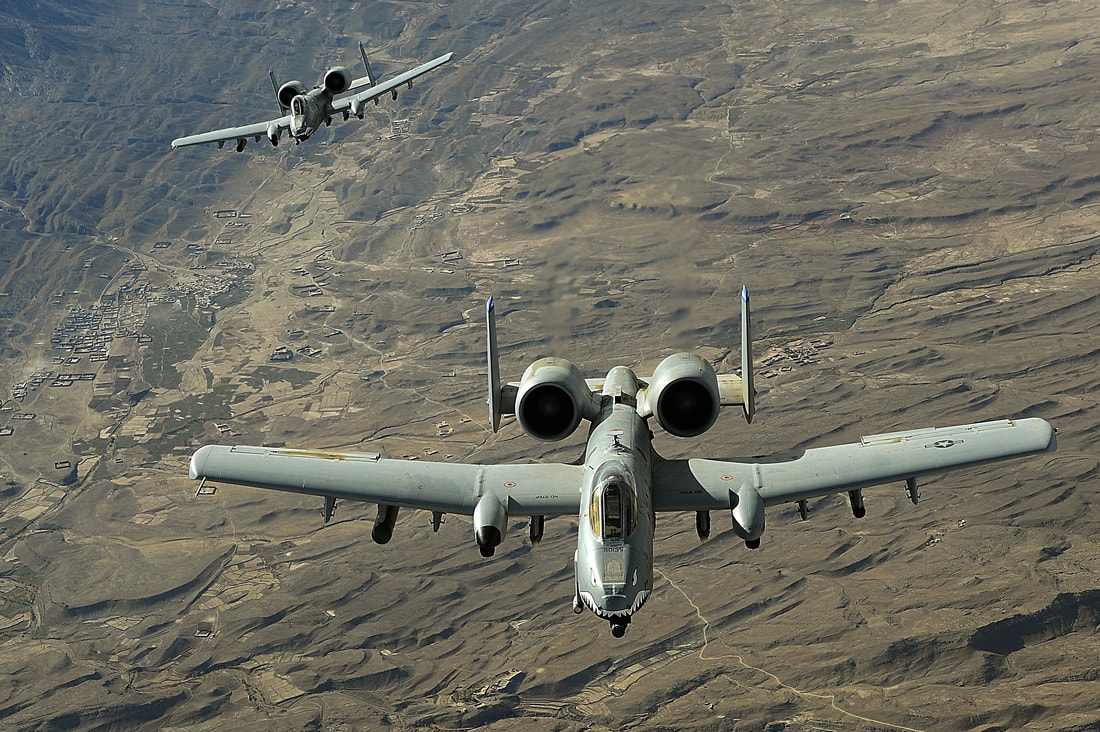
The CAS Request
A standard CAS request is as follows. This can be expanded on or condensed as the situation dictates - this should simply serve as a guideline of what information can be useful and how to present it.
In order to effectively understand the message, the FAC should break it up into pieces so that the CAS pilot can digest the information more coherently. Once the call for fire has been transmitted, the CAS pilot should give a readback to the FAC to ensure no mistakes were made.
1. Establish comms with the aircraft. This call allows for the CAS aircraft and FAC to establish that CAS is needed and warn the pilot that the full CAS request will follow. This is typically where the FAC will also request the pilot to move to an IP or a BP.
"Hawg, this is _______, requesting immediate CAS"
2) Establish Routing/Safety of Flight. Routing and Safety of flight is the very first thing established after the FAC checks in with the aircraft. The aircraft will receive information regarding safe areas or zones such as; aircraft deconfliction, known anti-aircraft threats in the area and stealth. The controller will then request the pilot to move to a specific holding point (IP or BP) based on the type of aircraft.
"Hawg, be advised; no known AA at this time. Request you move to IP Tango"
3. Conduct Check-in. The controller will request a check-in. A check-in the information the aircraft will pass to the ground controller. It will detail the ordnance the aircraft has on board, playtime (time remaining on station) and capabilities.
The CAS Check-in format is as follows:
• Callsign and Number/Type of Aircraft — How many and what kind of aircraft.
• Position/Altitude — Where the aircraft is when he is checking in, and what altitude he is operating at.
• Ordnance — What bombs/missiles he has onboard.
\
• Playtime — Amount of time the aircraft has on station in relation to fuel.
• Capabilities — What equipment he has, like NVGs, laser targeting pod, etc.
• Abort Code — What code is to be used for aborts, or if it is in the clear.
"Hawg Checking in a flight of two A-10s, motoring west, 20 miles, at Angels 12. Ordnance to follow: 4 laser Mavericks, 2 HARMs, 6 by GBU-12s, 800 rounds a piece. 0+40 Time on Station. Ready for tasking."
4. Give Aircraft 'Situation' update. A quick update of the ground situation will be sent from the ground controller to prepare the aircraft for the upcoming engagement. This usually includes;
• Threat Activity
• Target/Enemy Situation
• Friendly Situation
• Clearance Authority
• Hazards
• Restrictions / Remarks
"Be advised, taking heavy contact 300 meters to our north. We are an infantry squad in a treeline to the east at RP4. We are requesting rockets and bombs on target "
5. Give Game Plan. A Game Plan is the overall plan of how the ground controller wants to strike a target, and with what ordnance. A Game Plan includes:
• Type of Control (Type I, II or III)
• Method of attack
(Bomb on Coordinate or Bomb on Target)
• Ordnance/Effects desired
• Time interval, if appropriate
At a minimum, game plans must include Type of Control and Method of Attack.
"Game plan is as follows, this will be a Type III control, bomb on coordinate. Requesting 3x GBUs and rockets immediately, over."
An example of how that might be condensed in a gaming environment is as follows:
FAC: "Hawg, this is Checkmate FAC, requesting immediate CAS.
Pilot: "Checkmate FAC, Hawg copies all. Send traffic."
FAC: "Hawg, be advised; no known AA at this time. Request you move to IP Tango"
Pilot: "Hawg copies all, moving to IP Tango. Standby 3"
Pilot: "Hawg set at IP Tango, send your traffic."
FAC: "Hawg, requesting check-in"
Pilot: "Hawg Checking in a flight of two A-10s, motoring west, 20 miles, at Angels 12. Ordnance to follow: 4 laser Mavericks, 2 HARMs, 6 by GBU-12s, 800 rounds a piece. 0+40 Time on Station. Ready for tasking."
FAC: "Be advised, taking heavy contact 300 meters to our north. We are an infantry squad in a treeline to the east at RP4. We are requesting rockets and bombs on target "
Pilot: "Solid copy, send game plan"
FAC: "Game plan is as follows, this will be a Type III control, bomb on coordinate. Requesting 3x GBUs and rockets immediately, over."
Pilot: "Affirm, send 9-line"
The 9-Line
At this point, this is where the pilot will request the forward air controller to utilize a 9-line or 5-line process, depending on whether it's a fixed-wing or rotary-wing aircraft, respectively.
1. Describe the initial point. This is the location that the strike will start from, ideally you should use map markers for reference.
"IP Tango"
2. Direction from IP to Target. This is typically the bearing in degrees from the IP to the target.
"Bearing 223"
3. Distance from IP to Target. Describe how far the target is from the aircraft.
"2.5 klicks"
4. Target Elevation. If possible, give the elevation.
"Elevation 25"
5. Describe the target. The FAC gives a brief description of the target to be attacked. This helps to give the CAS aircraft an idea of what ordnance he will use.
"Target is an enemy infantry squad"
6. Describe the target location. The FAC clearly describes where the target is located. Map markers are good to use for this, combined with some kind of visual reference that can be seen from the air.
"Grid reference '064 193"
7. Marking Method. Mark the target with equipment such as laser designator, by IR pointer, by smoke, flare, etc. Map markers also work for this.
“Marked by Laser”.
8. Friendly position. This given in a simple direction and distance from target to friendlies. Try to avoid using grids.
"Friendlies are 300m to the South, danger close”
9. Egress Instructions. Directional guidance after the strike is complete. Aircraft may be instructed to stay at the overhead or move to an IP for safety.
"Egress East to West"
10. Elaborate additional remarks as necessary. Anything not covered already, as time and the situation allow.
"Remarks as follows; enemy is all over the treeline"
An example of how that might be condensed in a gaming environment is as follows:
FAC: "9-Line is as follows:
"IP Tango;"
"Heading 223;
Distance 2.5 klicks"
"Target Elevation 25"
"Target is an enemy infantry squad all over treeline;
Grid reference '064 193;"
“Marked by Laser”.
"Friendlies are 300m to the South, danger close”
"Egress West"
"End 9-Line, over"
...
Pilot: "Copy, IP inbound."
FAC: "Laser on. Call contact? Over"
Pilot: "Contact, Hawg on target."
FAC: "Solid copy, continue. Over?"
Pilot: "Wings level"
FAC: "Cleared to engage."
Pilot: "Roger. Bombs away, bombs away."
Second pilot: "Dash 2 wings level."
FAC: "Roger. Dash 2 cleared hot."
Second pilot: "Maverick away."
FAC: "Hawg, egressing west, standing by for BDA, over."
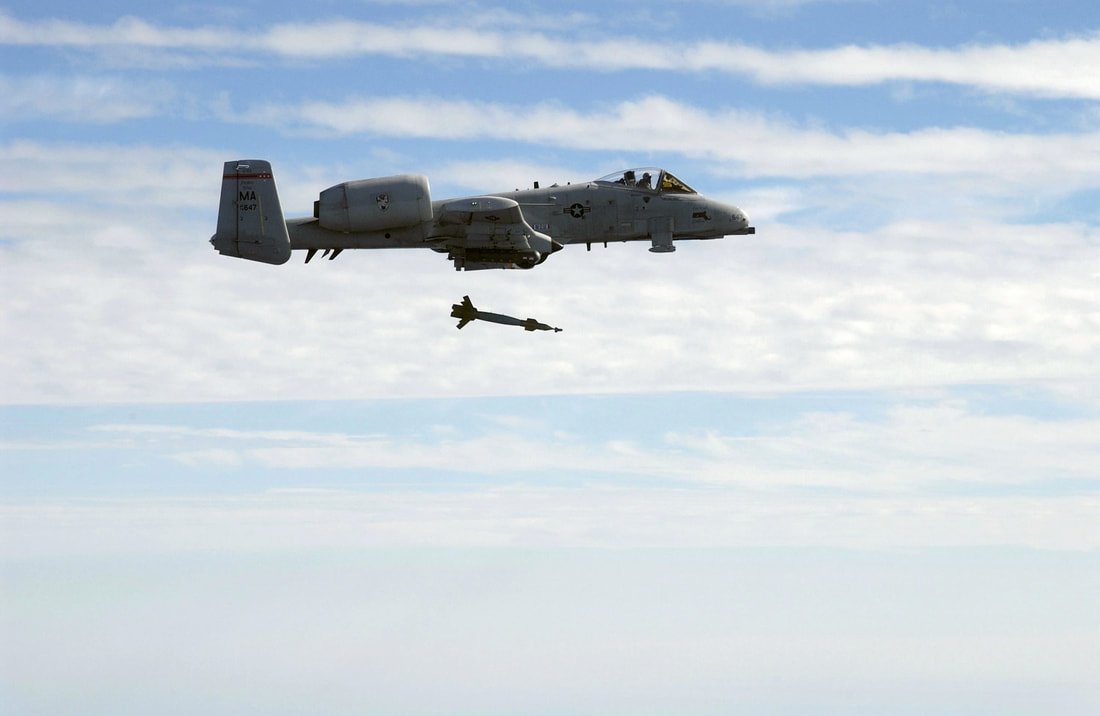
The 5-Line
The only big difference between rotary-wing and fixed-wing CAS is the fact that battle points are used instead of initial points. Typically, rotary-wing attack aviation is used more effectively as overwatch and are very friendly centric, meaning as long as they know where friendlies are, they can get strikes off faster, as they fly a lot closer to friendlies and generally have better situational awareness.
The helicopter CAS 5-Line is used to expedite strikes when rotary-wing pilots have improved situational awareness of the friendly situation on the ground. Note; the same format is utilized for gunships, and close combat attack aircraft.
1. Establish the Warning Order. The warning order informs the attacking aircrew they are about to receive an attack brief. For RW CAS 5-lines, this warning order should contain the game plan information found in a standard attack brief, type of control, and method of attack, and may include ordnance requested. Interval will generally not apply to a 5-line. This line can be skipped if the game plan has already been established.
"Ugly 3-5, Broadsword 1-1, 5-line, Type 2 control, BOT, rockets and guns"
2. Friendly Location/Position Marking. The FAC should pass the friendly observer location and how it is marked if applicable. FACs should avoid passing friendly grids, instead using named locations, map markers or references.
"Friendly position is Checkpoint 925 marked by IR strobe"
3. Target Location. The FAC passes the target location using direction, distance and/or coordinates.
"Northwest 200"
4. Target Description/Marked By. Target description should be specific enough for the aircrew to find and identify the target, yet concise and brief. Further details may be passed as the aircrew is ingressing. Type, number, orientation, and degree of protection is a good format. If the target is marked, how it is marked should also be passed.
"Single technical vehicle marked by IR SPARKLE"
5. Remarks
The remarks section should include other information necessary for a safe and effective attack.
"Make all attacks over my right shoulder, left pull, keep all effects of fires west of MSR Clovis.”
An example of how that might be condensed in a gaming environment is as follows:
FAC: “Ugly 3-5, Broadsword 1-1, 5-line, Type 2 control, BOT, rockets and guns"
"My position is checkpoint 925 marked by IR strobe"
"Northwest 200, single technical vehicle marked by IR SPARKLE"
"Make all attacks over my right shoulder, left pull, keep all effects of fires west of MSR Clovis.”
Pilot: “Ugly 3-5 copies over your right shoulder, left pull, keep all effects of fires west of MSR Clovis, pushing.”
FAC: “Ugly 3-5, continue.”
Pilot: “Ugly 3-5 and flight, VISUAL, TALLY, IN.”
FAC: “Ugly 3-5 and flight, CLEARED HOT.”
CAS Terms & Meanings
There are several standardized words and phrases used when communicating with the aircraft. They're broken down below into "Terminal Control" and "General" sections.
Terminal Control
• Method of Attack (MOA)
The method of attack is not specific to a type of control, ordnance, or aircraft and may be different between aircraft in a flight.
• Bomb on Coordinate (BOC)
Bomb on Coordinate attacks are used when the FAC determines that he can create the desired effects against that target with CAS aircraft and ordnance employing on a specified set of coordinates. CAS aircraft are not required to tally / contact / capture the target when conducting BOC attacks.
• Bomb on Target
Bomb on Target attacks require the aircrew to tally / contact / capture the FAC's intended target or aim point.
• Weapons Release Authority
The authority and responsibility for the expenditure of any ordnance rests with the commander of the mission. The commander will then delegate weapons release clearance authority to FAC to facilitate CAS attacks.
• Laser On.
Used by the aircraft pilot to request that the laser designator be switched on. Once it's on, the FAC calls "Copy, laser on" at which point the aircraft attempts to acquire the target.
• Laser Off.
Laser designator has been switched off. Aircraft must give a "Laser on" command for the FAC to designate again.
• Cleared hot.
This call informs the CASA that they are authorized to release munitions. Typically this will not be used in a gaming environment, but it's something to keep in mind.
• Continue dry.
This call is given either by the FAC or the CAS Aircraft. "Continue dry" simply means that the aircraft is going to fly an attack run but not release ordnance. This can be the result of an abort call or when circumstances make it likely that ordnance release at that particular time will be less than desirable. If the FAC tells the CAS aircraft to "Continue dry", the CAS pilot should reply with "Roger, continuing dry" to let the FAC know that he understood the message.
• Abort, abort, abort.
CAS Aircraft must break off the attack. Munitions release is not authorized. This can be used, for instance, if the FAC sees that the CASA is about to attack the wrong target, friendly positions, or if other negative circumstances will degrade the strike's effectiveness beyond usefulness.
• Type 1
Type 1 requires the JTAC to see both the fighter and target throughout the attack to ensure the fighter is attacking the right target. This is the most common and restrictive of the three types. Type 1 is most often used when friendly forces are "danger close". Each pass must be cleared.
• Type 2
Type 2 only requires the FAC to see either the target or fighter. After the fighter calls “in”, the FAC will give a “Cleared Hot” call for either of these scenarios. Type 2 Control is utilized when either visual acquisition of the attacking aircraft and/or target at weapons release is not possible or the aircraft are not in a position to acquire the mark/target prior to weapons release / launch. The FAC must clear each pass.
• Type 3
Type 3 control is the least restricted control type. It is used when the FAC requires the ability to provide clearance for multiple attacks within a single engagement. Used when multiple strikes in a row are needed. The clearance call for a type 3 is “Cleared to Engage”. The FAC doesn’t have to see either the target or fighter. Only the first pass needs to be cleared The most common types of CAS control are type I and II. Type III is rarely used especially in a COIN fight, where the avoidance of civilian casualties are paramount.
• Time on Target (TOT)
TOT is a time at which the aircraft bombs are to impact the target and around which supporting surface fires can be coordinated.
• Time to Target (TTT)
TTT establishes a precise number of minutes and seconds that elapse between an established time hack and bombs on target.
• Initial Points
IPs are normally located from 5 to 15 kilometers from the target for fixed wing aircraft. High altitude aircraft may require IPs in excess of 20km from the target.
• Battle Positions
BPs are set 1-5 kilometers (km) for rotatory wings aircraft.
• Delivery Prowords
The words "CLEARED", "HOT" and "ENGAGE" will be used only by the FAC and when ordnance is actually to be delivered.
General
• Bombs away.
Bombs have been dropped. When utilizing laser guidance, this notifies the FAC that the bombs are falling and that laser designation must be maintained until impact. When in a "danger close" situation, this can be used to notify the friendly ground forces to take cover.
• Visual.
CAS aircraft has spotted friendly positions.
• Blind.
CAS aircraft cannot spot friendly positions.
• Tally.
CAS aircraft has spotted hostile targets.
• No joy.
CAS aircraft cannot spot hostile targets.
• Winchester.
CAS aircraft is out of munitions.
Target Designation with Lasers
Lasing a target is by far the best method for CAS strikes. There are a few guidelines to keep in mind when utilizing this method.
• Do not turn on the laser until the CAS aircraft calls for it. This will typically be when the aircraft is ten seconds out from the target. Turning it on early only increases the chance that the enemy will detect it and attempt to evade.
• The laser spot is visible to the enemy if they're looking for it. If necessary, lase something near the target, out of view of the enemy. Once the aircraft acquires the laser and is moments away from dropping their ordnance, shift the laser directly onto the enemy position. This will give them much less time to react in the event that they spot the dot. Ensure that the distance shifted is not so high that it causes trouble for the strike aircraft. The laser dot is hardest to see during the daytime, but can stand out brightly when viewed at night or when under nightvision.
• Ensure that your laser is splashing on the target, and is not obstructed by something closer to you (ie: a bush, tree, wall, etc). If you don't see the laser shining on the target in conditions where it should be visible, shift around until you do, or until you're absolutely positive that you are not accidentally lasing your own position.
Target Designation without Lasers
CAS without laser designation is a bit trickier. Follow these guidelines
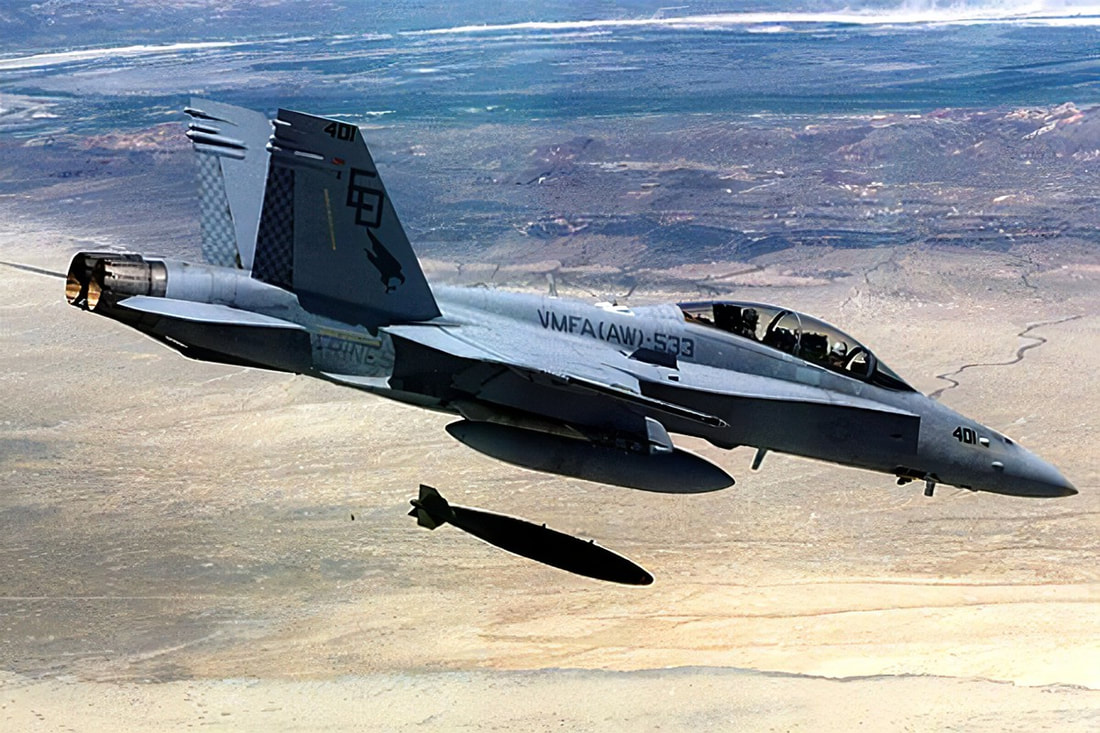
Guiding with Map Marks
Map markers are as accurate as the player placing them, and with good players, they can be pin-point precise. The main problem with map marks is that it requires the pilot to spend time looking at the map, which can be problematic.
Guiding with Landmarks
Depending on the type of landmark and distance of the target from it, landmarks can be either excellent or merely acceptable guides. The key thing to keep in mind is that the landmark must be something that can be easily seen from the air. The type of air asset (jets naturally are moving much faster than helos) will dictate what type of landmark is suitable. Landmarks can be natural parts of the terrain (ie boulders, a prominent cluster of trees, the bend of a river) or man-made (buildings, destroyed vehicles, smoke columns).
Guiding with Munitions or Smoke
This is the least desirable way to orient aircraft on a target, since it typically alerts the target and gives them a bearing on friendly forces. In a pinch, infantry can utilize smoke (preferably launched via a UGL) or a M32 to designate a target for aircraft. Tracers can also be used to designate targets. Guiding a CAS strike with munitions can be very difficult, and should be avoided when possible. Efforts should be made to accomplish the guidance in another fashion before resorting to this, particularly when stealth is a concern.
The CAS Aircraft/Pilot
Flying as a CAS pilot is a demanding but ultimately enjoyable role. As a CAS pilot you have the capability to dramatically influence the course of a battle with the timely delivery of your ordnance. Becoming a proficient pilot takes time and is best done offline at first, with simple bombing scenarios and navigational drills to get you up to speed on how best to approach targets, navigate, deliver dumb ordnance, etc. The finesse comes in putting this into play in a live session and being able to communicate with ground elements and safely put bombs on target without friendly casualties. To that end, here are a few CAS tips.
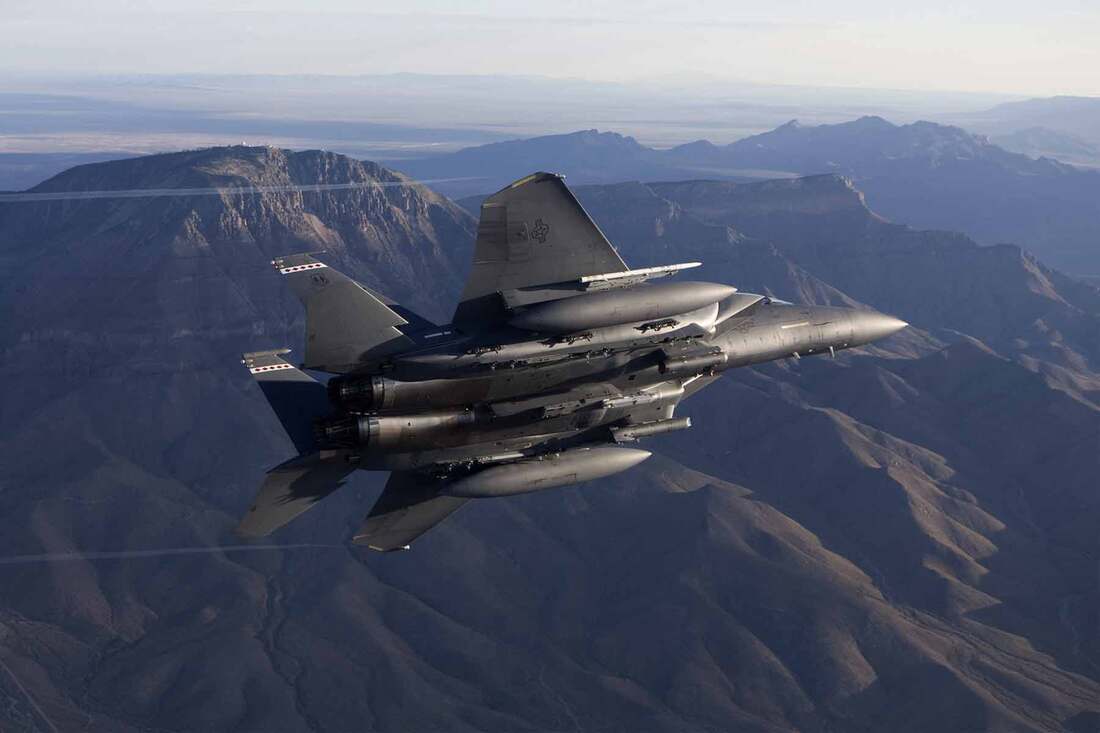
Basic CAS Aircraft Guidelines
• Ensure that you have your keybinds set up properly in advance. You will want to bind the following controls at a minimum: Lower/Raise Flaps, Lower/Raise Gear, Eject.
• TrackIR is a godsend if you plan to fly aircraft (be they jets or helos) with any frequency. I highly recommend that people interested in flight check it out.
• Know how to use your flaps. Flaps provide additional lift and stability to the aircraft when operating at slow speeds. They are extremely valuable for gun or rocket runs in a low-threat environment.
• Know how to conduct a check-in brief & readbacks.
This is done to ensure that the Forward Air Controller knows what ordnance you have on board and what you understood from his messages. Be sure to include number and type of aircraft, direction, altitude, ordnance, and how much time they are available for.
An example of this might be;
"FAC, this is Hawg. Checking in a flight of one A-10, motoring west, 20 miles, at Angels 12. Ordnance to follow 6 laser Mavericks, 2 HARMs, 6 GBU-12s, 1000 rounds a piece. 0+40 Time on Station. Ready for tasking"
• By default, pressing "T" will lock targets, while "R" will cycle through targets for any ordnance that can acquire a lock (ie LGBs, Hellfires, etc).
• When view distances are low and navigation becomes difficult, roads can be followed at low-altitude to get you to a target town. The benefit of this is that the road will run through the town, which means you will automatically be aligned with the town simply by following the road.
• When view distances are high enough, flying at altitude while inverted can give you a great view of the terrain below.
• Don't rush a drop. If you can't acquire a laser designator target fast enough to align and drop ordnance properly, make another pass. Rushing tends to cause bombs to be ineffective or cause friendly casualties.
• Make attack runs parallel to friendly troops whenever possible. This helps to prevent long or short rounds or bombs from impacting in friendly positions.
• Dive to increase your accuracy in bomb delivery. Coming in from higher altitudes and diving towards the target can do a great deal to increase the accuracy of dumb munitions. Even laser-guided bombs can benefit from this tactic. Alternatively, use a pop-up attack method to deliver your ordnance - fly in low, pop up before the target, then dive to attack.
• Shift-clicking on the map will give you a visual waypoint in your HUD. This can be used to keep track of friendly positions, associate a map marker to a terrain position, etc.
• Laser marks can be used to guide you onto a target even if you are out of laser-guided bombs. Simply switch to the bombs, acquire the laser target, align on it, and make an attack run. When you are within gun range, switch to guns and you should be aligned on where the laser mark was and ready to engage whatever target was being painted by it.
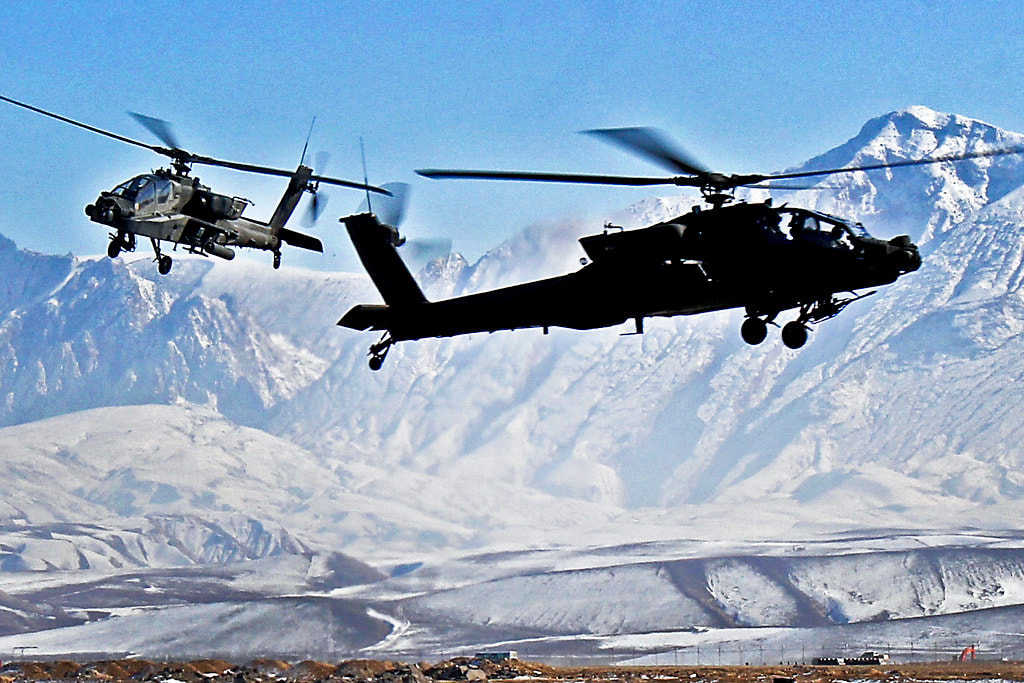
CAS Munitions
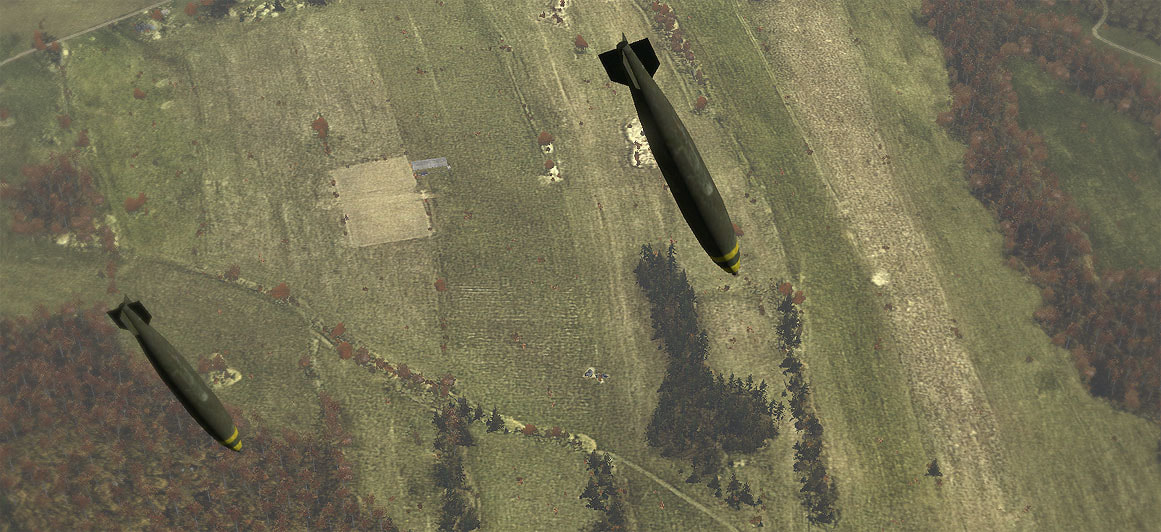
Folding-Fin Aerial Rockets (FFARs)
In Arma, these are a bit more powerful and precise than their real-world counterparts and are quite useful weapons. FFARs give an aircraft a large number of high-explosive warheads which can be fired with good precision at the enemy. They have a moderate blast radius and are very effective against infantry, vehicles, and light armor. These are best employed from rotary-wing aircraft, but still pack a punch when employed from fixed-wing craft. FFARs can be used effectively in any quantity required, from a few rockets fired at a single target to an entire barrage being placed on an area target.
Guided Rockets
CAS Aircraft are typically armed with Direct Attack Guided Rockets (DAGR) that can lock onto and guide towards ground targets. These rockets have limited maneuverability and a narrow launch cone - fast-moving ground vehicles or large amounts of correction required will tend to cause them to miss their target.
Anti-Tank Guided Missiles (ATGMs) & Air-to-Ground Missiles (AGMs)
Hellfires and Mavericks fall into this category. They are lock-on, fire-and-forget (in Arma) missiles that are perfect for knocking out tanks and other priority vehicle targets.
The AGM-65 "Maverick" series are fired by fixed-wing aircraft and can knock out anything on the battlefield with a single hit. TOWs and Hellfires are carried by helicopters, by comparison, and do a slightly lower amount of damage that is generally capable of taking out armored vehicles with a single hit.
The AGM-65 "Maverick" series are fired by fixed-wing aircraft and can knock out anything on the battlefield with a single hit. TOWs and Hellfires are carried by helicopters, by comparison, and do a slightly lower amount of damage that is generally capable of taking out armored vehicles with a single hit.
'Dumb' Bombs
These come in a variety of sizes, from 500 to 2000 pounds. They are a bit on the difficult side to be accurate with, due to the lack of a CCIP (continuously calculated impact point) feature on the heads-up display - though some realism mods do introduce such functionality. However, if you can get these to land close to a target, you'll probably obliterate it. These are extremely effective in the urban environment, against all types of vehicles, and of course against infantry. Most buildings can be flattened by 'dumb' bombs, killing everything inside of them in the process.
Laser-Guided 'Smart' Bombs
Same as the dumb bombs, except fitted with guidance fins and a laser tracking package that allows them to guide in on a spot of reflected laser energy. With proper employment these are the deadliest CAS munitions around. Landing one of these on-target will obliterate it and everything around it. The only tricky part is practicing good FAC/CASAP coordination to ensure that the right target is lased, and that the delivering aircraft is able to drop the bomb where it's needed.
Cannons
The effectiveness of CAS cannons depends largely upon the type of cannon. The 20mm cannons on the Viper and Cobra are best at destroying light armor, vehicles, and infantry. Naturally, the Cobra and Viper are best able to engage infantry with their cannons due to them being rotary-wing aircraft that feature a swiveling cannon.
On the other side of things, the Apache has a very powerful 30mm cannon that can make short work of most everything on the battlefield. The A-10 Warthog has an even more impressive 30mm cannon that can tear through most tanks like a knife through tinfoil. Both of these aircraft can do an enormous amount of damage with their cannons and should view them as a primary rather than secondary armament.
On the other side of things, the Apache has a very powerful 30mm cannon that can make short work of most everything on the battlefield. The A-10 Warthog has an even more impressive 30mm cannon that can tear through most tanks like a knife through tinfoil. Both of these aircraft can do an enormous amount of damage with their cannons and should view them as a primary rather than secondary armament.
Working with Artillery
Artillery is long-range fire support that can act as a massive force-multiplier to the troops it is supporting on the ground. An infantry platoon supported by a battery of 155mm Howitzers has far, far more firepower at its fingertips than a Company (four platoons) of enemy infantry without artillery support.
Artillery is there for all your heavy support needs. They stay back from any active fighting and provide covering fire as well as active bombardment of enemy positions. They are at least lightly armored and are considered a prime target for any enemy, hence why they are usually protected within a base or have some sort of covering element when working in enemy regions.
Due to their nature, these bad boys will have a rather boring mission ahead of them. They are rarely operated by players due to this. You can expect them to be used by headquarters (the mission maker) if the front line infantry calls for it.
Pros & Cons of Artillery in the Combined Arms Fight
Pros
• Powerful terminal effects. Artillery rounds come in a variety of types and sizes, but the general rule is that they offer powerful blast effects and are effective at putting a great deal of hurt on enemy forces, particularly soft-skinned vehicles, light armor, and infantry. Specialized rounds are also effective at dealing with hardened or armored targets.
• Can cover areas that cannot be reached or observed by infantry, complementing any infantry defense. Due to their flight characteristics, artillery can rain down on areas that the infantry may not be able to effectively cover. This can be used, particularly in the defense, to reinforce the overall defense by forcing the enemy to either face the direct fires of the defending infantry, or come under the indirect fires of the supporting artillery.
• Long reach. Artillery starts at several kilometers of range, and goes up significantly with each increase in artillery type. They are able to sling rounds all over any map or terrain with relative ease. Artillery camps can also be positioned close to the front lines in fortified bases in order to give the maximum possible support to friendly forces.
• Can screen with smoke or illuminate the night with flares. Smoke rounds are available to provide either a defensive or offensive smoke screen in most weather conditions, while flares can be used to illuminate targets and terrain at night.
• Variety of ammo types and fuze types for maximum effects. Arty comes with a huge variety of ammunition and fuzing types, described later in this section. Whether working against infantry or armor, there is a fuze and round combination for pretty much every eventuality.
• Easily able to task organize. Having a centralized fire control system allows all calls for artillery support to be evaluated in one location, and if needed, a division's entire firepower to be concentrated on a target rather than a unit only being able to request fire from the artillery assigned to them.
• Can be directed by a single person without giving their position away. A forward observer can call in and adjust artillery fire from a concealed location without ever giving themselves away. One good forward observer in a good position, with the support of an artillery battery, can be a major thorn in the enemy's side.
Cons
• Delay between calling for it and getting effects on the ground. The time-of-flight of artillery rounds will vary based on whether they are fired as high-angle or low-angle fire (note that mortars are high-angle only), as well as the distance from the target. This delay can be up to a minute just for the time-of-flight. Add onto that the fact that the artillery battery must plot the target, align their guns to it, and load the ammo before ever firing the first shot, and you may have to wait several minutes before the first shot impacts.
• Requires skilled FO to call effectively. A bad forward observer can easily call artillery down onto empty ground, or worse, friendly positions.
• Requires skilled FO to call effectively. A bad forward observer can easily call artillery down onto empty ground, or worse, friendly positions.
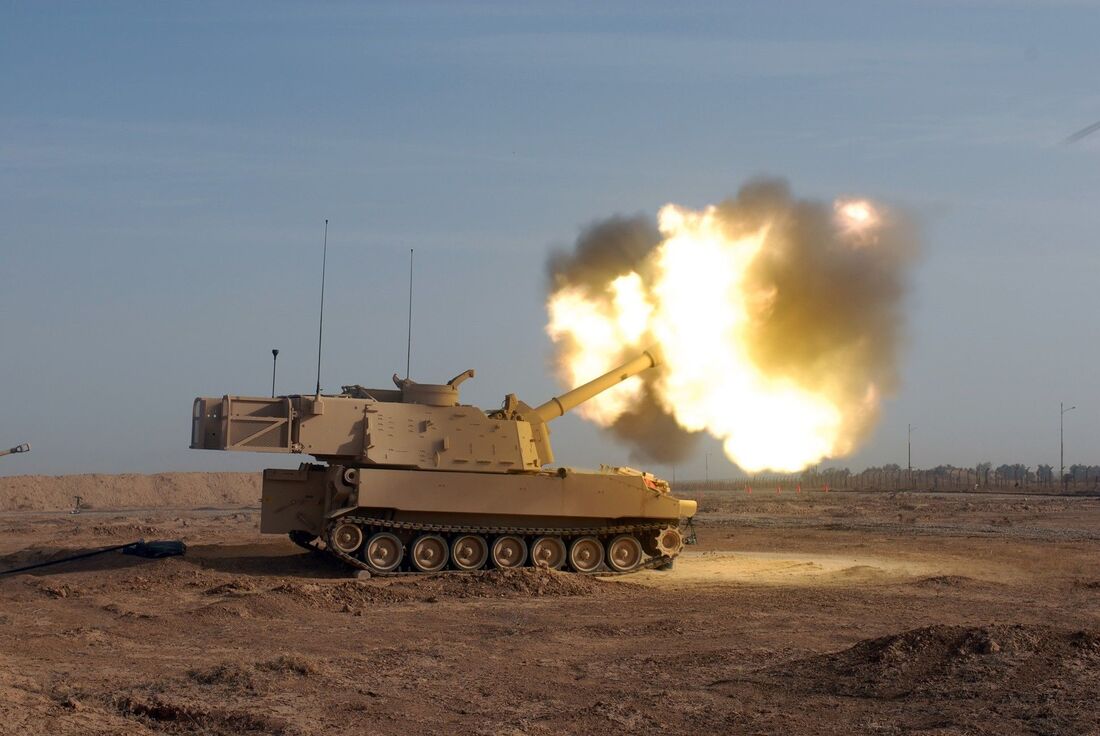
Artillery Realism
There are several aspects of realistic artillery support that are not seen in games with more casual action-based artillery (ie BF2) or mods/scripts that don't model it ballistically (ie the typical "map click" scripts for OFP/Arma). Some of these elements are as follows.
• It takes time for the artillery crew to dial in the information from the Forward Observer and get their battery ready to fire. Artillery support can be quick, but it is not instantaneous as in some unrealistic models of it.
• Artillery rounds fly a ballistic path from the guns to the target. There are many factors that can influence the accuracy of the rounds, and several measures that the enemy can take to help to lessen their effects. Guns may fire high-angle, low-angle, from close or long range, with any combination of sheafs and such, and all of this combines to dictate how much of an effect any given strike will have on the target. The terrain they are used in, and the terrain at the target, also factors into it.
• It takes time for the artillery to impact after it has begun firing. There is a significant amount of "lead" or pre-planning that must be factored into the use of an artillery asset. Finding chokepoints, natural rally points, and other likely enemy routes and pre-planning fires on them can help to make the artillery responsive and able to engage such targets effectively. Waiting until the last second and trying to call in a strike on a moving enemy will be far less effective than planning ahead and anticipating their movements and attack routes.
The Forward Observer
The Forward Observer is the platoon's direct link to artillery support. He is tasked with calling for fire in accordance with the Platoon Commander's direction, adjusting fire, and generally being all things artillery. Forward Observers take up positions where they can directly observe the accuracy and effects of artillery fire, and relay the results back to the guns for correction.
The proper use of artillery requires that the person calling it in is knowledgeable on the previously-listed aspects (and more) and is competent as a "Forward Observer". Artillery in the hands of a skilled FO is a huge asset, whereas without that skill the artillery will only end up churning dirt and making loud but ineffective noises. As the saying goes, the most dangerous man on the battlefield is one with a radio paired with access to accurate and on time explosives.
The proper use of artillery requires that the person calling it in is knowledgeable on the previously-listed aspects (and more) and is competent as a "Forward Observer". Artillery in the hands of a skilled FO is a huge asset, whereas without that skill the artillery will only end up churning dirt and making loud but ineffective noises. As the saying goes, the most dangerous man on the battlefield is one with a radio paired with access to accurate and on time explosives.
Forward Observer Tips
• Get a good perspective. Calling for accurate fire oftentimes (but not always) requires you to see what you're trying to hit. Adjusting fire requires that you can not only see the impact area, but can also view it from a perspective where you can accurately gauge depth. This usually means that you will need to be at a higher elevation than whatever you're directing fire on.
• Don't pick an obvious observation point. There were very few church steeples that survived World War II in western Europe. While such a position gives you a commanding view of the terrain, it also sticks out like a sore thumb and tends to attract all manner of enemy fire, particularly of the high-explosive variety. The use of tall structures must be considered carefully - the benefit is observation, the downside being an obvious target to the enemy.
• Try to predict where the enemy will go, where they might halt to regroup, and what lanes they'll attack through when in the defense. Pre-plotting targets in these areas will allow for you to be more responsive with your artillery fire. Establishing reference targets also allows for friendly forces to more easily call for quick-reaction artillery strikes on pre-established locations.
• Know your round types, fuze types, gun/battery types, sheaf options, and fire options, and take advantage of them. A good FO will know how best to utilize his artillery assets to maximize their effects on the enemy.
• Coordinate closely with infantry units at all times. Pay particular attention to coordination when suppressing the enemy while friendly forces move up to assault. You want to maintain artillery fire on the enemy unit the maneuvering friendly elements are close enough to the objective to assault it immediately after the artillery fire is lifted. Failure to do this can result in heavy casualties for an assault force, as the enemy potentially will be able to recover in time to attempt to repel the assault.
• Know the different types of artillery and how to employ them effectively. Mortars, howitzers, and MLRS systems all have distinct characteristics and uses. One tactic is being able to concentrate fire, concentrating fire is the ability of integrating multiple artillery pieces into a synchronized bombardment so that much greater damage can be inflicted on the enemy.
• Know how to adjust fire. Be familiar with concepts like "Bracketing", firing spot rounds, calling in adjustments to human players, and so on.
The Artillery Request
Radio etiquette in the artillery realm is a bit different than what you are used to in the typical “Hey you, this is me, over”. A standard call for fire request is similar to the CAS request but is different in various ways that applies only to artillery crews. This can be expanded on or condensed as the situation dictates - this should simply serve as a guideline of what information can be useful and how to present it.
Note; the person initiating the call for fire will talk and end their transmission with “over”. The fire direction center (FDC) or gun line will repeat your transmission ending it with “out”. for example:
Additionally, transmitting numbers is different than what other guidelines insist. Numbers such as 100, will be said as “one-hundred” and 3000 “three-thousand”. Numbers such as 2200 or 0600 would be said as “two two-hundred” and “zero six hundred”. for numbers such as 1230 or 4765, you will have to say each individual number, “one two three zero” and “four seven six five”. numbers such as 50 or 09 are “five zero” and “zero nine”.
1. Establish comms with the Artillery unit. This is considered the observer identification & warning order. This call allows for the fire direction center and FO to establish that a call for fire request is needed and warn the crew that the full request will follow.
This will typically follow with the warning order, which can consist of; Adjust Fire, Fire For Effect, Suppression, Immediate Suppression/Smoke, Suppression of Enemy Air Defenses
"Steel Rain, this is _______, fire for effect, over"
2. Describe the target location. Known as the target location, altitude, and direction. The FO clearly describes where the target is located and direction. Map markers are good to use for this. It is best to use the grid method to describe the location on the map, the FO should use try to achieve an 8 or 10 digit grid if possible to enhance accuracy. Additionally, bearing, altitude and distance should also be considered as well. Bearing is always in mils, and for simplicity you should always round to the nearest 10
(i.e. an azimuth of 6219 should be rounded to 6220, and 0234 should be rounded to 0230).
The altitude should also be rounded to the nearest 10.
"Grid 'C0421 1138', direction 4200, altitude 70, over"
3. Describe the target, specific type of ammo & methods of control . This is the target description and the methods of control. The FO gives a brief description of the target to be attacked. This helps to give the artillery crew an idea of what ordnance they should use. . This should typically be; number of targets, target description, and degree of protection.
This can then be followed by a specific type of ammo, and method of control (found below).
Fire When Ready (default method), At my Command, Cannot Observe, Time on Target, Time to Target, Continuous Fire, Cease Loading, Check Fire, Request Splash, Repeat, Do Not Load, Duration.
"One enemy bunker in the open, over"
Once your call for fire has been completed, you will receive a message to observer (MTO). This transmission is sent by the FDC to the observer to relay specific information related to the fire mission. This includes the changes to fire mission, gun line’s call sign, number of rounds, and target number.
An MTO looks like the following:
FDC: "Message to Observer; Steel Rain. 3 rounds.. Target Number Alpha Bravo 0001, over."
Upon reviewing this MTO, you will repeat the transmission to the FDC ending the transmission with out.
An MTO looks like the following:
FDC: "Message to Observer; Steel Rain. 3 rounds.. Target Number Alpha Bravo 0001, over."
Upon reviewing this MTO, you will repeat the transmission to the FDC ending the transmission with out.
An example of how that might be condensed in a gaming environment is as follows:
(Note: Each transmission is read back by the receiving party and will end the readback with "Out")
FO: "Thunder, this is Observer, fire for effect, over."
FDC: "Observer, this is Thunder, fire for effect, out."
FO: "Grid SZ0421 1138, altitude 70, Direction 4200, over"
FDC: "Grid SZ0421 1138, altitude 70, Direction 4200, out"
FO: ""One infantry squad moving in the open, over"
FDC: "One infantry squad moving in the open, out"
...
FDC: "Message to Observer; Thunder. 5 rounds. Target Number Bravo 0001 over."
FO: "Message to Observer; Thunder. 5 rounds. Target Number Bravo 0001 out."
....Artillery begins firing...
FDC: "Shot, over"
FO: "Shot, out"
...10 seconds before impact...
FDC: "Splash, over"
FO: "Splash, out"
Note, if the fire mission is complete, the Fire Direction Center will announce 'rounds complete',.
If the FO does not need anymore rounds, the Forward Observer should then state:
'End of Mission, target number, target neutralized, estimate ____ casualties over.'
The FDC will then repeat 'End of Mission, out'.
FO: 'End of Mission, target number Bravo 0001, 1x bunker neutralized, estimate 4 casualties, over.'
FDC: 'End of Mission, out.'
Note: You should not end your mission until both the FDC announces “rounds complete” and the dust has settled and you can confirm the effects of the fire mission.
Adjusting Rounds
If a round has landed short or beyond your target, adjust your round using the following:
Range Correction. When adjusting for a range correction; say add/drop, range corrections should be sent in hundreds, the drops only in tens. For example, you may add 100, then drop 50, which in-turn may sound like “add 100, drop 50, over”
If you are making range corrections but are unsure of the targets true range, you can use successive bracketing.
Successive Bracketing. This is the method of adding and dropping of the round by specific increments until you have the desired effects on target. The increments of successive bracketing are 1600, 800, 400, 200, 100, and 50 meters. Note; that you should not be using any corrections greater than 400 unless you are absolutely sure there is no risk to civilians or collateral damage.
For example, if your shot lands short of the target, within 10 seconds of you observing the round impact, you should be send a message adding 400, once that round lands, you see that the round landed over. From there you can drop 200, then drop 100, then add 50. The idea is to use these increments to close the gap. If you use successive bracketing correctly, you are almost guaranteed to have your round land within 50m of your intended target.
Deviation Corrections. If your round has landed to the left or right of your target, you can adjust it using deviation corrections, typically done by using binoculars.
This is done by placing the center of your binoculars on the impact of the round, and count how many ticks to the left/right of the target the impact is. You then multiply that number by 10, giving your how many mils to the left/right you need to adjust.
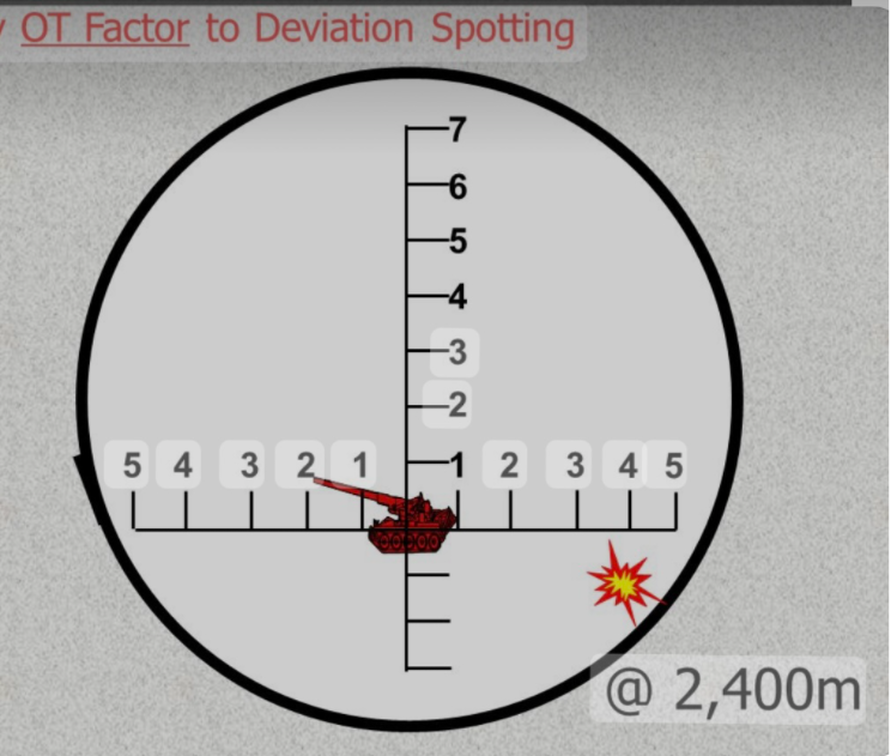
For example; the round has landed 4 tics to the right, multiplied by 10, your correction would be 40 left.
Your transmissions will be the direction (left/right) followed by the number of mils, such as “right three five” or “left one hundred”.
Deviation correction 1400m and closer are given as previously stated. any deviation correction for rounds that have impacted 1500m+ must be given your observer target (OT) factor. Take into consideration that at greater distances, a more drastic change in mils is necessary even though your eyes may not perceive it. Let's take a look at the example from before.
We’ve already established that the target is 40 mils the the right. It is then identified at a range of 2400m. rounding that the nearest thousand, you get 2000. Drop the last three zeros and you get an Observer to Target factor of two. Multiply this factor by your original count and you will get the effective deviation correction of 80 mils left.
A legitimate correction may sound like “add 400, right 70, over”. The minimum deviation correction is 35, so any correction less than 35 mils does not warrant a deviation correction.
Since this is an adjust fire mission, the gun line will only fire one singular round. this is for you as an observer to see where the round lands and to adjust it accordingly.
Once you’ve made the necessary corrections to your rounds, you will typically call “Fire For Effect, over”. Fire For Effect (FFE) is the portion of the fire mission where you intend to destroy your target. unless otherwise stated, a fire for effect will have each gun in the gun line (typically 3) fire one round. you may request additional rounds. this should sound like “3 rounds fire for effect, over”. Note that the number of rounds requested is a round from each gun, so if you request 3 rounds from a gun line that consists of 3 guns, you’ll get 9 rounds in total.
An example of how that might be condensed is as follows:
FO: "Thunder, this is Checkmate 6 Romeo, adjust fire, over"
FDC: "Adjust fire, out"
FO: "Grid SZ0421 1138, altitude 400, direction 3410, over. "
FDC: "Grid SZ0421 1138, altitude 70, direction 4200, out."
FO: "One infantry squad, in the open, over"
FDC: "One infantry squad, in the open, out."
...
FDC: "Message to observer, thunder, one round, target number india sierra 0-0-0-1, over"
FO: "Message to observer, thunder, one round, target number india sierra 0-0-0-1, out"
....Artillery begins firing...
FDC: "Shot, over"
FO: "Shot, out"
...10 seconds before impact...
FDC: "Splash, over"
FO: "Splash, out"
FO: "Target number india sierra 0-0-0-1 Right 4-0, add 2-0-0, over"
FDC: "Target number india sierra 0-0-0-1 Right 4-0, add 2-0-0, out"
....Artillery begins firing...
FDC: "Shot, over"
FO: "Shot, out"
...10 seconds before impact...
FDC: "Splash, over"
FO: "Splash, out"
FO: "Drop 100, over"
FDC: "Drop 100, out"
....Artillery begins firing...
FDC: "Shot, over"
FO: "Shot, out"
...10 seconds before impact...
FDC: "Splash, over"
FO: "Splash, out"
FO: "Target number india sierra 0-0-0-1 Drop 50, fire for effect, over"
FDC: "Target number india sierra 0-0-0-1 Drop 50, fire for effect, out"
....Artillery begins firing...
FDC: "Shot, over"
FO: "Shot, out"
...10 seconds before impact...
FDC: "Splash, over"
FO: "Splash, out"
FDC: "Rounds complete, over"
FO: "Rounds complete, out"
FO: "End of mission, target number india sierra 0001, enemy squad neutralized, estimate 12 casualties, over."
FDC: end of mission, out.
Forward Observer & Artillery Terms
Shot
This is sent from the firing unit once the first rounds are fired. The FO at that point knows that rounds are on the way. The FO can use this term to communicate to his platoon that a friendly artillery unit has begun firing.
Splash
This is sent from the firing unit five seconds before the first rounds impact. The FO at this point should observe the impact area to watch the effects of the artillery. Adjustments will be called if necessary to get the rounds on target. When Splash is called, all friendly units within "danger close" distance of the target should ensure that they are in good cover in case the rounds are off.
Rounds Complete
Firing unit has fired all rounds for the fire mission. Depending on the number of rounds and the trajectory used, "Rounds Complete" can sometimes come before the first round ever hits.
Arty
'Artillery'.
Battery
The primary artillery unit, consisting of 3-6 cannons, typically of a single caliber.
Battery-One
A method of fire wherein the cannon of a battery fire each volley in unison.
Check-Fire
A signal for the artillery to immediately halt firing.
DARMA
Defense Against Rocket Mortar Attack. An artillery tactic to fire against enemy rocket or mortar positions during an enemy attack. Coordinated with a Counter Mortar Radar when available and operational.
Delta-Tango
Defensive target, designated by an FO for quick attention if his unit comes under attack. Usually called into Bn-FDC/battery as the infantry established its NDP (Night Defensive Perimeter).
FDC
Fire Direction Center. The arty unit which at battery level calculates the adjustments of the cannon to cause the shells to impact on target. At Battalion level, the FDC operates from the TOC (Tactical Operations Center) and provides liason between the infantry and artillery with regard to artillery operations. The TOC often contains an Air Warning group which kept aircraft advised of artillery flight through the local airspace.
Fire For Effect
The continuous firing of a battery's cannon, sustained until a 'cease-fire' or 'check-fire' is called.
GT-Line
The direct line on a map from the firing battery to the target. Most ground units should avoid travel on the GT-Line since the most common 'mistake' of an arty projectile in flight is the "Short-Round" which falls short of the target, invariably on the GT-Line.
Gun
An artillery cannon with a long barrel.
High Angle Fire
Artillery trajectory wherein the shell travels higher than its distance down range. Used for firing over intervening mountains, etc, inherently less accurate than low angle fire (standard) due to shell ballistics and wind effects.
Howitzer
An artillery cannon capable of both High-angle and Low-Angle fire.
Mortar
Crew served, muzzle loading, high angle cannon. Used primarily for fire missions at ranges too short for howitzers.
Round
Before firing, the assembly of shell projectile, powder charge, and case, ready to be fired. After firing, refers to the projectile only.
Shell
The projectile which carries a 'payload' to the target; fitted with a fuze on its nose to trigger its explosion.
Short Round
An artillery round which falls short of its target.
Treeburst
Explosion above ground, usually unintentional, due to a shell striking and detonating on trees or other above-ground-level objects.
Volley
The firing of each cannon in a battery.
Walking Barrage
Firing between friendlies and the enemy to provide protection while moving the impact point toward the enemy in order to drive him back.
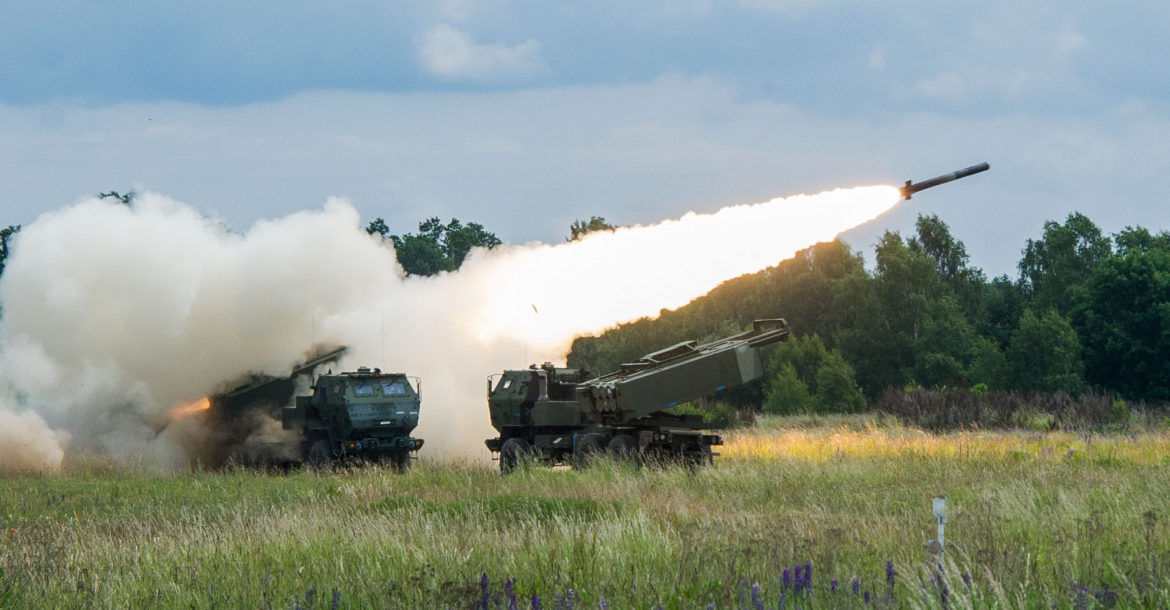
Artillery Rounds & Fuzing 101
The following table of artillery round types and their effects is taken from Artillery field manuals of the United States Army.
Round Type
High Explosive
HE is usually TNT or Composition B, and takes a PD (QUICK), VT, delay or Mechanical Time fuze. Effective against personnel, vehicles, and structures. HE/VT is also effective against stationary armored vehicles. HE/Delay is good for targets under vegetation, and for flipping vehicles.
White Phosphorous (Willy Pete)
Bursts on impact, or in the air (with fuze time). On bursting, the shell spreads burning white phosphorus, for marking, screening, obscuring and incendiary effects. It is useful against vehicles, ammunition, Infantry, POL and enemy observers.
Illumination
A base-ejecting projectile that expels a burning illuminant and a small projectile. The parachute drifts over the area, and provides illumination for maneuver or adjusting fire (with continuous and coordinated illumination). It can also be used to mark targets.
Smoke
The Artillery Module models improved smoke effects, that is, felt wedges impregnated with WP, which can provide 5-10 minutes of smoke over a large area.
Remote Anti-Armor Mines (RAAMS)
A 155mm howitzer can fire Remote Antiarmor Mines (RAAMS); Part of the Family of Scatterable Mines (FASCAM), RAAMS typically spread over a 400m area, arm shortly after impact, and will trigger when armored vehicles run over them.
Copperhead
Copperheads are special 155mm projectiles employed by later versions of the M109 series and the M198 howitzer. Approximately thirteen seconds before impact, the Copperhead's laser light sensor becomes active, and it uses fins to guide itself to the laser light source. It fuzes on impact with a shaped charge capable of destroying or disabling armored vehicles.
Because of their relatively high cost, low volume (one platoon fires a single Copperhead every thirty seconds), and restrictive employment considerations, Copperheads are best used against enemy command vehicles and centers, and other high-value targets. Copperheads are ideally used in priority fire missions, and the reduced response time they bring.
Improved Conventional Munitions (ICM)
ICM is a base-ejection projectile with a MT fuze and a number of submunitions. APICM grenades saturate the target area with shrapnel, and are highly effective against personnel in the open. DPICM submunitions are capable of penetrating 2cm of armor, and have an antipersonnel effect as well. DPICM is highly effective against personnel in the open and soft vehicles. It is also effective against armor. ICM shells and sheaves assume a target with a 200m-radius. (instead of 100m for HE). ICM should never be fired High Angle.
Arma 3 refers to these as 'cluster' shells.
Sense and Destroy Armor (SADARM)
Sense-and-Destroy Armor rounds are third-generation artillery shells carried by 155mm Howitzers. They deploy two sensor-fuzed munitions which parachute over the battlespace, and scan (using radar and infrared) for suitable armor targets. When they find such a target, they fire a penetrator to destroy or disable it. SADARMs are highly effective, and are called as any other round. If they do not find a suitable target, they self-destruct. The observer should ensure that no friendly units are in the area. SADARMs can be used effectively in CANNOT OBSERVE conditions, especially counter-battery fire.
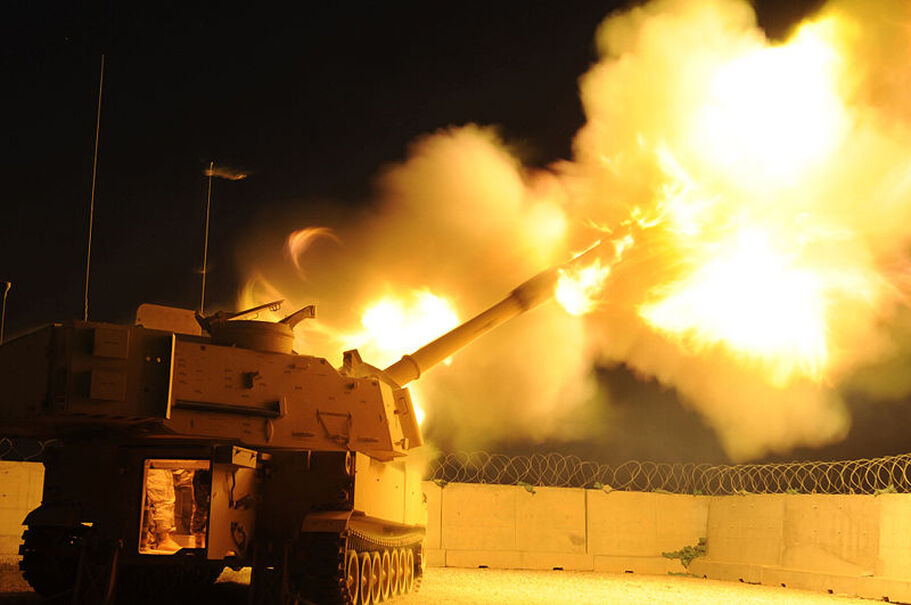
Fuze Types
Quick
Fuze quick is a point-detonating fuze, and is used with HE and WP projectiles. Fuze quick is effective against standing and prone personnel, armored and soft-skinned vehicles. Fuze quick is useful for adjusting fire and engaging targets on ridgelines; but it is not recommended against entrenched troops or those on uneven ground.
Delay
A fuze delay functions 0.05 seconds after impact. A fuze delay allows penetration of dense woods and light earthworks.
Time
Fuze time has a mechanical or electronic timing device that functions a set time after being fired. Fuze time, when used with HE and WP, should be adjusted to obtain an effective HOB; then these projectiles are useful against troops and vehicles in open and in trenches, as well as in rough terrain. Because of the variations between fuzes, fuze time should never be used for High Angle fire with these projectiles. Time fuzes are the only fuze used for Base-Ejecting projectiles (e.g., Illumination, ICM, SADARM) and smoke.
VT
VT (Variable Time) fuzes arm approximated 3.5 seconds before anticipated impact. They then use a radio signal to determine the shell's proximity to other objects (especially the ground). When they pass within a set distance of other objects (for example, 8 meters), the fuze functions. HE/VT is effective against all targets that Fuze Time is, except that it is not recommended for targets under canopy, such as those in woods.
